Painted Shader Guide
The Painted shader allows you paint shapes directly into the scene. There are many uses for this. At its simplest you can use it to paint colours for a surface layer. However it's probably most useful for painting masks which you can use for controlling things like surface layer distribution or where populations appear. You can also use it to create displacement on surfaces.
For information on the specific settings of the Painted shader please see the node documentation.
Contents
Painting Basics[edit]
The easiest way to start painting with the Painted shader is to use the Paint session button at the top of the 3D Preview. This button has a little paintbrush icon. To create a new shader and start painting with it choose the "Create and paint new shader" item from the "Start painting shader" submenu. If you want to paint with an existing shader you can choose it from that submenu. You can only paint one shader at a time, although if you open multiple 3D Previews you can paint a different shader in each one.
When you start painting the 3D Preview begins a painting session. You can tell this is happening because the scene becomes greyed out. This helps make painted strokes stand out better. The menu for Paint session button also changes. You can use the menu to change between Paint and Eraser modes (explained in the Strokes section), as well as to finish the paint session.
When the 3D Preview is being used for a painting session there are two cues to help you paint. One is a dashed yellow circle which gives an idea of the brush size in the scene. The other is that the location where the centre of the stroke will be is shown as a highlighted yellow triangle.
You paint by clicking and dragging the mouse. The stroke is drawn as you paint. You finish painting a stroke by releasing the mouse button.
There are limits to how fast the shader can capture the stroke points. The shader fills in the gaps so you get a continuous stroke. However if you paint very fast you might see that the stroke looks like a chain of straight lines instead of a smooth curve. If you find this is happening paint more slowly.
When you are finished painting you can end the painting session either by selecting "Stop painting" item from the Paint session button menu or by pressing the Escape key.
An important thing to be aware of is that creating a Painted shader doesn't automatically incorporate it into the scene. The main effect of this is that when you finish the painting session you won't be able to see the Painted shader where you've just been painting. You need to do something like connect the shader into the surface shader network or assign it as a blend shader before you can see it in the scene outside of a painting session.
Strokes[edit]
Every time you click, paint and then release the mouse a new stroke is added to the shader. Each stroke is recorded individually, although it's not yet possible to edit them individually. Each new stroke is layered on top of all the old strokes.
There are two types of strokes, paint strokes and erase strokes. You can change between the two types of strokes while painting using the 3D Preview Painted shader button.
Paint strokes are the normal strokes. They paint colour into the shader.
Erase strokes are very similar to paint strokes. The big difference is that they paint "nothing" into the shader. The way an erase stroke works is that it makes all the parts of previous strokes covered by the erase stroke invisible.
There is an important point here about using erase strokes. If you are erasing a lot of the previously painted strokes it might be more efficient to clear the shader and start again. When you erase the previously painted strokes under the erased area are not actually deleted, they're still part of the shader but made invisible by the erase strokes. Erasing a large part of the painted strokes might make the shader slower than necessary to render and will also mean saved project files are larger than they need to be. Clearing the shader might not always be practical, perhaps because it would be awkward to repaint the remaining strokes, but it's something to consider.
An aspect of the strokes which might not be obvious is that they're actually 3D. Each stroke is made up of spheres. They're not just flat, they have volume. These spheres are called blobs, for "blob of paint". The blobs are spaced along the stroke. The actual paint effect is volumetric. The Brush falloff and Flow parameters control the density of the volume of the sphere.
By default the shader uses a Plan Y (top down) projection for the shader which makes the stroke appear as though it's flat. If you change the shader's Projection parameter to 3D you can treat the shader like it was a collection of spheres. You can use the Transform to position the strokes in 3D space.
This is an advanced and not really fully developed aspect of the shader. It's mentioned simply to make you aware that it is a possibility and it can be experimented with.
Where Can I Paint?[edit]
There are several elements of the scene you can paint on. The main ones are the terrain and the background sphere. The background sphere is a very large sphere surrounding the planet which is used in rendering the sky and atmosphere. There are also certain built in objects you can paint on, such as the Plane, Disc and Sphere. You can't paint on imported objects or other built in objects such as the Rock, Grass Clump and Card.
It might help you to understand how the Painted shader knows where to draw strokes. The scene in the 3D Preview is rendered as a collection of triangles, which is like a low resolution version of the actual scene. When you move the mouse around during a painting session you will see yellow triangles drawn under the mouse. These are the triangles used to render the preview. The Painted shader knows where to draw the stroke in 3D space by shooting an imaginary line (or ray) into the scene from the mouse position and finding the closest of those triangles. The point where the imaginary line hits that triangle is where the blob of paint is placed in 3D space.
That might seem a bit technical but it will help you to understand some aspects of the Painted shader behaviour. One of these is that you can only paint on parts of the preview that have been rendered. When you change the viewing direction of the preview sometimes parts of it are either not rendered immediately or, if you have the 3D Preview paused, not rendered at all. You can't paint on those parts of the scene.
Another thing to watch for is when you're painting on the terrain near to the horizon. If you paint off the terrain onto the background sphere you may not get the results you're expecting. The background sphere is a long way from the terrain so when you paint off the terrain and onto the background sphere the stroke has to make a big jump. This could mean that the stroke doesn't appear on the terrain where you expect it to, or it could mean that painting gets slow until you move back on to the terrain.
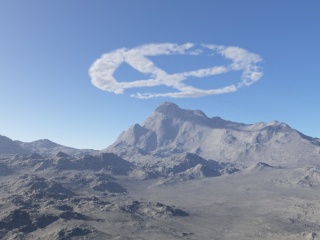
As mentioned above there are several objects you can paint on aside from the terrain and background sphere. These are the Plane, Disc and Sphere. This has a number of potential uses. One example is painting shapes for clouds. Let's say you want a cloud of a certain shape above the peak of a mountain. You could place a Plane object above the mountain at the same altitude as the cloud layer. Paint the cloud shape on the plane. Attach the Painted shader to the Final density modulator parameter of the cloud layer. Finally disable the plane to prevent it rendering and now you have a custom cloud shape. If you want to reposition the cloud shape you can use the Painted shader Transform parameter.
Improving Painting Feedback and Performance[edit]
There are several things you can do to improve the painting feedback and performance.
As mentioned in the "Where can I Paint?" section, painting is linked to the triangles generated for the 3D Preview. You have probably noticed that as time goes on the detail of the 3D Preview increases. This is because the triangles generated get smaller as the preview is refines. These smaller triangles effect the painting both in two ways. Most importantly the painting shader preview quality increases as the 3D Preview gets more detailed. This is particularly noticeable if you are using a relatively small brush. Painting also gets a bit more accurate as the preview detail increases.
You might also notice that when you finish painting a stroke the 3D Preview starts refining from lowest quality again. You might find this makes painting a slower process.
The way to both paint with a higher quality preview and to be able to paint more smoothly is to allow the 3D Preview to refine to a high detail level and then pause it. Pausing the preview keeps the detail high and stops the preview from starting over every time you finish a stroke. The only drawback to this is that if you change the view direction of the preview much you may reveal parts of the scene which haven't been rendered yet, and you won't be able to paint on those. The solution is to un-pause the preview, let it render back up to the desired detail and then pause it again.
Something else you need to think about is the size of the area you're painting across and choosing the appropriate brush settings. Let's say you want to paint on the background sphere. When you first start a new scene the background sphere just above the horizon is some 190,000 km across. The default brush for the Painted shader is an absolute brush which has a diameter of 1000 metres (1 km). As you can imagine a brush that size is not going to make a lot of impact on an area 190,000 km wide. You can paint with it but you might find painting is very slow both in terms of covering the area but also how quickly you are able to paint. Painting can become laggy which is because the Painted shader is having to fill in a lot of data.
When you're painting a large or very distant area the view-relative brush can work much better. The size of the view-relative brush is proportional to the preview size. This means that when you're painting in the far distance the brush stays relatively large. That means you will both cover the area more quickly but also should find that the painting is a lot more responsive.
Painted Shader Examples[edit]
These are project files showing some different ways of using the Painted shader. The projects are explained in greater detail in the Comments section of the project settings. To view this click the Project Settings button in the bottom left of the main window. You might need to right click and choose "Save as" (Windows) or option-click (Mac) on the project file links to download them directly and prevent them opening in your browser.
Population density
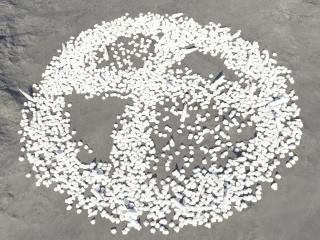
This project shows how to use a Painted shader to control the density of a population.
Media:Painted_shader_population_density.tgd
Painting a cloud
This project demonstrates how to use a Painted shader to control the shape of a cloud layer.
Media:Painted_shader_cloud.tgd
Displacement
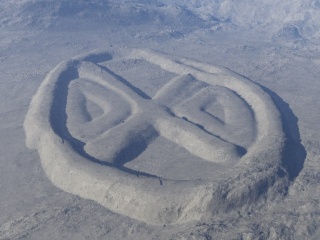
This project gives an example of painting displacement on the terrain.
Media:Painted_shader_displacement.tgd
Surface colour
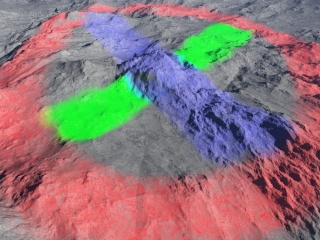
This project shows how to paint colour onto a surface layer.
A shader is a program or set of instructions used in 3D computer graphics to determine the final surface properties of an object or image. This can include arbitrarily complex descriptions of light absorption and diffusion, texture mapping, reflection and refraction, shadowing, surface displacement and post-processing effects. In Terragen 2 shaders are used to construct and modify almost every element of a scene.
Literally, to change the position of something. In graphics terminology to displace a surface is to modify its geometric (3D) structure using reference data of some kind. For example, a grayscale image might be taken as input, with black areas indicating no displacement of the surface, and white indicating maximum displacement. In Terragen 2 displacement is used to create all terrain by taking heightfield or procedural data as input and using it to displace the normally flat sphere of the planet.
A parameter is an individual setting in a node parameter view which controls some aspect of the node.


