Organizing Your Terragen Project
When you start a new Terragen project the Node Network pane is laid out nice and orderly, but by the time you get to the end of a project it can look like a spider’s web, with all the connection lines crisscrossing each other. In this article we’ll look at the many ways Terragen can help us to keep our project organized.
Contents
Organizing with Groups[edit]
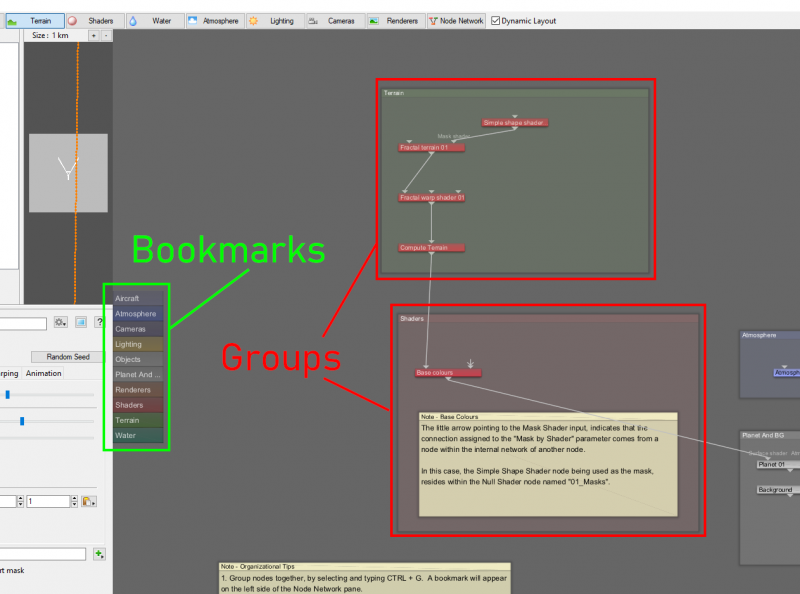
Let’s start with Terragen’s ability to group nodes together and create the bookmarks that appear along the left side of the Node Network pane. By default Terragen already has some nodes grouped together, like the Terrain and Atmosphere groups.
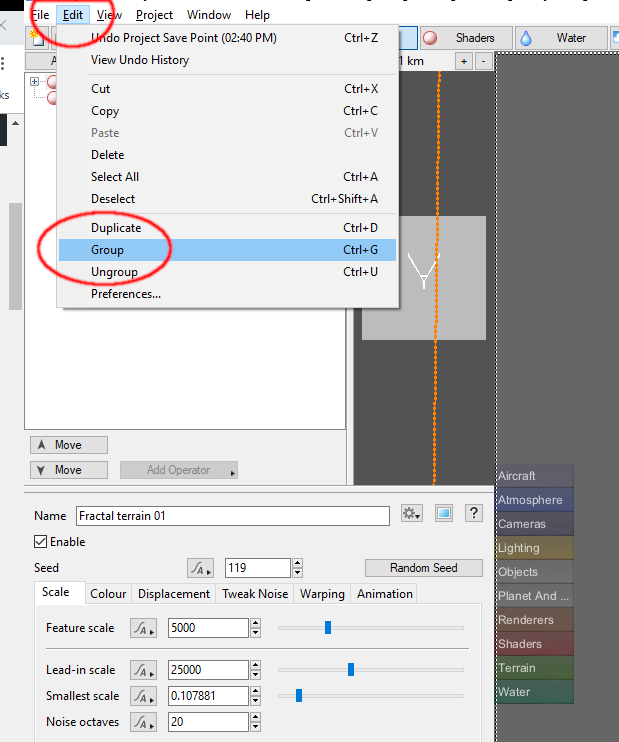
The easiest way to create a group is to select some nodes and press "Ctl+G". You could do the same thing by selecting the nodes to be grouped and choosing "Edit > Group" from the Main Menu.
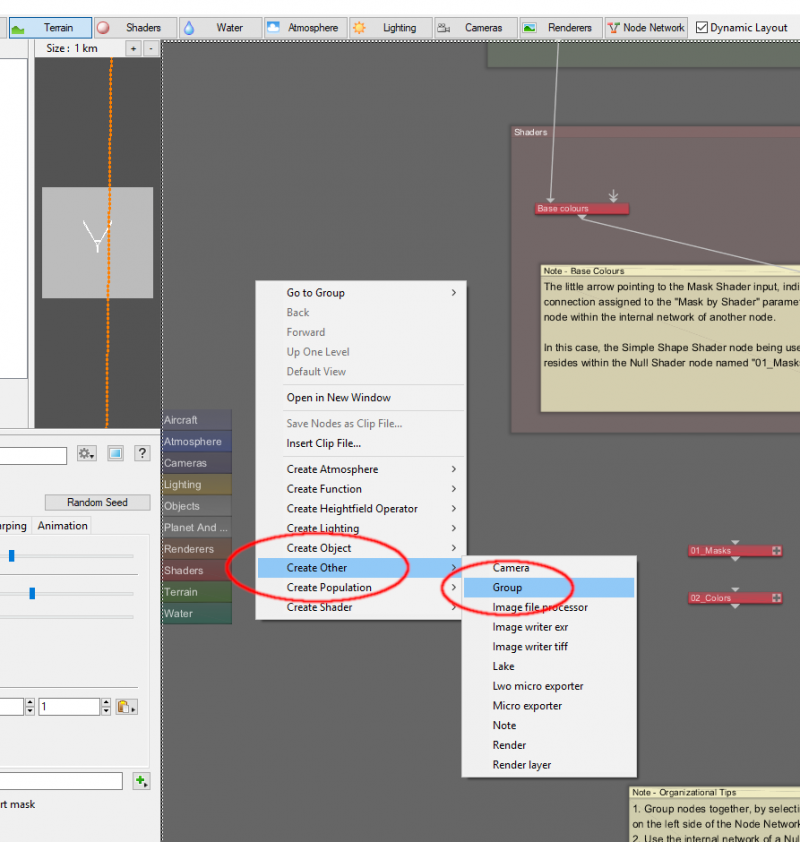
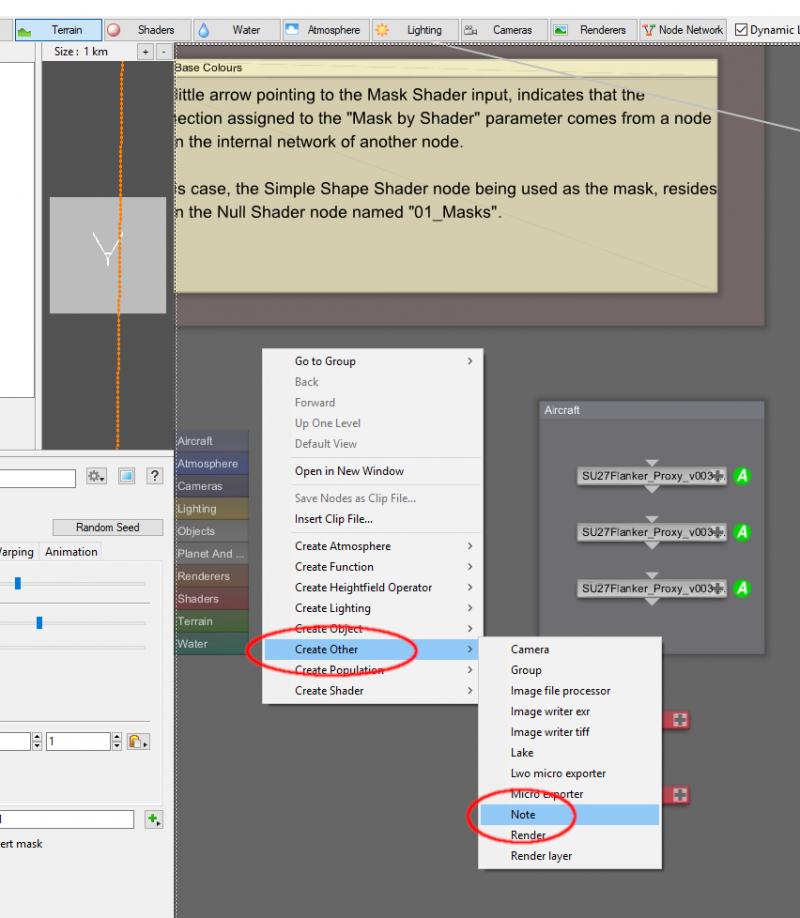
You can create an empty group by right clicking in the Node Network pane and selecting "Create Other > Group".
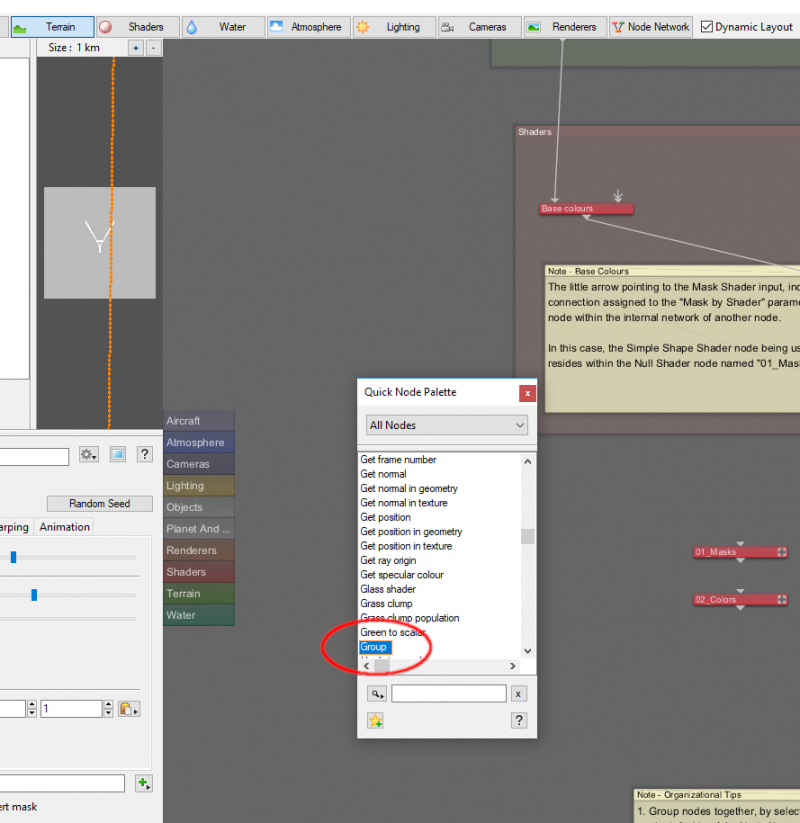
Alternatively, when the Node Network pane is active, press "N" or "Tab" to bring up the Quick Node Palette and start typing the word "group", then double click on the word "Group" from the Node List. If the word "Group" is already highlighted in the Node List then you can simply press "Enter".
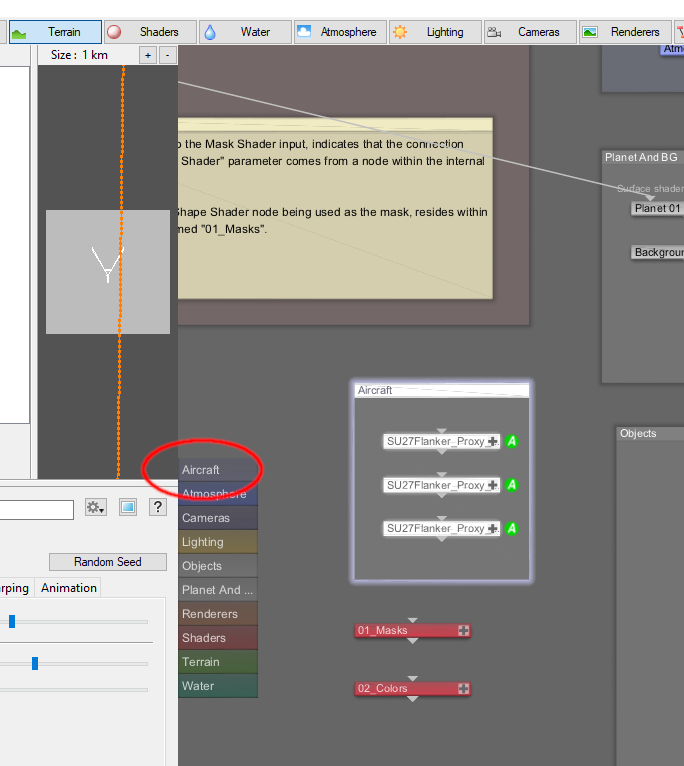
Now you can drag the nodes you want to be grouped together into the empty group. At this point, you should select the group and move it around a bit, to make sure all the nodes are constrained within the group. If a node has not been included in the group, it should show up having a white border line around it. Once a group is created a bookmark will appear on the left side of the Node Network pane. Clicking on the bookmark will center the group in the Node Network pane.
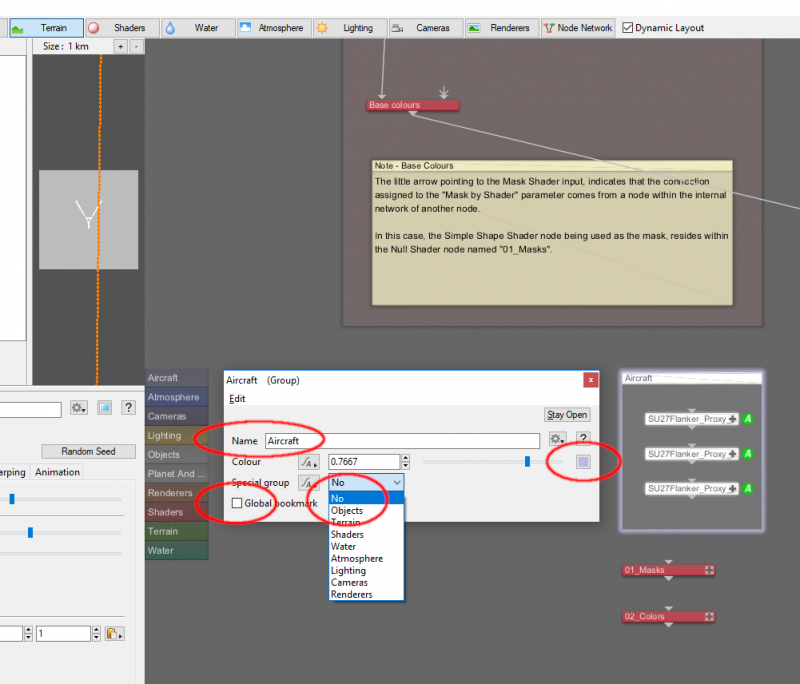
You can change the name of the group by double clicking on the group node and typing a new name, and change the color of the group by clicking on the color icon and choosing a different color. The Special Group parameter should always be set to "No" for user defined groups, because Terragen uses this parameter internally to identify the default groups of a scene. When the Global Bookmark parameter is checked the bookmark will show up on the left in all Node Network panes, but when unchecked will only show up in the local Node Network pane that it resides in. For example, adding a group within an object’s internal shader network and leaving the Global Bookmark parameter unchecked will only allow the bookmark to show up in the node's internal shader network, but when checked will show the bookmark in all the Node Network panes.
Organizing with Null Shaders[edit]
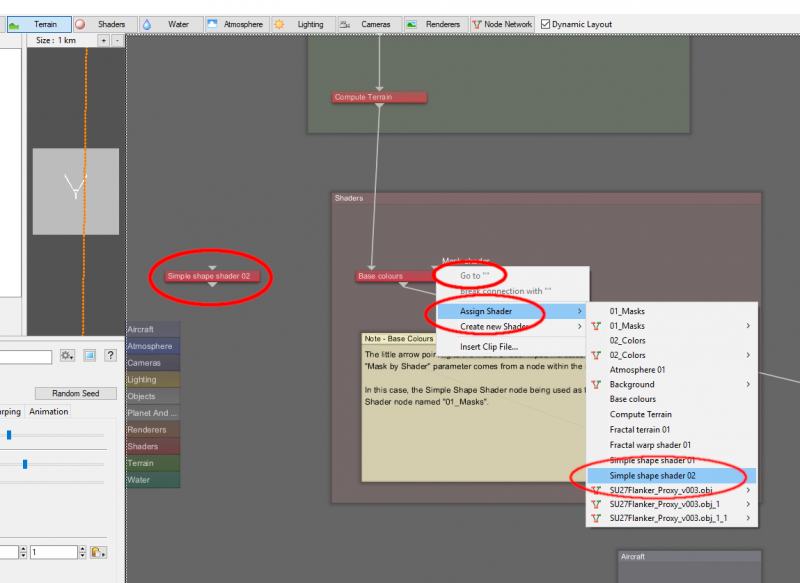
Another technique for organizing and keeping the Node Network clear of connection wires and visual clutter is to create or place commonly accessed nodes within one or more Null Shader nodes. To demonstrate this, add a Simple Shape Shader node to the scene. When we try and assign the Simple Shape Shader as a mask for the Base Colour shader, the shader shows up alphabetically at the end of the Node List unless we were to rename it. This list can grow quite long by the end of a shot, and once we assign it as the Base Colour mask, the connection wire stretches across the Node Network, which can add visual clutter to a complex scene.
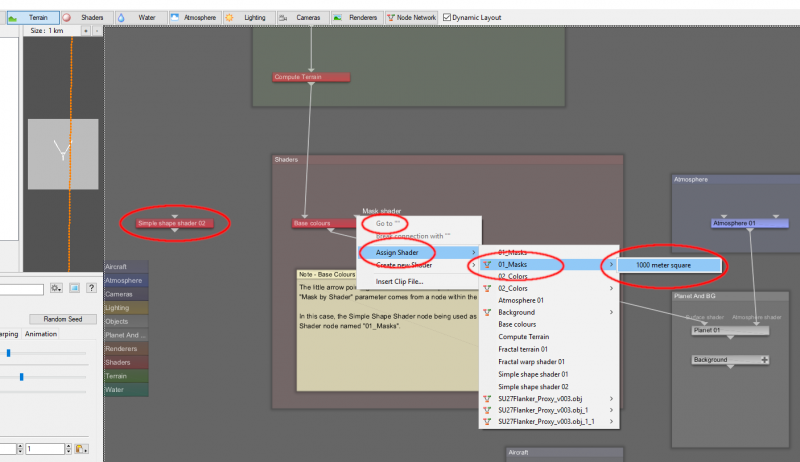
One way around this is to add a Null Shader node to the scene and rename it to something like "0_Masks", so it will show up at the top of the Node List. Right-click on the Null Shader node to open its internal network, then create the Simple Shape Shader node there. Alternatively, you could Cut and Paste an existing node into the Null Shader node’s internal network, but you would then have to reassign the mask wherever it had been used. When we exit the internal node view and assign the Simple Shape Shader as the mask for the Base Colour, we can find it at the top of the Node List under the heading 0_Masks.
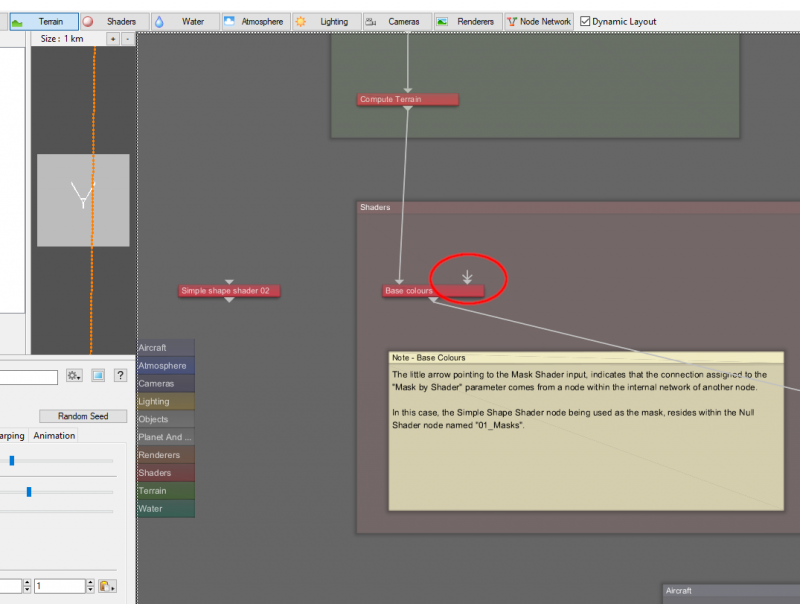
This can save a lot of time searching for items in the Node List by the time we’re done with the shot, and notice how the connection wire has been replaced by a small arrow to indicate there is an internal connection to the mask input.
Organizing with Clip Files[edit]
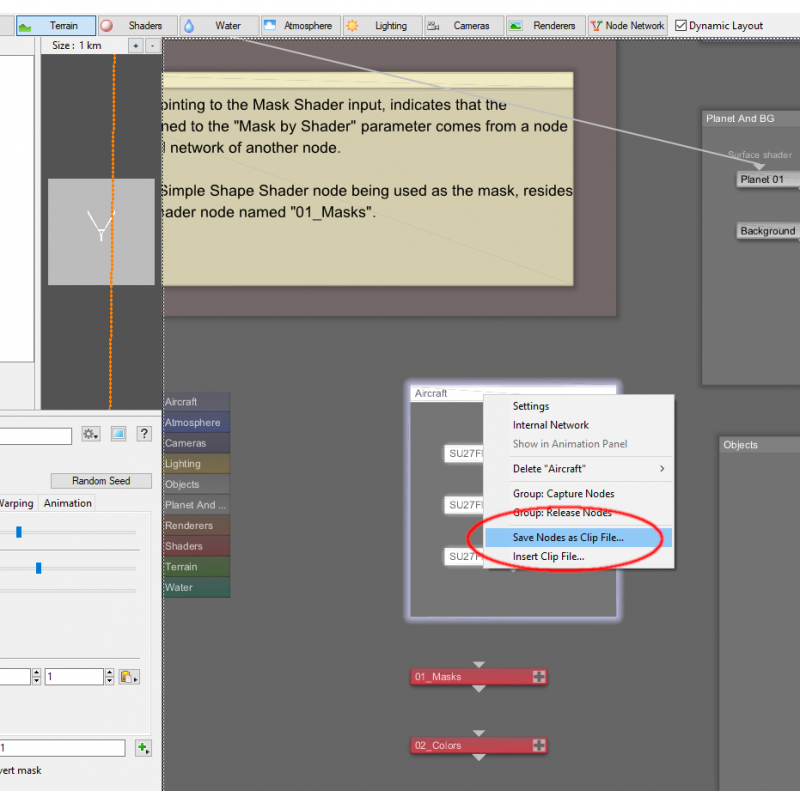
Another big time saver is to save common node setups as Clip files. These can be recalled at a later date and loaded into any Terragen project. Select a group of nodes and right-click, then choose "Save Nodes as Clip File".
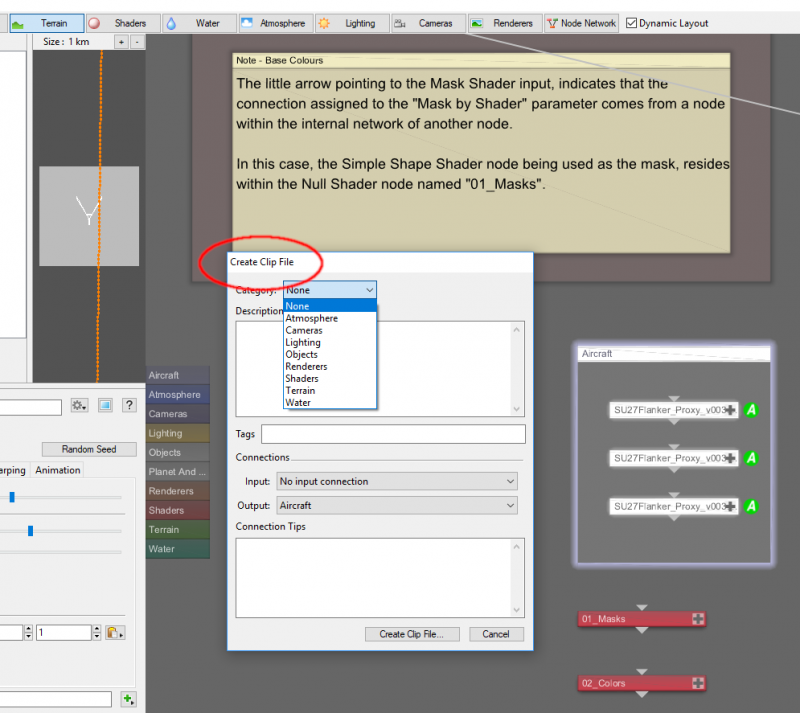
The Create Clip File dialog appears. Enter a description and any tags or connection notes, then save it by clicking on the "Create Clip File" button.
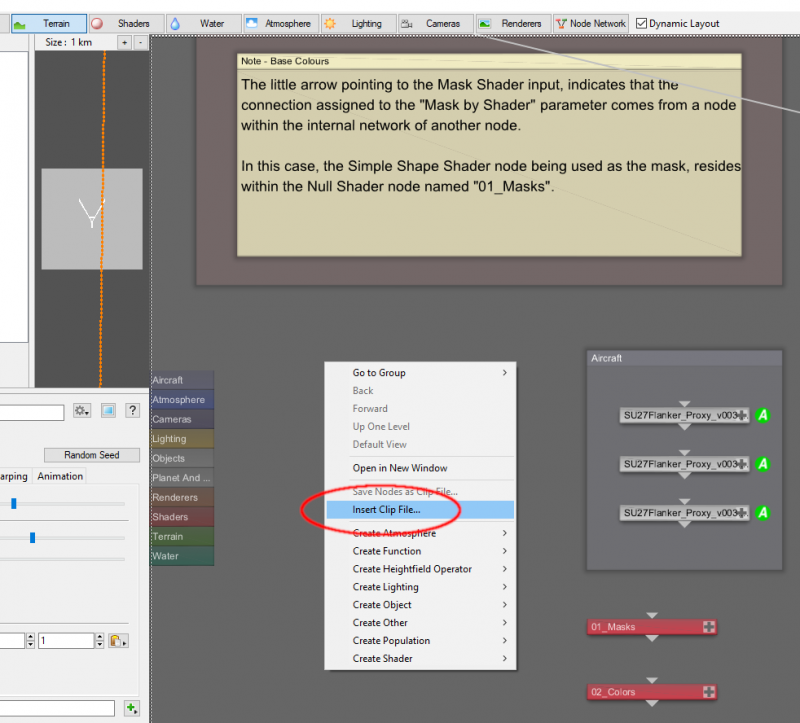
To import the clip file, right-click in the Node Network pane, choose "Insert Clip File" and select the clip file. The saved nodes are imported into your scene and ready to be used.
You can even copy and paste nodes between Terragen projects, or to and from text files and emails, which can be useful for sharing small clips. For more information about using Clip Files, please see the Terragen Guide Working with Clip Files.
Organizing with Notes[edit]
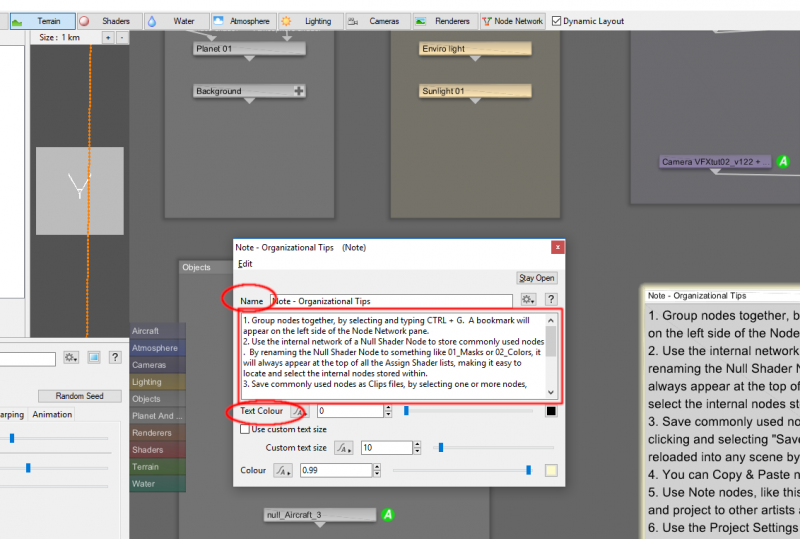
In the content files included with these tutorials, we make extensive use of the Note node to document what we’ve done. You can quickly add a Note node using the Quick Node Palette, or right-clicking in the Node Network pane and choosing "Create Other -> Note".
The dialogue window allows you to rename the Note node as desired, and type your comments in the empty area. You can also change the color and size of the text as needed. This is a great way to remind yourself what you were doing, or leave notes for other artists working on the shot.
Organizing with Project Settings[edit]
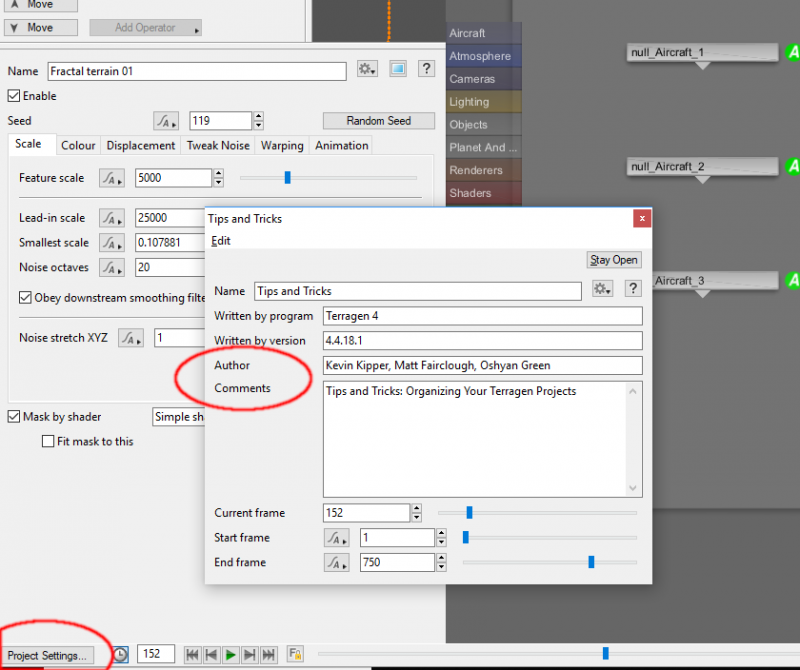
The final organizational tip is to use the Project Settings button at the bottom left of the Terragen project. Here you can add comments and authorship information.
You can download a Terragen Project file for this tutorial to further explore these organizational tips and tricks.
Media:Tutorial_OrganizingYourTerragenProject.zip
A parameter is an individual setting in a node parameter view which controls some aspect of the node.
A shader is a program or set of instructions used in 3D computer graphics to determine the final surface properties of an object or image. This can include arbitrarily complex descriptions of light absorption and diffusion, texture mapping, reflection and refraction, shadowing, surface displacement and post-processing effects. In Terragen 2 shaders are used to construct and modify almost every element of a scene.
A single object or device in the node network which generates or modifies data and may accept input data or create output data or both, depending on its function. Nodes usually have their own settings which control the data they create or how they modify data passing through them. Nodes are connected together in a network to perform work in a network-based user interface. In Terragen 2 nodes are connected together to describe a scene.
