Distribution Shader v4
Contents
Overview[edit]
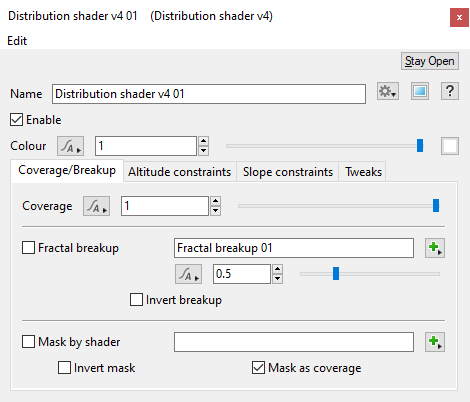
The Distribution shader is a versatile shader, useful for applying and controlling where colour appears. It is often used to generate masks in order to blend other shaders or limit where populations appear. In many ways It is similar to a Surface Layer, having altitude and slope constraints, and coverage and breakup settings, but without displacement and luminosity parameters.
Settings:
- Name: This setting allows you to apply a descriptive name to the node, which can be helpful when using multiple Distribution shader nodes in a project.
- Enable: When checked, the node is active and the settings below will affect the surface. When unchecked, the node is ignored.
- Colour: This shader outputs the colour defined by the colour swatch to the right. A slider and numerical input field allow you to easily adjust the colour’s brightness up or down. White is often chosen for generating masks.
Coverage/Breakup Tab[edit]
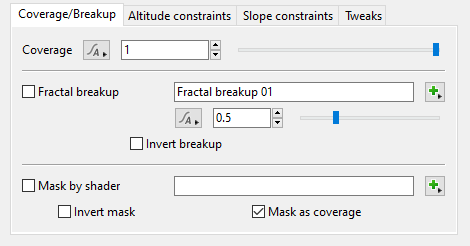
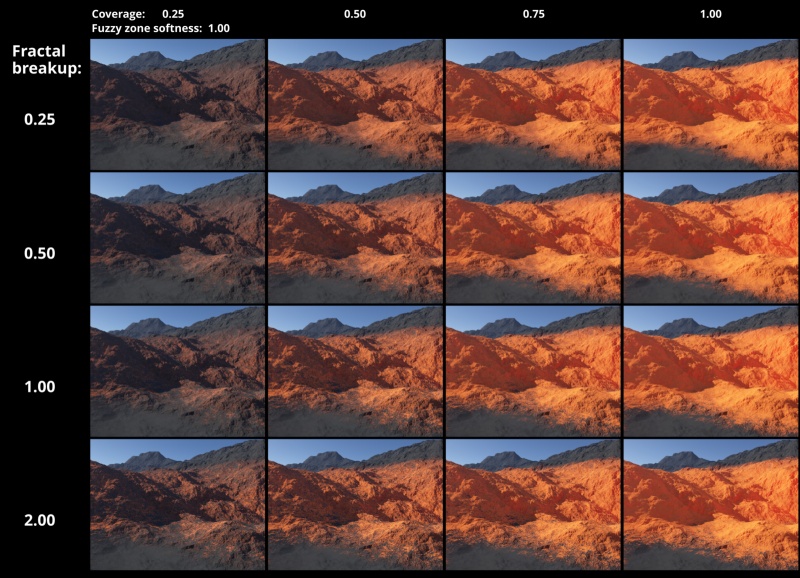
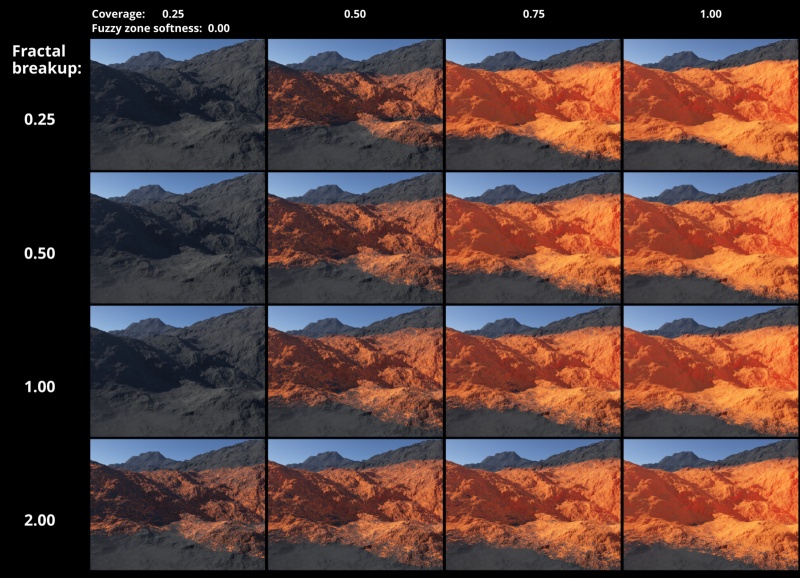
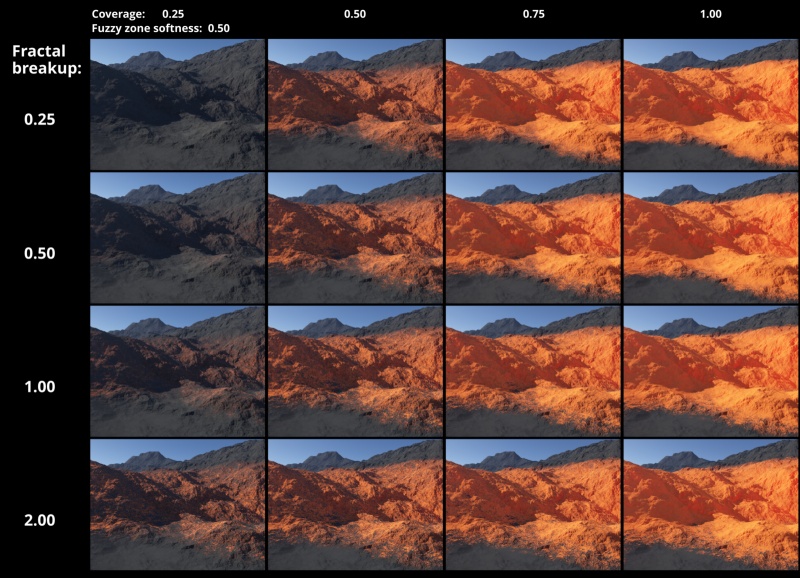
- Coverage: This setting controls how much of this shader is applied, almost like a transparency control. A value of 1 means the shader is fully applied and will cover all surfaces upstream of it in the node network, while smaller values allow only a portion of the surface layer to be applied, so the upstream surfaces will show through. Coverage can be randomised by the use of the Fractal breakup setting below, which allows for a more naturalistic look by randomly breaking up the opacity of the coverage.
- Fractal breakup: When checked, shader opacity is broken up using the fractal assigned in the field to the right. This introduces a sense of randomness and texture, especially when used as a mask. The amount of fractal breakup is specified in the controls immediately below. Larger numbers mean greater breakup. See Fractal Breakup Explained for details.
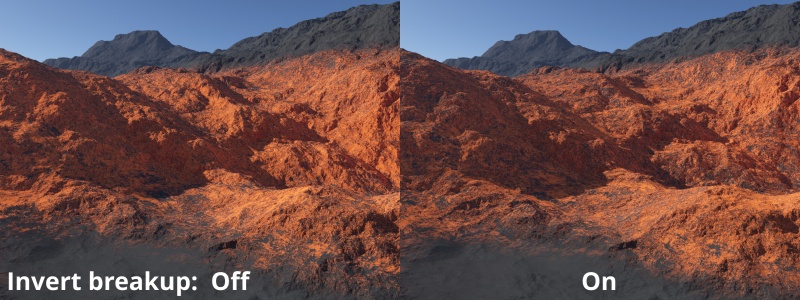
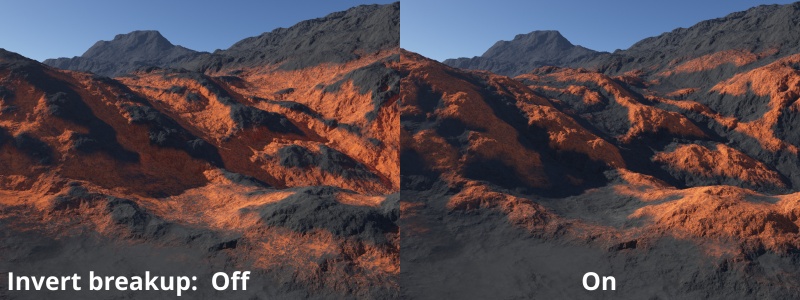
- Invert breakup: When checked, the fractal breakup pattern is inverted, i.e. light parts become dark and vice versa.
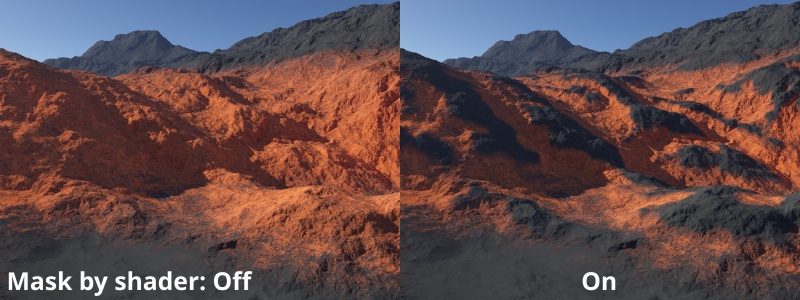
- Mask by shader: When checked, the shader or function nodes assigned to this setting are used as a mask for this Distribution shader. For example, you could use an Image Map Shader and an image to control where the Distribution shader appears. Likewise, you could paint a mask with a Painted Shader, or use a Simple Shape Shader to limit this shader to a hexagonal area. White parts of the shader indicate that the mask is more opaque, while shades of grey control the opacity or coverage of the layer. You can also control the RGB channels individually.
- Invert mask: When checked, the masking shader is inverted, i.e. light parts become dark and vice versa.
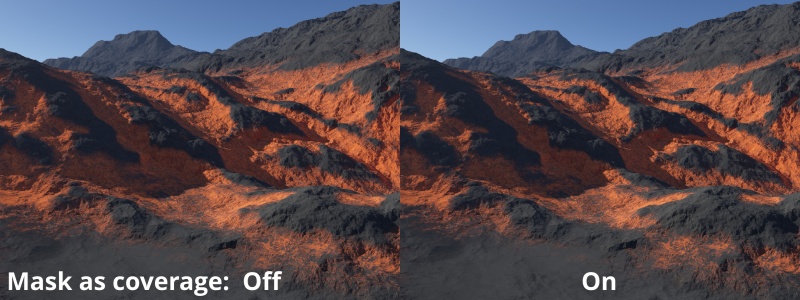
- Mask as coverage: When checked, the shader or function nodes assigned to this setting are used to modify coverage rather than simply as a mask for the shader. Blending as coverage allows for more sophisticated interaction with aspects of the shader such as fractal breakup. This can be a subtle effect though and is an advanced feature you would not typically need to use.
Altitude Constraints Tab[edit]
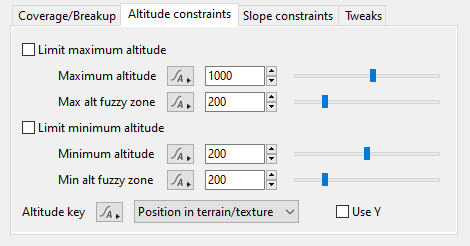
This tab has settings which let you control where the Distribution shader appears by altitude or height. For example, if your shader layer represents snow you might not want it to appear below a certain height. You can use the 3D Preview to quickly and accurately select altitudes by right clicking in the pane at the altitude you want and selecting “Copy Altitude” from the context menu, then pasting the copied value into the text field for Minimum Altitude by highlighting its current value and pressing “Ctrl + V” on your keyboard. With the Limit minimum altitude checkbox enabled, the snow layer will only cover the terrain to the point at which you clicked in the 3D Preview.
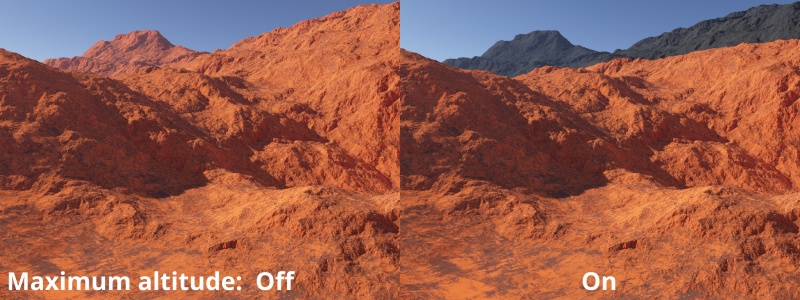
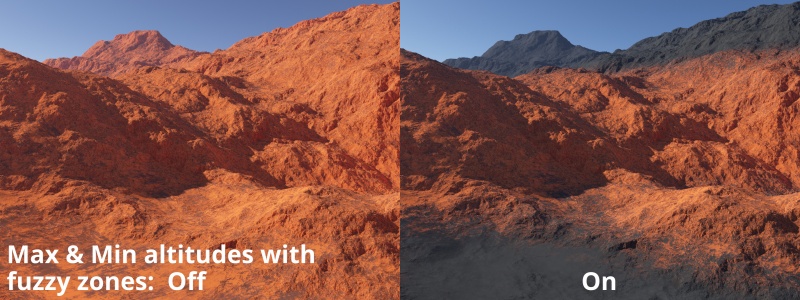
- Limit maximum altitude: When checked, the Maximum altitude constraint becomes active and the shader is limited to altitudes below the Maximum altitude value.
- Maximum altitude: This setting controls the maximum height at which the shader will appear at.
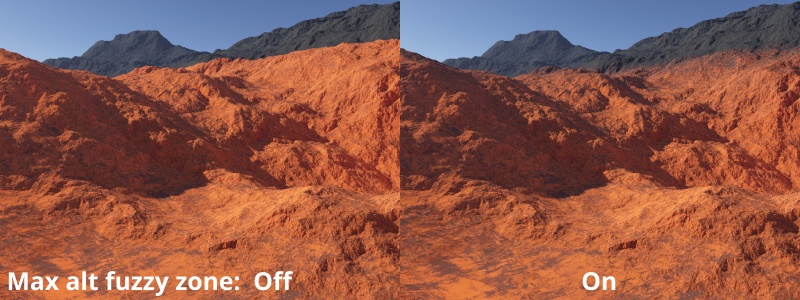
- Max alt fuzzy zone: This controls the width of the fuzzy zone for the maximum altitude constraint. The fuzzy zone is an area below the maximum altitude which controls how the shader is blended. Fuzzy Zones are explained in detail here.
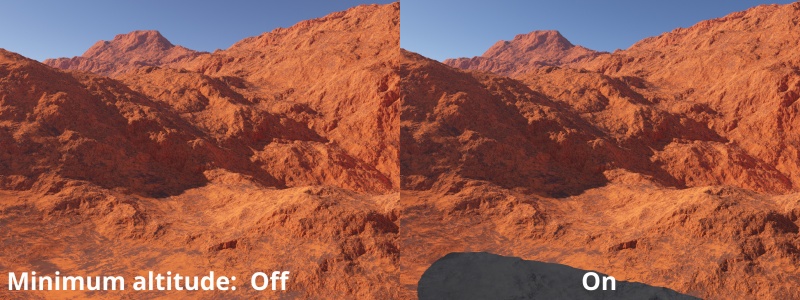
- Limit minimum altitude: When checked, the Minimum altitude constraint becomes active and the shader will not appear below the Minimum altitude value.
- Minimum altitude: This setting controls the minimum height at which the shader will appear at.
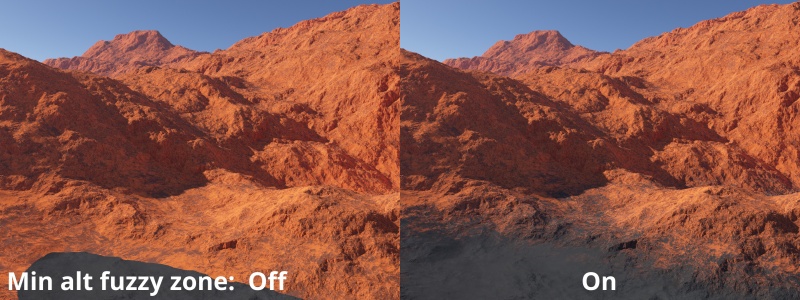
- Min alt fuzzy zone: This controls the width of the fuzzy zone for the minimum altitude constraint. The fuzzy zone is an area above the minimum altitude which controls how the shader is blended. Fuzzy zones are explained in detail here.
- Altitude key: This popup menu has two options which are used to select how the altitude or height is based.
Final position: When selected the altitudes are based on world space and not texture space.
Position in terrain/texture: When selected the altitudes are based on texture space
- Use Y: Description coming soon.
Slope Constraints Tab[edit]
This tab has settings which let you control where the Distribution shader appears according to slope. For example, if your surface layer represents grass you might want it to only grow on slopes that are relatively flat. You can use the 3D Preview to quickly and accurately select the angle of the sloping terrain by right clicking in the pane at the level of the sloping area you want and selecting “Copy Slope Angle” from the context menu, then pasting the copied value into the text field for Maximum slope angle by highlighting its current value and pressing “Ctrl + V” on your keyboard. With the Limit maximum slope checkbox enabled, the grass layer will only be visible on the terrain up to the point at which you clicked in the 3D Preview.
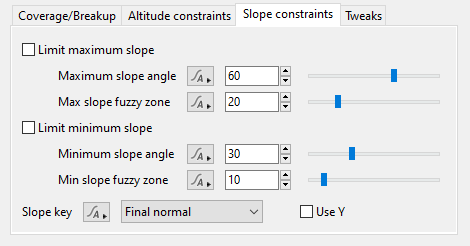
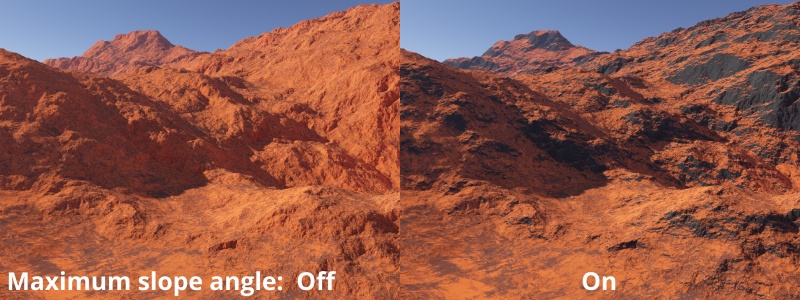
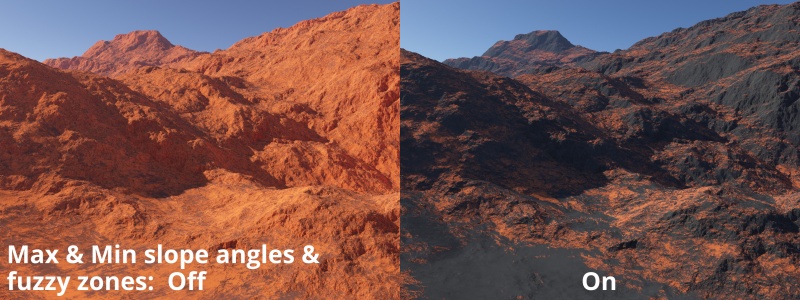
- Limit maximum slope: When checked, the Maximum slope constraint becomes active and the shader will not be visible on slopes that are steeper than the Maximum slope angle.
- Maximum slope angle: This setting controls the maximum slope angle that the shader will appear at.
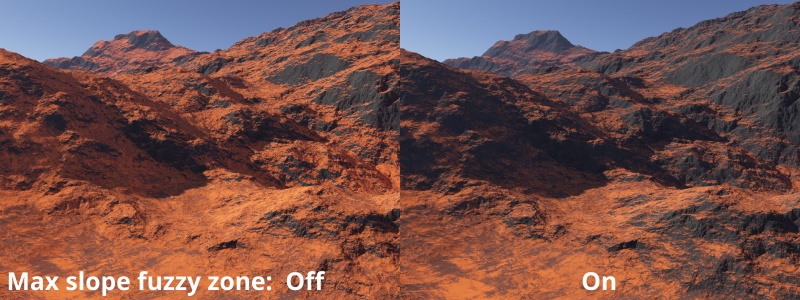
- Max slope fuzzy zone: This controls the width of the fuzzy zone for the maximum slope constraint. The fuzzy zone is an area of the shader that is less steep than the maximum slope angle and controls how the shader is blended. Fuzzy Zones are explained in detail here.
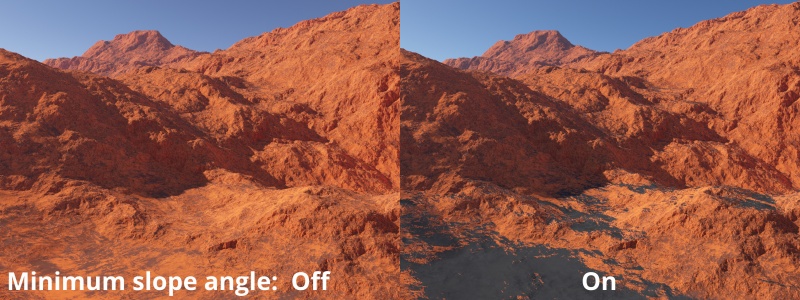
- Limit minimum slope:When checked, the Minimum slope constraint becomes active and the shader will not be visible on slopes that are less steep than the Minimum slope angle.
- Minimum slope angle: This setting controls the minimum slope angle that the shader will appear at. It will not appear on areas flatter than this angle.
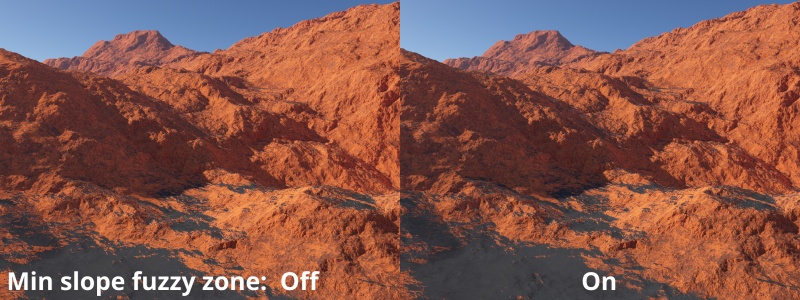
- Min slope fuzzy zone: This controls the width of the fuzzy zone for the minimum altitude constraint. The fuzzy zone is an area above the minimum altitude which controls how the shader is blended. Fuzzy Zones are explained in detail here.
- Slope key: This popup menu has three options which are used to select how the slope is calculated.
Final normal: This is the final normal computed after all the displacements have happened in the scene.
Terrain normal: This is the terrain normal, normally obtained from the last Compute Terrain node.
Planet/object normal: This the normal from the planet or object the surface layer is attached to, after displacement has been applied.
- Use Y: Slope is calculated based on the chosen option in the Slope key setting and wherever you go on the planet (or object) the slopes remain relative to the surface. When this checkbox is enabled, the Y value from the normal will be used instead, which means the angle now becomes relative to the Y axis and as you move further from the planet origin the slope will change. This is most useful for creating global planet-wide effects. For normal surfacing situations you can ignore this setting.
Tweaks Tab[edit]
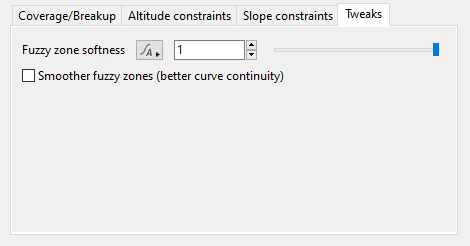
- Fuzzy zone softness: This setting changes the rate at which a partially-weighted surface approaches full weight. Where a shader is partially weighted, perhaps within the fuzzy zone of an altitude constraint or the transition zone of the Intersect Underlying feature, the weight can be boosted. This allows different effects than are possible with other settings that affect coverage. Low values allows the colour transition to become sharper.
- Smoother fuzzy zones (better curve continuity):- Description coming soon.
A shader is a program or set of instructions used in 3D computer graphics to determine the final surface properties of an object or image. This can include arbitrarily complex descriptions of light absorption and diffusion, texture mapping, reflection and refraction, shadowing, surface displacement and post-processing effects. In Terragen 2 shaders are used to construct and modify almost every element of a scene.
Literally, to change the position of something. In graphics terminology to displace a surface is to modify its geometric (3D) structure using reference data of some kind. For example, a grayscale image might be taken as input, with black areas indicating no displacement of the surface, and white indicating maximum displacement. In Terragen 2 displacement is used to create all terrain by taking heightfield or procedural data as input and using it to displace the normally flat sphere of the planet.
A single object or device in the node network which generates or modifies data and may accept input data or create output data or both, depending on its function. Nodes usually have their own settings which control the data they create or how they modify data passing through them. Nodes are connected together in a network to perform work in a network-based user interface. In Terragen 2 nodes are connected together to describe a scene.
