Cloud Layer v2
Contents
Overview[edit]
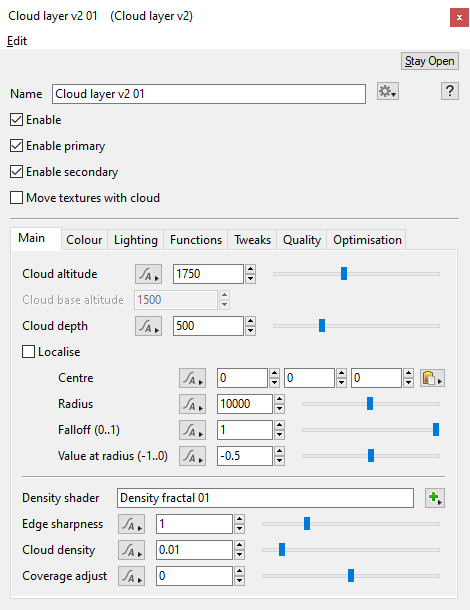
The Cloud Layer v2 node creates a planet-wide layer of clouds that are either based on 2D with simulated 3D shading for faster rendering, or full volumetric 3D for maximum realism at the expense of longer render times.
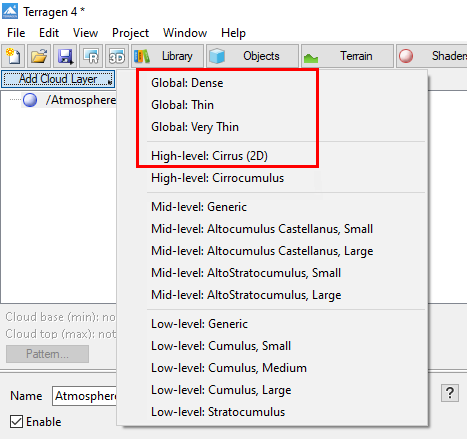
The “Add Cloud Layer” button at the top of the Atmosphere project view allows you to choose from several cloud presets. Creating cloud layers automatically creates a density shader, which defines the overall shape or pattern of the clouds.
Cloud layer placement is primarily defined by the height and altitude of the cloud layer and multiple cloud layers can be used to create clouds at different altitudes, or of different types. There is no limit to the number of layers that can be added.
Settings:
- Name: This setting allows you to apply a descriptive name to the node, which can be helpful when using multiple Cloud Layer v2 nodes in a project.
- Enable: When unchecked, or disabled, the cloud layer is completely turned off and will no longer contribute to the scene.
- Enable primary: When unchecked, or disabled, the cloud layer will not be visible to the camera and will not show up in renders. However, if the "Enable secondary" checkbox is enabled the cloud layer will still affect scene lighting and be visible in reflections.
- Enable secondary: When unchecked, or disabled, the cloud layer will not influence scene lighting or be visible in reflections.
- Move textures with cloud: When checked, or enabled, the fractal noise patterns that internally define the cloud layer moves with the cloud layer as it’s repositioned using the Centre setting. When unchecked, or disabled, repositioning the cloud layer causes a different part of the fractal noise pattern to be visible.
Main Tab[edit]
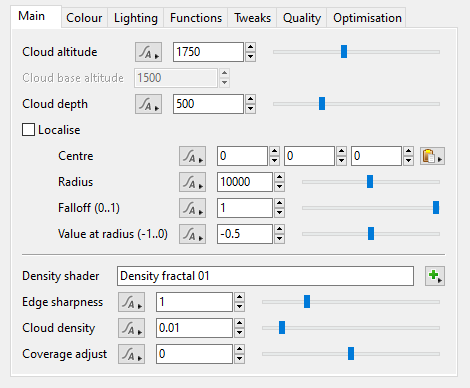
- Cloud altitude: This setting defines the mid-point of the Cloud Layer v2 between its base and top. It is also the same value as the “Y” component of the Centre setting, and changing either setting automatically updated the other.
- Cloud base altitude: This setting is for display purposes only and can not be edited. It mirrors the “Cloud base (min)” display readout beneath the Cloud Node list. Changing the “Cloud altitude”, “Cloud depth” or “Centre” settings will cause this setting to update automatically.
- Cloud depth: This setting defines the height, or depth, of the Cloud Layer v2. Half of its value extends below the “Cloud altitude” and half above. For example, if the "Cloud depth" and "Cloud altitude" values were 1,000 metres, then the Cloud layer v2 would extend from 500 metres to 1,500 metres in altitude.
- Localise: When checked, the cloud layer becomes constrained to the local area defined by the Centre, Radius, Falloff, and Value at Radius settings directly beneath the checkbox.
- Centre: This setting is the position coordinates of the Cloud Layer v2 within the project. The “Y” component value is the same as the "Cloud altitude" and changing either setting will automatically update the other.
- Radius: This setting defines the maximum extent of the Cloud Layer v2.
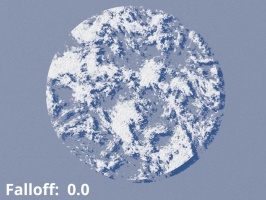
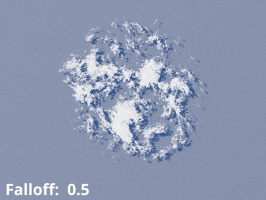
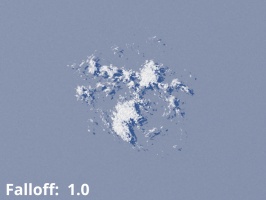
- Falloff (0..1): This setting controls the density of the cloud from its centre to the edge of the localisation sphere. A curve is applied to fade out the cloud as it approaches the edge. A value of 0 means there is no falloff and the clouds will have a hard edge at the sphere radius. Larger values make the clouds fade out more towards the edge of the sphere.
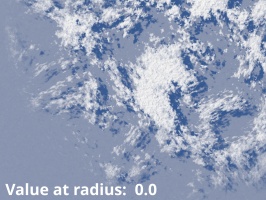
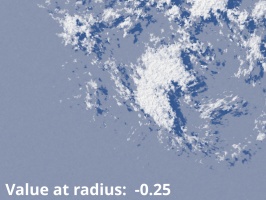
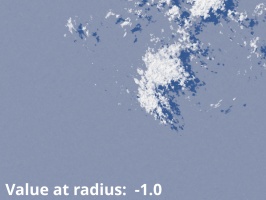
- Value at radius (-1..0): This setting controls opacity of the clouds at the edge of the radius.
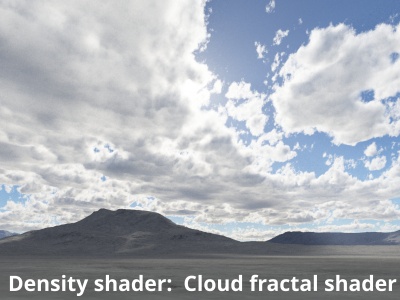
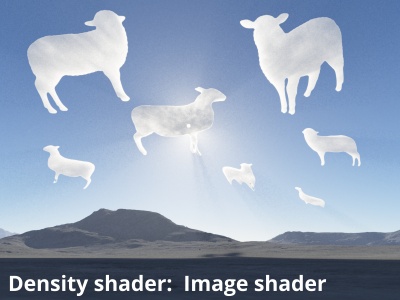
- Density shader: The shader or function assigned to this setting provides the Cloud Layer v2 with its basic shape or pattern. By default a Density fractal shader is automatically assigned when a new Cloud Layer v2 is created. To change the basic shape of the clouds, or to animate them over time, you need to modify the assigned shader or function.
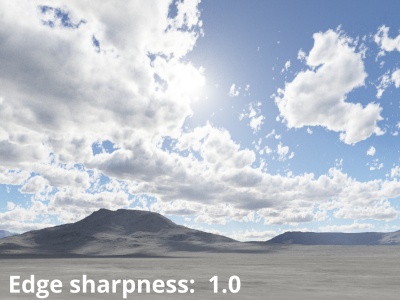
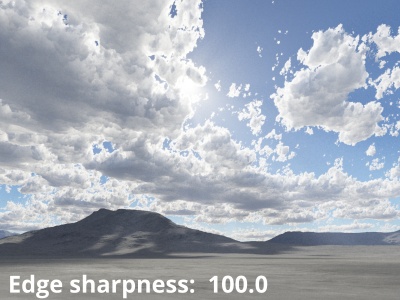
- Edge Sharpness: See Cloud density.
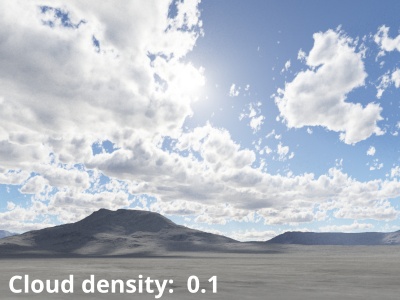
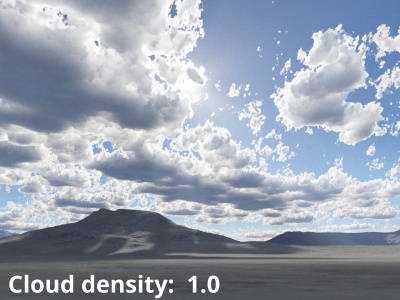
- Cloud density: Along with "Edge sharpness" this setting controls the transparency or opaqueness of the clouds within the cloud layer. Low values make the clouds look thin and let more light pass through them. Higher values make the clouds look thicker and denser, as well as darker because less light passes through them. Generally speaking we recommend using the "Cloud density setting" because the automatic sampling adjustments that derive from the "Ray-marching quality" are more strongly influenced by "Cloud density" than by "Edge sharpness". In other words, if you set "Cloud density" very high, the render quality will adjust accordingly to keep the noise levels the same, but if you do this with "Edge sharpness" it will not increase sampling to the same degree, meaning that you might have to increase the "Ray-marching quality" much higher than is typical for most scenes.
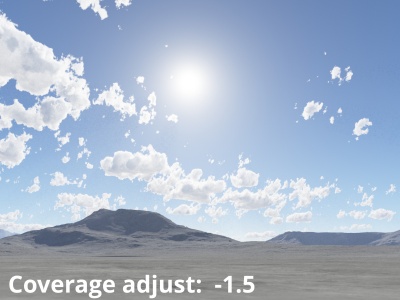
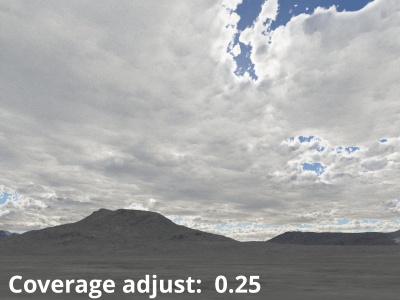
- Coverage adjust: This setting controls the amount of clouds within the cloud layer. Low values reduce the amount of individual clouds and increase the amount of empty space between them. Increasing the value fills up the area with more individual clouds.
Colour Tab[edit]
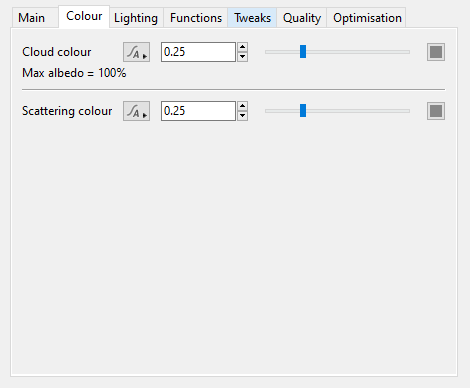
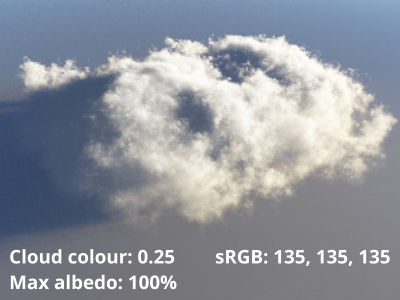
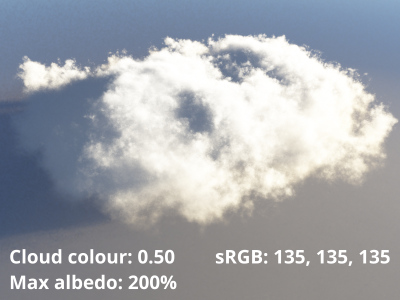
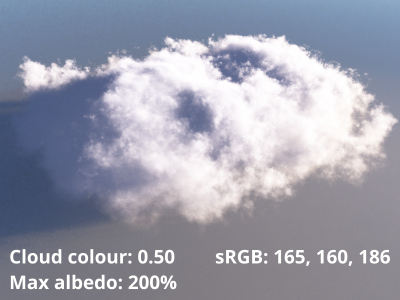
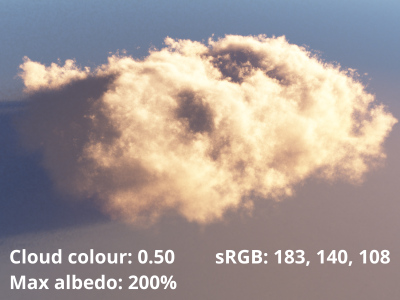
- Cloud colour: This setting controls the colour of the cloud. Displayed beneath the setting is a readout indicating the level of albedo, which is a measurement of reflected light. The maximum albedo possible In the real world is 100% and a "Cloud colour" of 0.25 can result in 100% albedo if the clouds are dense enough due to the way volumetric colours are calibrated in Terragen. For realistic looking cloud layers, it is recommended to keep the albedo value to around 100%.
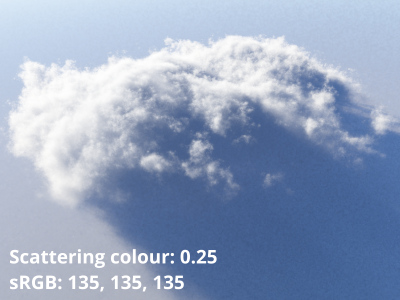
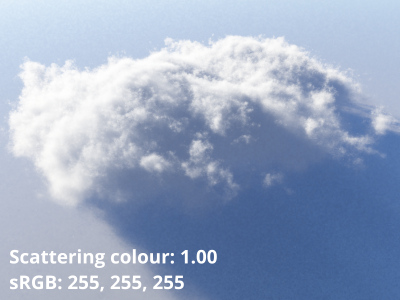
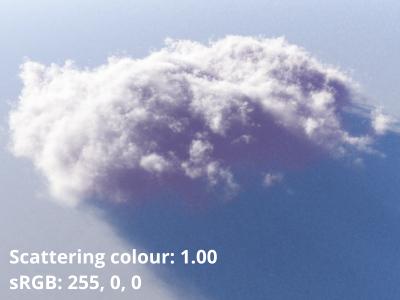
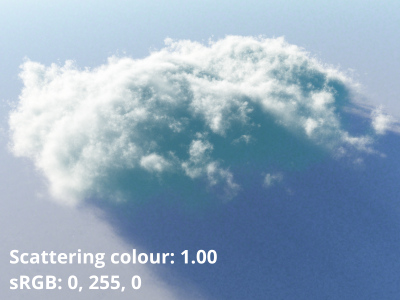
- Scattering colour: This setting can be used to brighten, darken or tint the colour of the indirect lighting or GI of the cloud layer.
Lighting Tab[edit]
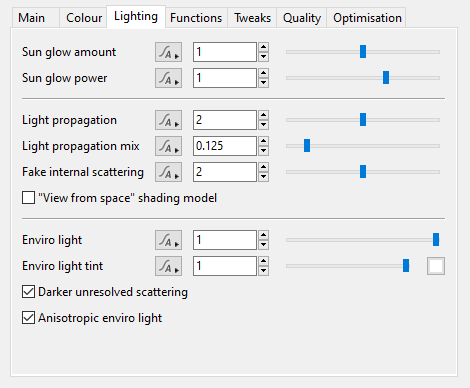
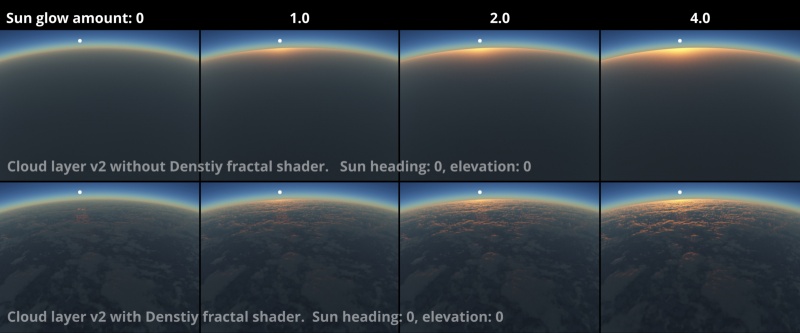
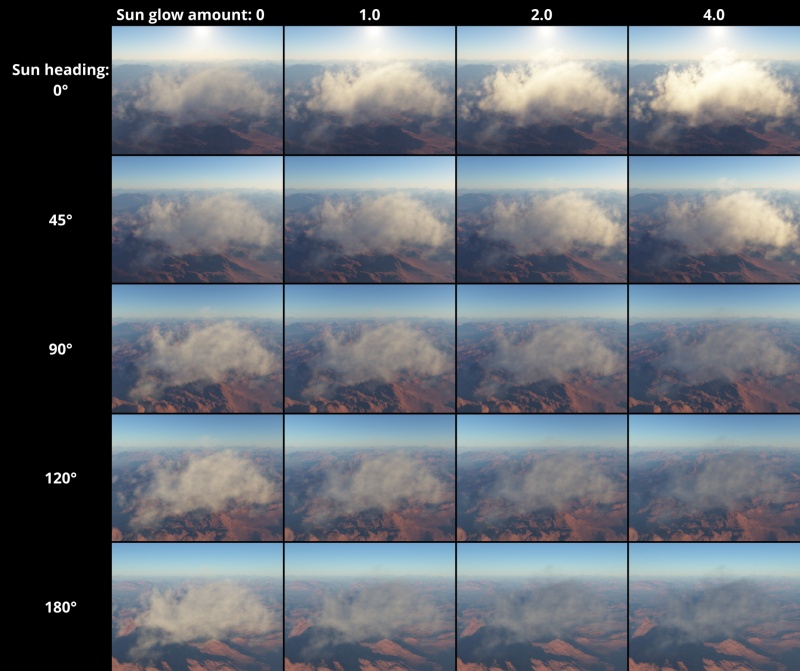
The bright outline along the edge of the cloud known as the silver lining occurs when light is scattered by cloud droplets along the cloud's outer edge. This contrast between the change in brightness with respect to the angle of the sun, is most clearly seen when the Cloud Layer v2 clouds are back-lit by the sun. When the "Sun glow amount" and "Sun glow power" settings are set to 0, light is scattered uniformly in all directions decreasing the silver lining phenomenon.
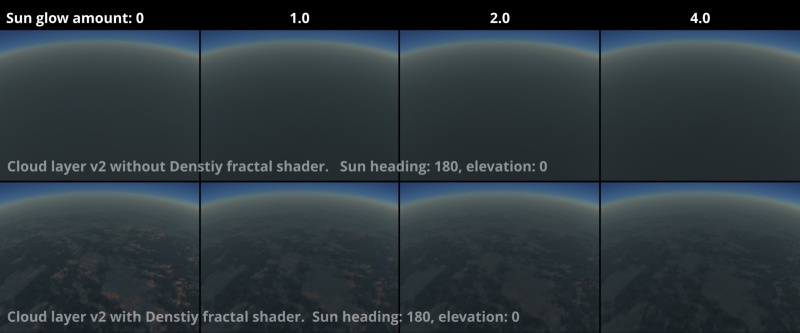
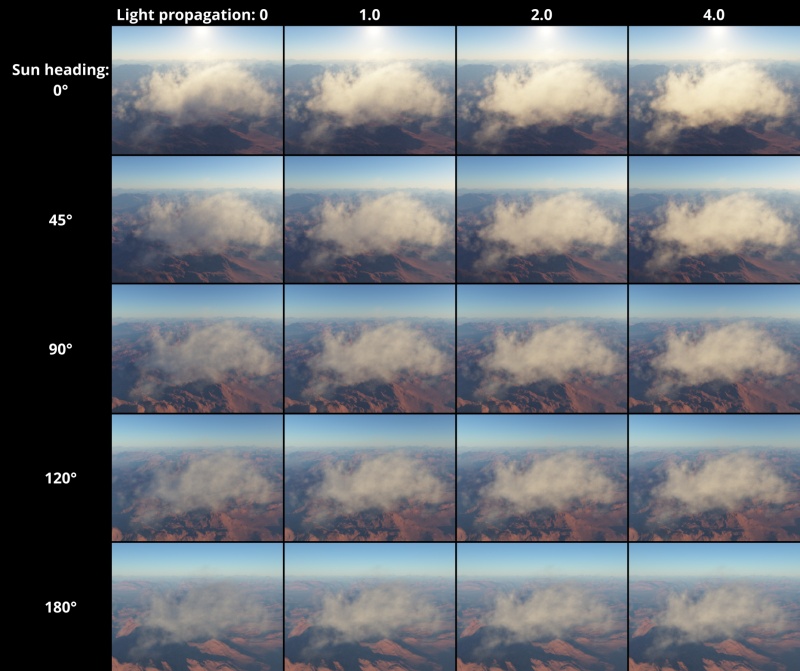
- Sun glow amount: When the sun is behind the cloud layer and in front of the observer (camera), increasing the "Sun glow amount" will scatter more light within the cloud, brightening the highlights of the cloud, especially in the area of the silver lining effect. A value of 0 will uniformly scatter the light throughout the cloud layer. As the value increases, areas of the cloud layer closer to the light source will appear brighter. This behavior can be clearly seen in the orbit type images below.
When the sun is behind the observer, increasing the "Sun glow amount" causes more light to be absorbed by the cloud therefore less light to be scattered and the clouds look less bright.
In the image below, the same effect can be seen when the “Localise” parameter is enabled on a Cloud layer V2 and the sun’s heading is rotated.
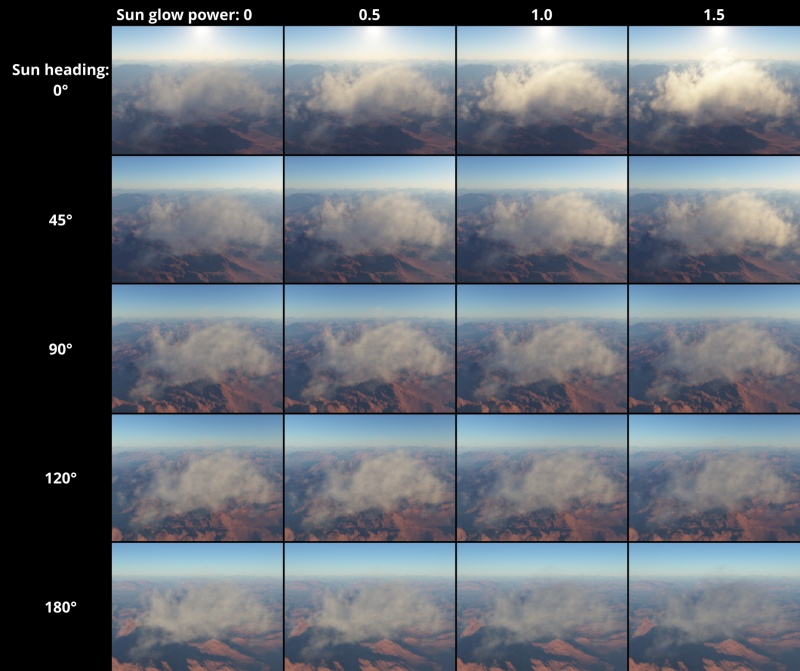
- Sun glow power: You can think of this setting as the “contrast” of the phase function which simulates the changes in brightness with respect to the angle from the sun. When the value is 0 the phase function returns 1 everywhere, uniformly scattering light in all directions. Increasing the value increases the contrast between sun-facing directions and sun-opposing directions.
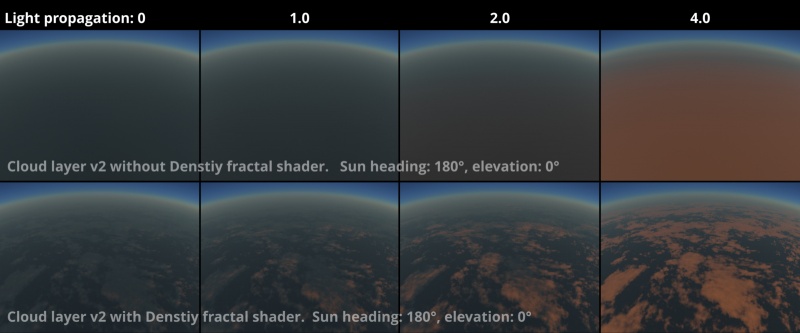
Light Propagation Overview: Along with the size of a cloud and its density at a given sampled point, the final look of the cloud depends on how light rays scatter through its volume, casting shadows upon itself and other cloud layers. A cloud’s original non-propagated light contribution includes self-shadowing, while an additional “light propagation” contribution allows light to travel further through the cloud layer. The parameters in this section provide a way to mix these contributions in order to artistically control the final lighting of the cloud.
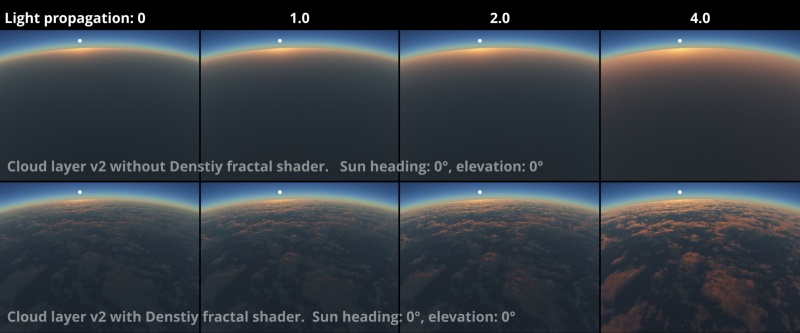
- Light propagation: Light propagation allows light to be less affected by cloud self-shadowing. Increasing the value allows the light to travel further through the cloud, increasing its brightness.
- Light propagation mix: This setting controls how much to mix the contribution of the "Light propagation" with the original non-propagated light. A value of 1 means use all of the light propagation result. This parameter does not go higher than 1.
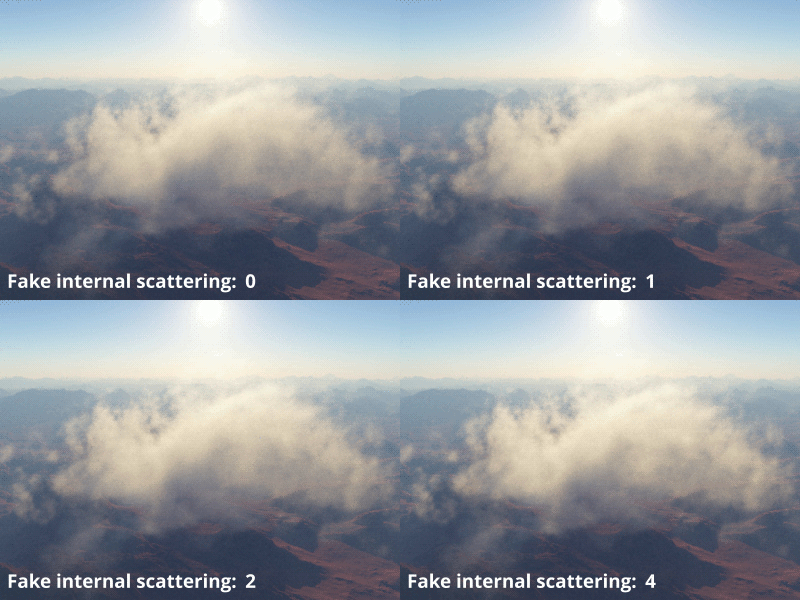
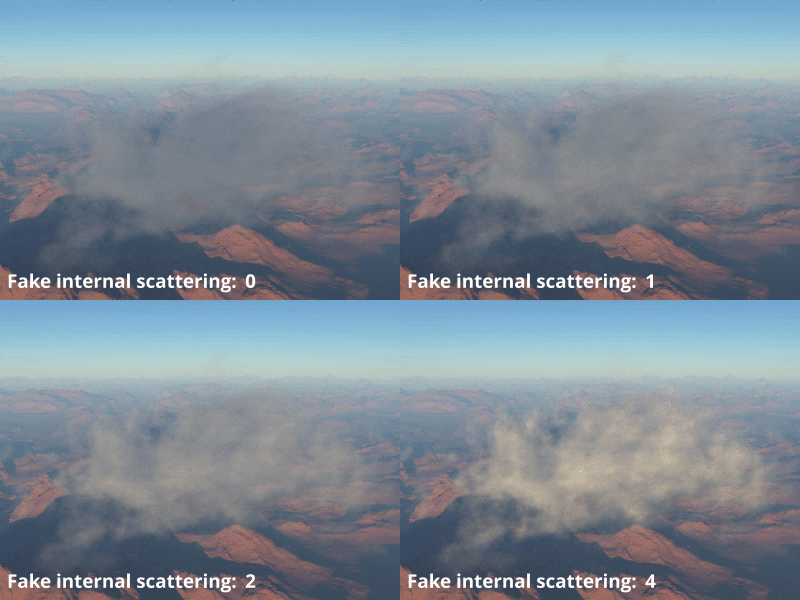
- Fake internal scattering: This setting controls the change from forward scattering in thin clouds to back scattering in dense clouds, as well as brightening the contribution of direct light sources on dense clouds. When set to 0 and the “Anisotropic enviro light” setting is checked, cloud density has no effect on enviro light contributions and they are predominantly forward scattering everywhere. The "Sun glow" settings also affect the contrast between forward and backward scattering weightings.
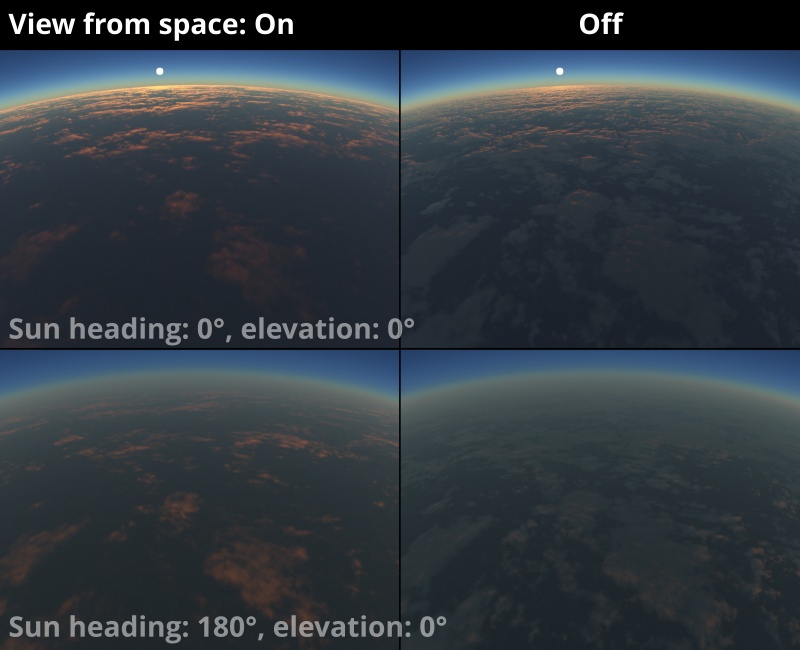
- “View from space” shading model: When checked, the behaviours of various parameters are changed to avoid problems that are typically more visible when viewed from very high altitude, which is most useful for global cloud layers.
Enviro Light Overview: Each Cloud Layer v2 node has its own environment light settings to provide control over how they receive light from their surroundings, which predominantly affects their appearance in the shadows.
- Enviro light: This setting provides control over the areas of the cloud lit by global illumination (GI). Lower values darken the global illumination and higher values brighten it.
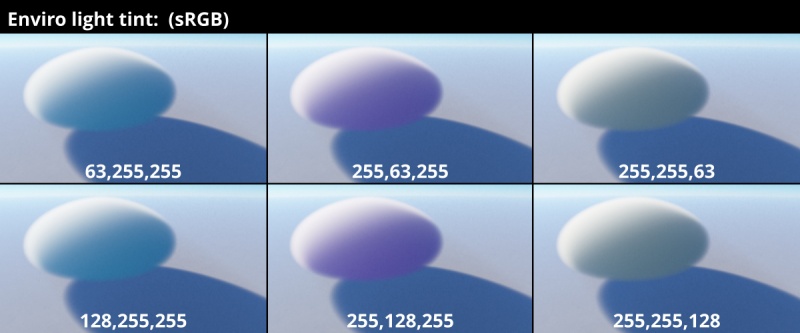
- Enviro light tint: This setting allows you to tint the areas affected by global illumination in the cloud layer.
- Darker unresolved scattering: When checked, the clouds scatter less GI light at distances which are too short to be adequately resolved by the GI samples in the pre-pass. When unchecked, light often blurs too far into the dark parts of clouds.
- Anisotropic enviro light: When enabled, enviro light (GI or Ambient Occlusion) contributions are weighted more strongly in the forward viewing direction than the backward viewing direction for thin clouds, and more strongly in the backward direction than the forward direction for dense clouds. The "Fake internal scattering" parameter controls the change from forward scattering in thin clouds to back scattering in dense clouds, as well as brightening the contribution of direct light sources on dense clouds. If Fake internal scattering is 0 while Anisotropic enviro light is enabled, cloud density has no effect on enviro light contributions and they are predominantly forward scattering everywhere. The "sun glow" settings also affect the contrast between forward- and back-scattering weightings.
Functions Tab[edit]
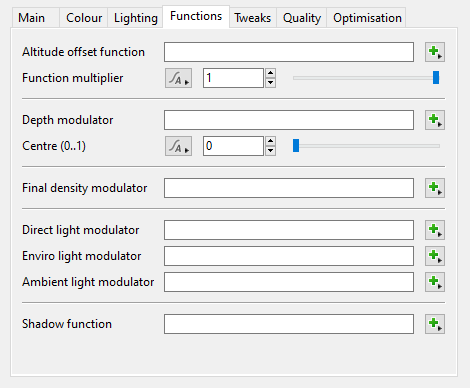
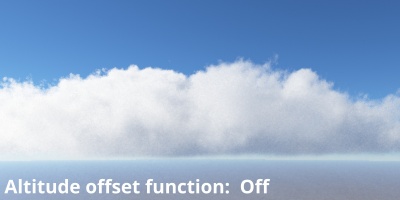
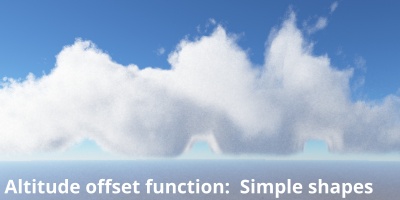
- Altitude offset function: The shader or function nodes assigned to this setting apply an offset to the clouds within the cloud layer, up to the extent of the cloud layer’s depth. In other words, you can’t offset clouds beyond the boundary of the cloud layer itself. The offset value is in metres, so if the output range of the assigned shader or function nodes is 0 to 1, you can multiply the output via the “Function multiplier”. Each cloud layer has a profile which is determined by the settings located on the Tweaks tab, such as “Taper top and base”. When the clouds do not fill the cloud layer completely, due to the cloud profile or low “Cloud coverage” then the “Altitude offset function” can shift the clouds up and down, limited to the extent of the cloud layer’s depth.
- Function multiplier: Multiples the output of the “Altitude offset function”. This can be used to increase, decrease, or invert an offset by entering a negative number.
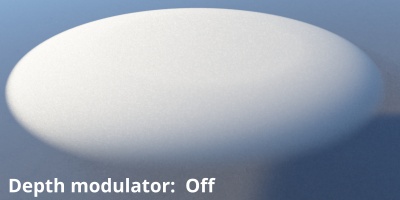
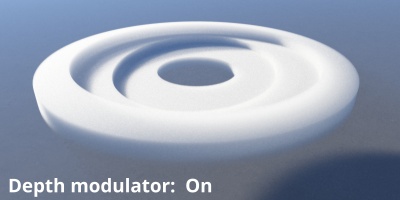
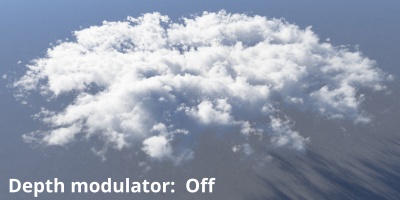
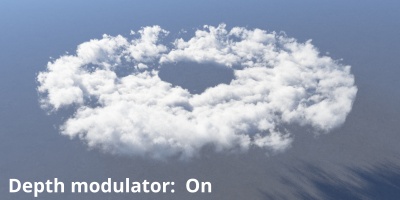
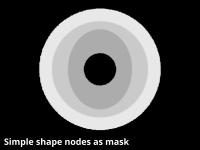
- Depth modulator: The shader or function nodes assigned to this setting reduce the depth of the clouds within the cloud layer. Note that the cloud layer’s dimensions as defined by the “Cloud altitude”, “Cloud depth”, and “Radius” settings on the Main tab, does not change, only the vertical height of the clouds within. For example, assigning a Constant scalar node with a value of 0.5 will reduce the height of the clouds by 50%. The anchor point at which the modulation takes place is defined by the “Centre (0..1)” setting below.
- Centre (0..1): This setting controls where the modulation effect is anchored or remains unchanged. A value of 0 causes the base of the cloud to remain unaffected, essentially compressing the top of the clouds towards the base. A value of point 0.5 causes the modulation effect to be anchored at the vertical center of the cloud layer and causes the base and top of the clouds to be pulled towards the center. A value of 1.0 causes the top of the clouds to remain unaffected while pulling the base of the clouds towards the top.
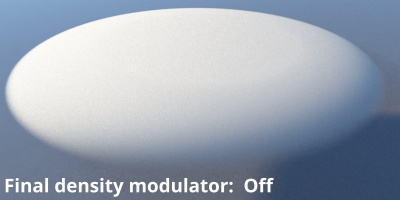
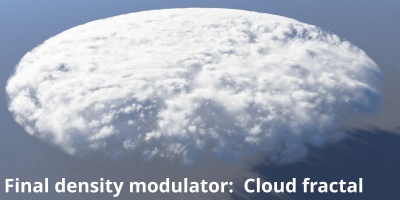
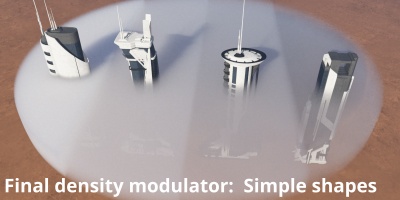
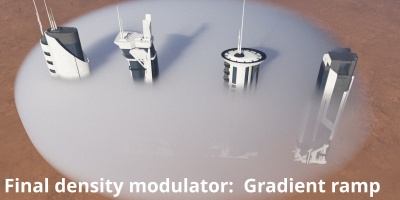
- Final density modulator: The shader or function nodes assigned to this setting reduce the final density or opacity of the cloud layer after the built-in profile and all other effects have been calculated. This modulator does not have any effect on the shape of the clouds. For Cloud Layer v2 clouds this setting is very similar to the “Cloud density” setting under the Main tab.
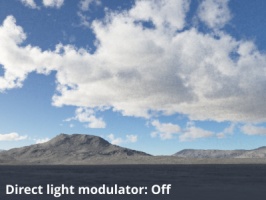
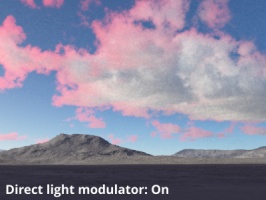
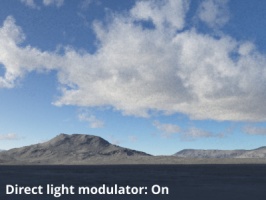
- Direct light modulator: The shader or function assigned to this setting is used as a multiplier to the direct lighting which illuminates the cloud layer, it has no effect on areas of the cloud illuminated by indirect lighting (global illumination). It can be used to modify the colour or brightness of a cloud layer where it encounters direct lighting.
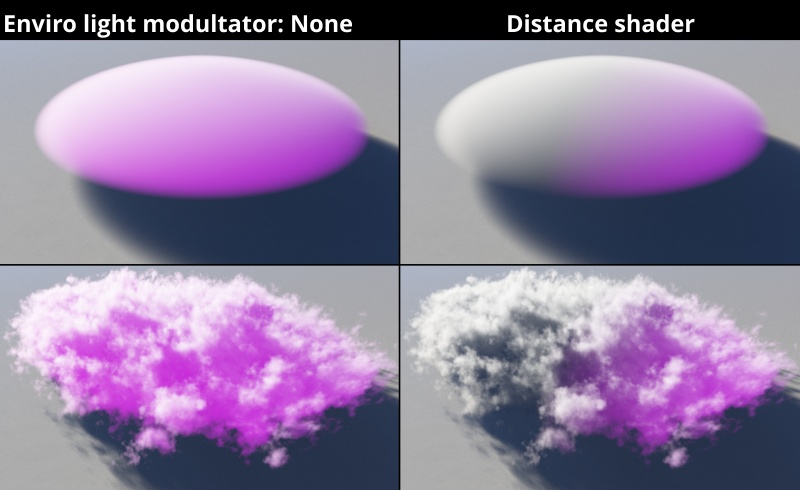
- Enviro light modulator: The shader or function assigned to this setting is used as a multiplier to the environment lighting (GI) which illuminates the cloud layer; it has no effect on areas of the cloud illuminated by direct lighting . It can be used to modify the colour or brightness of a cloud layer where it encounters indirect lighting. In the example images below, the Enviro light tint setting has been used to tint the GI towards a magenta colour, while a Distance shader is used to modulate the enviro light.
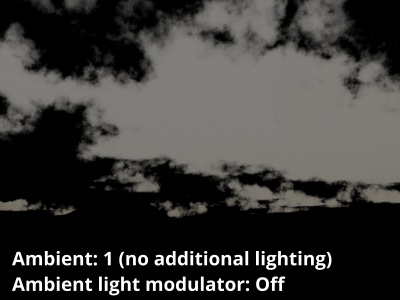
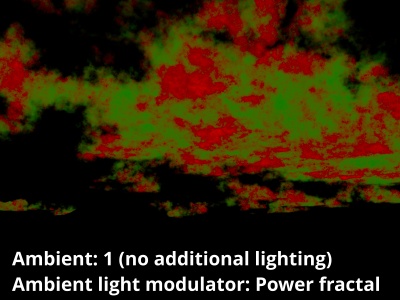
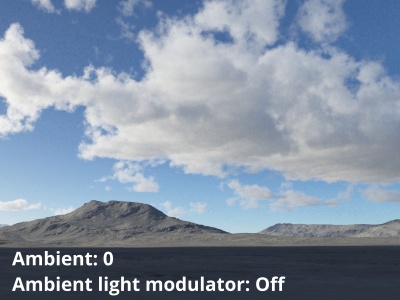
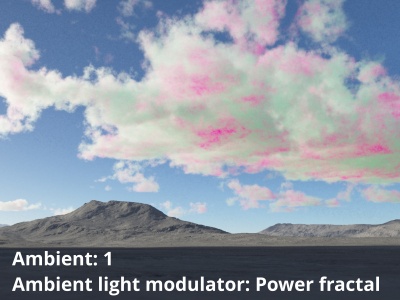
- Ambient light modulator: The shader or function assigned to this setting is used as a multiplier to the cloud layer’s Ambient setting. In order for the modulator to have an effect the Ambient value must be greater than 0.
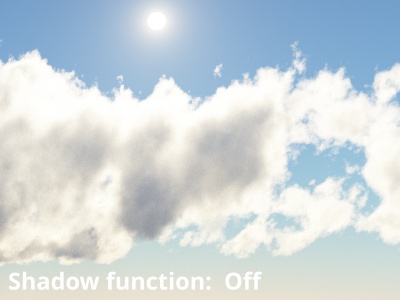
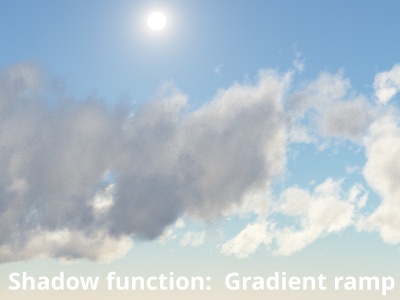
- Shadow function: This setting can be used to define additional regions of shadow on the Cloud Layer v2 for any direct light sources that cast shadows. This may be useful to remove light in certain regions of the Cloud Layer v2 clouds when correct shadows of surfaces would be too expensive to calculate. Where the value is 1, or white, the Cloud Layer v2 will receive no light contribution from light sources that have shadow casting enabled. Where the function is 0, or black, the Cloud Layer v2 receives all the light from light sources. This function has no effect on the Enviro Light or light sources that do not have shadows enabled.
Tweaks Tab[edit]
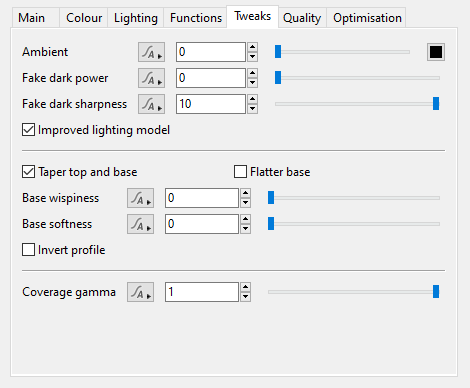
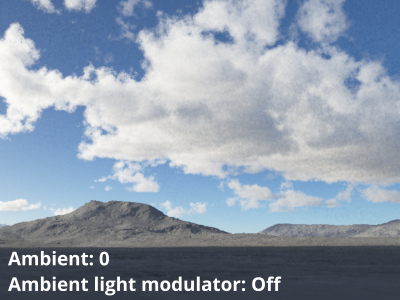
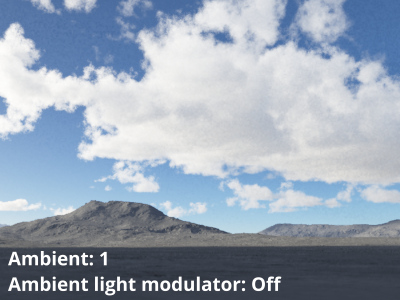
- Ambient: This setting defines a colour and intensity which is added to the lighting that illuminates the cloud layer. While disabled by default, so that only direct and indirect lighting (global illumination) affect the cloud layer, a practical example for using this setting would be to increase the overall brightness of the cloud layer. The colour and intensity of the Ambient setting can be modulated by the "Ambient light modulator".
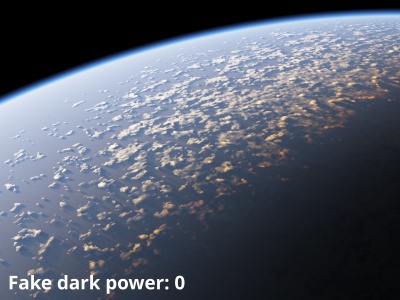
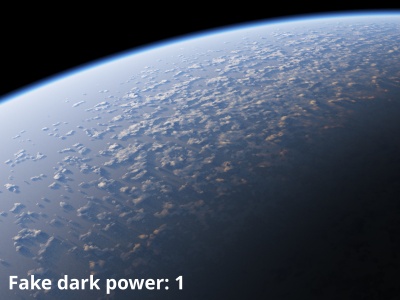
- Fake dark power: This setting is intended for planetary orbit views, as a way to artificially darken the cloud layer if it appears too bright, especially near the terminator, the line that divides the daylit side and the dark night side of a planetary body. Higher values increase the darkness of the cloud layers.
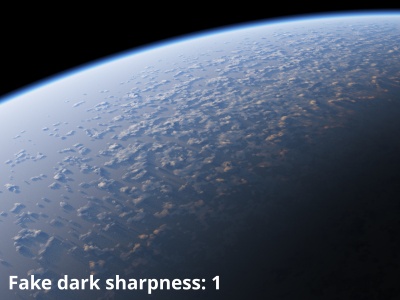
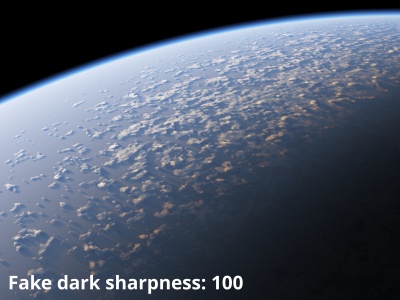
- Fake dark sharpness: This setting is intended for planetary orbit views, as a way to artificially adjust the falloff of the terminator line on the cloud layer. In order for this setting to have an effect, the "Fake dark power" must be greater than 0. Higher values result in a quicker falloff or sharper transition.
Cloud profile: Cloud Layer v2 clouds have an internal vertical profile that shapes the cloud. The profile inhibits the clouds from reaching the very top and bottom of the cloud layer at full density, thus avoiding an unpleasant flat top and bottom to the cloud layer and is designed to give reasonable cloud shapes, considering it has no prior knowledge of the function nodes chosen as input. You can make simple changes to the profile via the "Invert profile" and "Flatter base" options. The profile is widest at 25% of the “Cloud depth” when “Flatter base” is disabled.
- Taper top and base: When checked, this setting enables the internal vertical profile that shapes the cloud. When unchecked, clouds within the cloud layer can extend up to the limits of the cloud layer if the “Cloud density” is high enough, but then will stop abruptly.
- Flatter base:
- Base wispiness:
- Base softness:
- Invert profile:
- Coverage gamma: This setting provides a way to reduce or increase the cloud coverage within the cloud layer based on a gamma function. Increasing the value increases the coverage.
Quality Tab[edit]
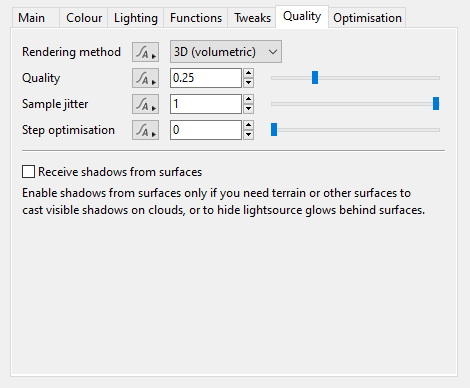
- Rendering method: This popup menu has two options which determine the way in which the cloud layer is rendered. Cloud Layer v2 clouds are based on procedural 3D textures and volumetric data therefore the 2D rendering method, which samples one point per pixel midway between the base and top of the cloud, is not recommended. The 3D (volumetric) rendering method uses ray-marching techniques to accumulate the density of the Cloud Layer v2.
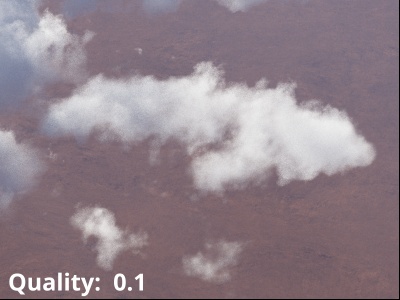
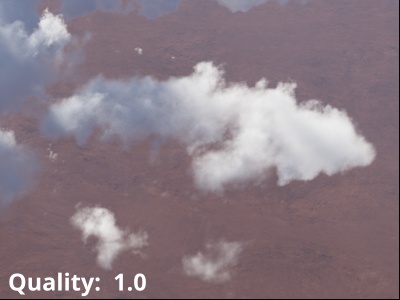
- Quality: = This setting provides a way to reduce render times by evaluating fewer samples within the volume along the ray. In many circumstances the quality of a rendered image using a value of 0.5 is almost indistinguishable to the quality at a value of 1.0 but at a faster render time. Using too low a value, such as 0.1 or less, can cause the shadows cast by the cloud layer onto itself, to appear lighter or more diminished.
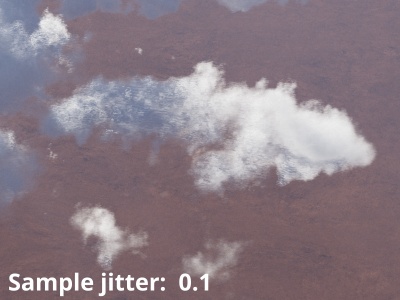
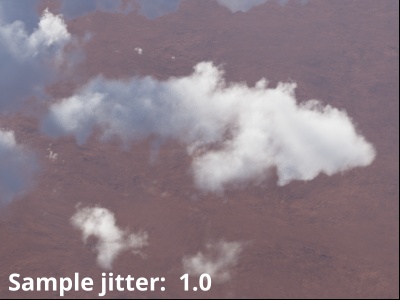
- Sample jitter: This setting provides an offset for each ray-marched segment of the volume being sampled. A value of 0 means the sample point is located at the center of each ray-marched segment being evaluated, which may introduce unwanted banding in the final rendered cloud layer. A value of 1, shifts the sample point along the ray, but still within the ray-marched segment being evaluated. This introduces noise into the final rendered cloud layer, however the anti-aliasing process averages all the neighboring rays together to create a better approximation of the volume being sampled.
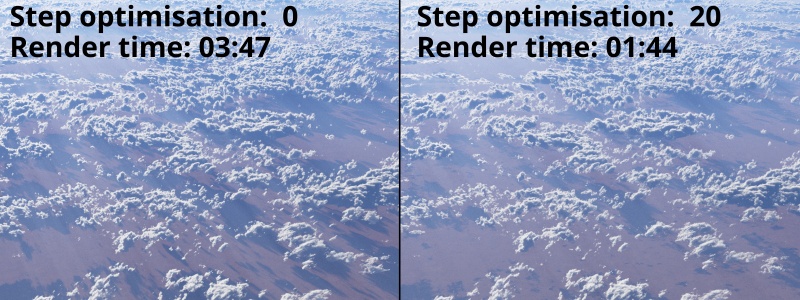
- Step optimisation: This setting provides a way to speed up ray-marching across empty space. Larger values allow the clouds to render faster by skipping over larger regions with negative density values, but artifacts may be introduced if the parameter is set too high. In the example image below, note how increasing the value from 0 to 20 decreased render times by two minutes, but less shadows are cast onto the terrain.
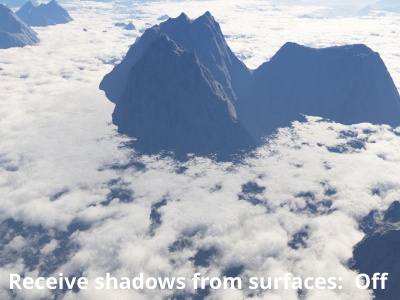
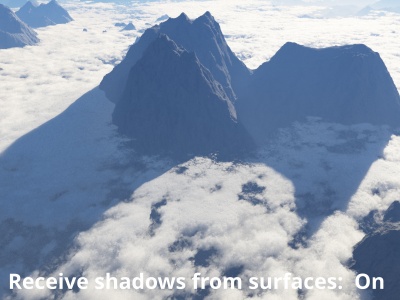
- Receive shadows from surfaces: This setting is disabled by default because generally speaking, cloud layers are positioned higher in altitude than the surrounding terrain and therefore would not receive shadows from the terrain. When cloud layers are positioned lower than the surrounding terrain and you want shadows to be cast from the terrain onto the cloud layers, enable the setting by clicking on the checkbox. Note, this may increase render times.
Optimisation Tab[edit]
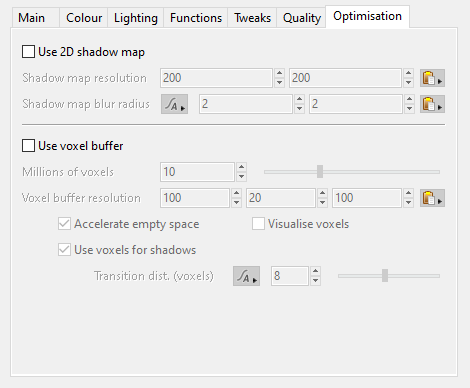
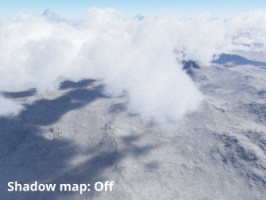
- Use 2D shadow map: Shadow maps were originally designed to avoid long render times when extreme anti-aliasing values would not resolve noise issues in the shadows cast by a cloud layer. When enabled, this setting generates a 2D map for the cloud layer at the start of the render process. You can think of the shadow map as a 2D image of the cloud layer’s density values from the top view. Internally, Terragen positions the shadow map at approximately the center of the cloud layer on the “Y” axis and as rays are traced through the cloud layer the density values are used to modify the lighting. Shadow maps can be used to cast shadows onto the terrain, objects and other cloud layers, but not the cloud layer itself.
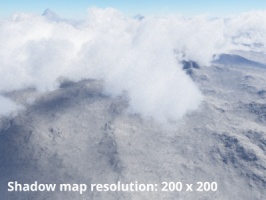
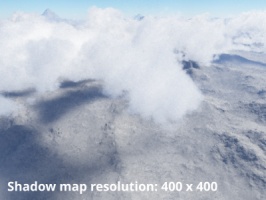
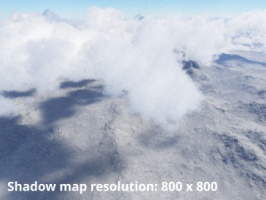
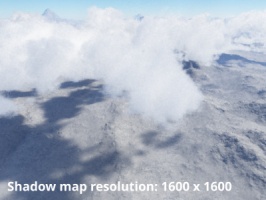
- Shadow map resolution: These values determine the width and height of the shadow map created for the cloud layer. Higher values take longer to calculate but result in more detail, while lower values tend to be softer and have less contrast, due to less detail. The cloud layer’s radius plays an important role in determining the level of detail of the shadow map. For example, a cloud layer with a radius value of 50,000 metres and mapped into 200 pixel by 200 pixel shadow map will appear softer than a cloud layer with a radius value of 20,000 metres mapped into the same resolution.
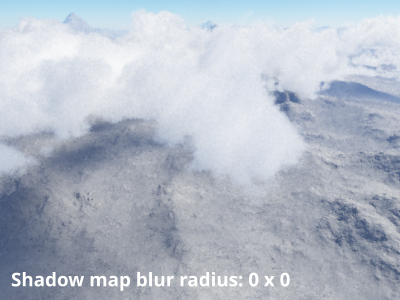
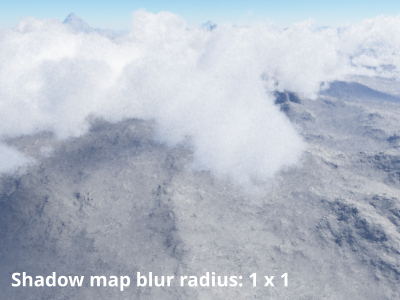
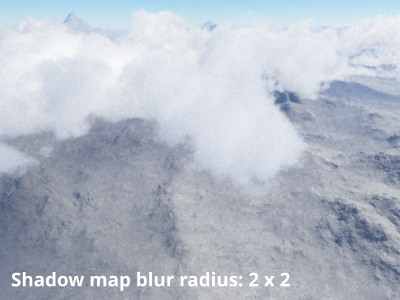
- Shadow map blur radius: When a cloud layer is animated its shape can potentially change every frame which could introduce unwanted flickering into the shadows cast by it. The "Shadow map blur radius" was designed to reduce the flickering by blurring the shadow map for the cloud layer. These values determine the blur radius in pixels to apply to the shadow map after it has been internally rendered, therefore the "Shadow map resolution" values are important to take into consideration. For example, a "Shadow map blur radius" of 2 will have a greater softening effect on a "Shadow map resolution" of 100 pixels by 100 pixels compared to a Shadow map resolution of 1000 pixels by 1000 pixels. The higher the "Shadow map blur radius" value the softer, or more blurred, the shadow map will be.
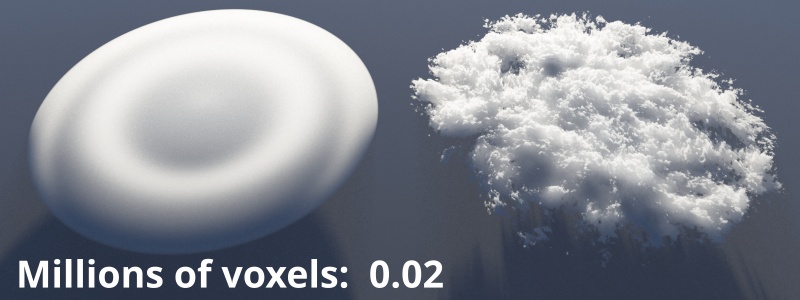
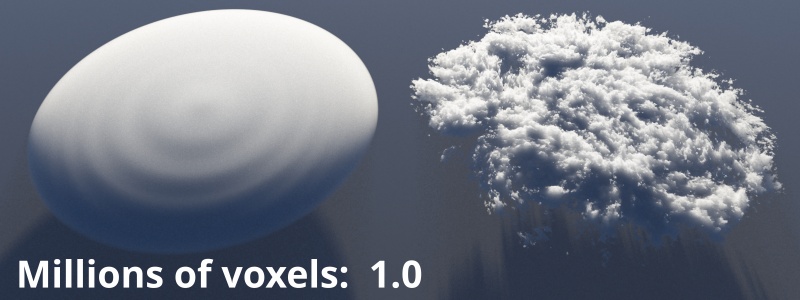
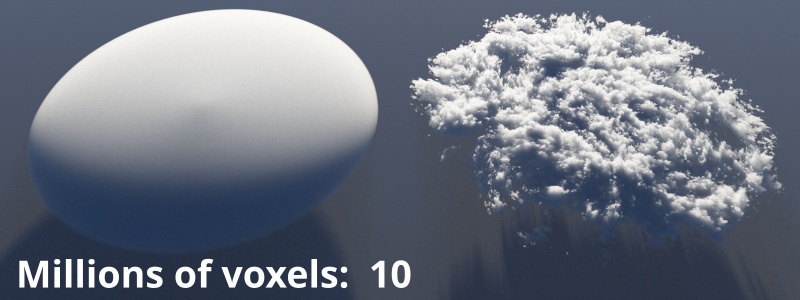
- Use voxel buffer: When enabled, a voxel buffer is created based on the "Millions of voxels" value.
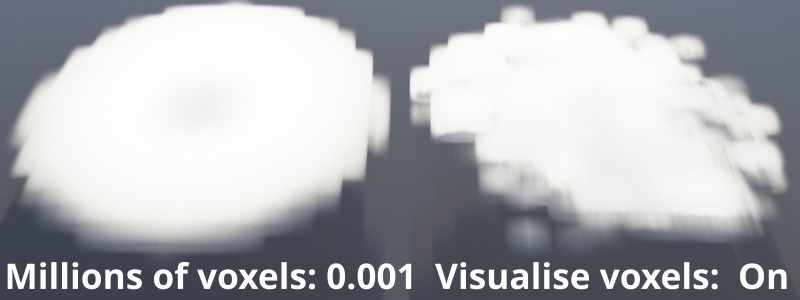
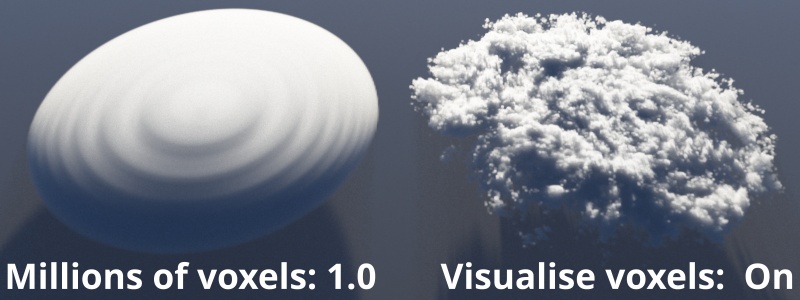
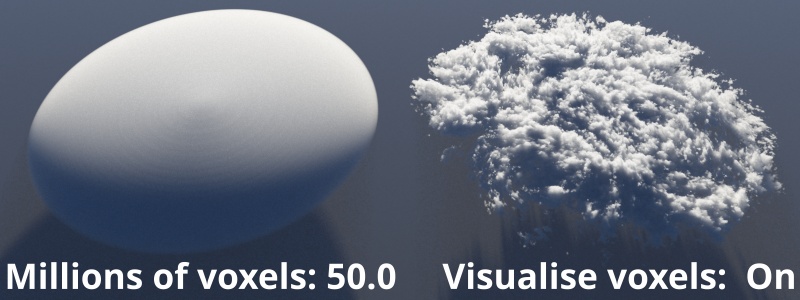
- Millions of voxels: Sets the maximum number of sample points, or voxels, that will be generated to form the voxel buffer. Higher values create more sample points, which results in having more detail in which to calculate shadow and lighting solutions. This can have a large effect on both render times and RAM use.
- Voxel buffer resolution: This read-only display shows the automatic distribution of the "Millions of voxels" in a grid-like pattern across the three axes of the voxel buffer.
- Accelerate empty space: When enabled, empty voxels in the voxel buffer are first identified in order that they may be skipped and not calculated during the render. This can result in render speed improvements on certain types of clouds such as those used globally.
- Visualise voxels: When enabled, the voxel buffer for the cloud layer is displayed in the 3D Preview and used for rendering the Cloud Layer v2.
- Use voxels for shadows: When enabled, the voxel buffer for the cloud layer will be used for cast shadows. This can result in faster render times and avoid noisy shadows, but may produce shadows with less detail.
- Transition dist. (voxels): This setting, measured in voxels, is the transition point at which shadows are calculated using the cloud layer’s actual volume instead of voxels. This leads to more accurately cast shadows when the shadow rays are shorter, such as bouncing around inside the cloud or when close to the terrain.
Node Context-Sensitive Menu[edit]
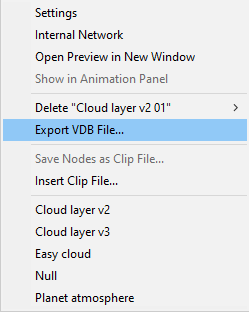
Right clicking on any node in the Node Network pane will bring up a context-sensitive menu for that type of node. The context-sensitive menu options for the Cloud Layer v2 node are:
- Settings: When clicked, the Node Properties pane will open in a separate window.
- Internal Network: When clicked, the current Node Network pane is replaced by the selected node’s Internal Node Network pane.
- Open Preview in New Window: When clicked, if applicable, a new preview window will open. Note that not all nodes can be previewed this way.
- Show in Animation Panel: When clicked, if one of the node’s parameters has keyframes, the Animation pane will open in a new window with the node selected and its animated parameters exposed.
- Delete “Cloud layer v2 ##” : When clicked, the node will be deleted from the project.
- Export VDB File: When clicked, the volumetric data for the cloud layer will be saved in the OpenVDB format.
- Save Nodes as Clip File: When clicked, the Create Clip File window will appear and the selected nodes can be saved as a Terragen Clip File (TGC).
- Insert Clip File: When clicked, a selected clip file will be inserted into the Node Network immediately following the node.
- Cloud layer v2: When clicked, a Cloud layer v2 node is inserted into the Node Network immediately following the node.
- Cloud layer v3: When clicked, a Cloud layer v3 node is inserted into the Node Network immediately following the node.
- Easy cloud: When clicked, an Easy Cloud node is inserted into the Node Network immediately following the node.
- Null: When clicked, a Null node is inserted into the Node Network immediately following the node.
- Planet atmosphere: When clicked, a Planet Atmosphere node is inserted into the Node Network immediately following the node.
A shader is a program or set of instructions used in 3D computer graphics to determine the final surface properties of an object or image. This can include arbitrarily complex descriptions of light absorption and diffusion, texture mapping, reflection and refraction, shadowing, surface displacement and post-processing effects. In Terragen 2 shaders are used to construct and modify almost every element of a scene.
A single object or device in the node network which generates or modifies data and may accept input data or create output data or both, depending on its function. Nodes usually have their own settings which control the data they create or how they modify data passing through them. Nodes are connected together in a network to perform work in a network-based user interface. In Terragen 2 nodes are connected together to describe a scene.
A parameter is an individual setting in a node parameter view which controls some aspect of the node.
A scalar is a single number. 1, 200.45, -45, -0.2 are all examples of scalar values.
A single element of an image which describes values for color and/or intensity, depending on the color system which the image uses. Groups of ordered pixels together form a raster image.
A sample refers to a value or set of values at a point in time and/or space. The defining point of a sample is that it is a chosen value out of a continuous signal. In Terragen 2 it is usually a mathematical (procedural) function that is being sampled.
