Water Shader

The Water Shader is specifically designed to provide a realistic water effect on Terragen surfaces, including wave-shaped displacement, reflectivity, and transparency. Specialized controls are provided to realistically simulate certain water phenomena, for example "wind patchiness".
Waves Tab[edit]
Settings
- Roughness: Controls the general roughness of the water surface.
- Wave scale: The average wave size.
- Smallest scale: Determines the size of the smallest details. You may want to decrease this if the water shape looks too simplistic, or increase it if you're only viewing the water from a distance. The smaller this is, the more octaves there are in the Water Shader noise function and the longer render times will be.
- Wind patch effect: In nature, there are variations in wave structure and overall water smoothness across large bodies of water due to wind. This and the next two settings simulate this effect. The "Wind patch effect" setting controls the amount of variation there will be between different areas—effectively the strength of this effect.
- Wind patch size: Controls the average scale of the areas of variation.
- Wind patch sharpness: Sets how sharp the line between areas of variation will be. Put another way, this controls how smooth the transition between areas of different roughness is.
Example movies
|
Roughness |
Wave scale |
Smallest scale |
|
|
Wind patch effect |
Wind patch size |
Wind patch sharpness |


Reflections Tab[edit]

This tab controls the reflectivity of the water.
Settings
- Master reflectivity: Controls the overall level of reflectivity for the water.
- Index of refraction: The amount of light refraction caused by a given material, as indicated on index of refraction (or refractive index). 1.33 is the standard refractive index for water. Index of refraction also affects the reflectivity of a surface. The higher this number is, the more reflective the surface will be. It makes the most difference on surfaces that are facing towards the camera (e.g. when looking down at water below the camera).
- Horizon shift: This function is used to simulate the "shift" in reflection due to the aggregate effect of greater or lesser surface roughness on distant reflective surfaces. It will essentially shift the angle of distant reflection toward or away from the horizon.
- Highlight intensity: Controls the strength of specular highlights from direct light sources such as the sun.
- Min highlight spread: Control the smallest amount of "spread" the reflections can have; in other words, how diffuse the reflections are. When rendering with the Standard Renderer this only affects specular highlights of direct light sources such as the sun. When rendering with Path Tracing this may affect the blurriness of all kinds of reflections, but depends on the version of Terragen.
Example movies
|
Master reflectivity |
Index of refraction |
Horizon shift |
|
|
Highlight intensity |
Min highlight spread |


Sub-surface Tab[edit]

- Decay distance: Light traveling through the water is absorbed using an exponential decay. "Decay distance" is how far (in metres) the light will travel before about 37% of its energy remains (if "Decay tint" is pure white). At twice the decay distance, only 14% of the light remains. Only 5% of the energy makes it to three times the decay distance. If "Decay tint" is anything other than pure white, light is absorbed at shorter distances than this.
- Decay tint: An RGB multiplier for the Decay distance. Mathematically it works by multiplying the decay distance separately for the red, green and blue components of the light, but the results are much more interesting. Intuitively you might think of it as the colour of the light that reaches the decay distance, but it can produce an interesting range of hues and saturations that depend on how far the light travels. For realistic results you might want to use pale colours because they automatically become richer where the light travels further than the decay distance.

Examples of "Decay distance" and "Decay tint". "Decay tint" is set to a pale red colour, the same colour in each example.
- Volume density: How "dense" the microscopic particles are which scatter light back out of the water as well as reduce the light passing through it. This produces the effect called subsurface scattering (SSS). You might think of it as the amount of air bubbles in the water or the proportion of other suspended particles. This density is relative to the "Decay distance"; when Decay distance is short, the absolute density of scattering particles will be higher. It works this way so that the "Volume density" controls the balance of scattering in relation to absorption, making it easier to control the colour of the SSS effect with a wide variety of decay distances.
- Volume colour: The colour of the particles that scatter light back out of the water. This isn't exactly the albedo of the particles, it's the colour of the cumulative effect of multiple scattering (although that is only approximated).

Examples of "Volume density" and "Volume colour". "Volume colour" is set to a pale red colour. Only the density varies.
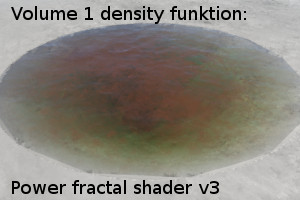
- Volume density function: A connection to a shader, shader network or function network that acts as multiplier to the density value. For example, this could be an Image Map Shader that loads a "cloudiness" map or "bubble density" map. This can provide a richer visual result than simply modulating the colour.
A tea-with-milk analogy is apt. Black tea mostly absorbs light without scattering it. It can be simulated with an orange-red decay tint. When milk is added it produces a light tan colour. The colour results from the balance (volume density) of the white milk (volume colour = white) to the tea (decay distance, decay tint = orange-red). If you use a volume density function you can also texture-map this balance, and this creates a rich spectrum of hues from only two colours. It is more visually interesting than just a linear mixture of the two colours.
- Volume colour function: A connection to a shader, shader network or function network that acts as an RGB multiplier to the volume colour. For example, this could be an Image Map Shader that loads a subsurface scattering texture.
- Evaluate colour function volumetrically (without UVs):

Two different settings of "Evaluate colour function volumetrically". In both examples the texture is projected along on the Z axis but they are evaluated differently by the renderer.

If the volume colour is driven by a UV-mapped texture, "Evaluate colour function volumetically" must be turned OFF to preserve the UVs.
- Lighting method in Std: The method used to simulate subsurface scattering when rendering with the Standard Renderer. This has only one mode called "Pseudo-volumetric".
- Lighting method in PT: The method used to simulate subsurface scattering when rendering with the Path Tracer. It has 3 options:
- Hard surface approximation: A fast preview of the subsurface effects, approximated with diffuse lighting at the surface.
- Subsurface scatter towards normal: A reasonably fast approximation of SSS that is designed for rendering water, but is also good for simple, flat objects such as a table or a slab of marble where the edges are not seen. It may also be useful for a variety of objects where the decay distance is small compared to the curvature of the object.
- Subsurface scatter in all directions: The slowest option, this is designed to accurately scatter light through a closed object, especially when it is back-lit. Light passes more realistically through edges and thin parts of the object, and it may also create deeper shadows where appropriate.

Example movies
|
Transparency |
Decay distance |
Decay tint |
|
|
Volume density |
Volume colour |
Volume density |
|
|
Volume density function |
Volume colour function |


Literally, to change the position of something. In graphics terminology to displace a surface is to modify its geometric (3D) structure using reference data of some kind. For example, a grayscale image might be taken as input, with black areas indicating no displacement of the surface, and white indicating maximum displacement. In Terragen 2 displacement is used to create all terrain by taking heightfield or procedural data as input and using it to displace the normally flat sphere of the planet.
A shader is a program or set of instructions used in 3D computer graphics to determine the final surface properties of an object or image. This can include arbitrarily complex descriptions of light absorption and diffusion, texture mapping, reflection and refraction, shadowing, surface displacement and post-processing effects. In Terragen 2 shaders are used to construct and modify almost every element of a scene.