Difference between revisions of "Terragen Sky Pink Sunrise"
(Uploaded tutorial text and placeholders for example images.) |
(Added example images to tutorial.) |
||
| Line 1: | Line 1: | ||
| − | + | [[File:PinkSunrise_26_SunriseSphereical.jpg| none|800px|Spherical map pink sunrise ]] | |
| − | PinkSunrise_26_SunriseSphereical.jpg | none|800px|Spherical map pink sunrise | ||
| − | |||
| Line 11: | Line 9: | ||
| − | + | [[File:PinkSunrise_00_Presets.jpg| none|599px|Sunrise presets included in Terragen Sky.]] | |
| − | |||
| Line 18: | Line 15: | ||
| − | + | [[File:PinkSunrise_01_ViewportDefault.jpg|none|800px|Terragen Sky UI with Dawn preset loaded.]] | |
| Line 27: | Line 24: | ||
| − | + | [[File:PinkSunrise_02_ViewportRaiseExp.jpg|none|800px|With the Exposure button enabled, dragging to the left and right in the Viewport will adjust the exposure. ]] | |
| Line 37: | Line 34: | ||
| − | + | [[File:PinkSunrise_03_ViewportRaiseExpSunElev.jpg|none|800px|Sun elevation value is -1.2 degrees. ]] | |
| Line 45: | Line 42: | ||
| − | + | [[File:PinkSunrise_04_PresetClear.jpg|none|598px|The clear preset.]] | |
| Line 53: | Line 50: | ||
| − | + | [[File:PinkSunrise_05_ResetExp.jpg| none|572px|Right-click on the Exposure button to bring up its context sensitive menu.]] | |
| Line 63: | Line 60: | ||
| − | + | [[File:PinkSunrise_06_ClearPresetSunRepo.jpg|none|800px|The sun repositioned in the Viewport and Layer 1 density increased. ]] | |
| Line 76: | Line 73: | ||
| − | + | [[File:PinkSunrise_08_ExposureInc.jpg| none|800px|Exposure increased. ]] | |
| Line 84: | Line 81: | ||
| − | + | [[File:PinkSunrise_09_Layer2.jpg| none|800px|Layer 2 enabled with clouds at an altitude of 4,000 metres. ]] | |
| Line 92: | Line 89: | ||
| − | + | [[File:PinkSunrise_10_Layer2SunElv-2.jpg|none|800px|Sun elevation value at -2.0 ]] | |
| Line 99: | Line 96: | ||
* Change the Sun elevation value to -2.10. | * Change the Sun elevation value to -2.10. | ||
| + | |||
You can see how subtle changes to the sun’s elevation value can result in “large” changes to the look of the cloud layer. | You can see how subtle changes to the sun’s elevation value can result in “large” changes to the look of the cloud layer. | ||
| − | + | [[File:PinkSunrise_17_SunElevationCompare.jpg|none|800px|Comparison as Sun elevation changes. ]] | |
| − | + | [[File:PinkSunrise_11_Layer2SunElv-2p1.jpg| none|800px|Cloud layer 2 with more contrast. ]] | |
| Line 114: | Line 112: | ||
| − | + | [[File:PinkSunrise_12_Layer3.jpg| none|800px|Cloud layer 3. ]] | |
| Line 122: | Line 120: | ||
| − | + | [[File:PinkSunrise_14_Layer3SunEl.jpg| none|800px|Cloud layer 3 with Sun elevation at -1.20 ]] | |
| Line 128: | Line 126: | ||
| − | + | [[File:PinkSunrise_19_RenderCloudLayers1-3.jpg| none|800px|Render of Cloud layers 1 - 3. ]] | |
| Line 134: | Line 132: | ||
| − | + | [[File:PinkSunrise_21_HazeParams.jpg | none|566px|Haze parameters.]] | |
| Line 140: | Line 138: | ||
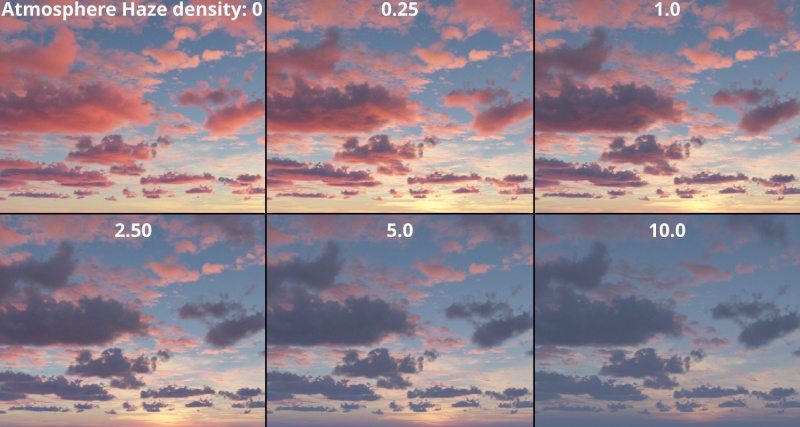
| − | + | [[File:PinkSunrise_18_AtmoHazeDensityCompare.jpg|none|800px|Atmosphere Haze density comparison. ]] | |
| Line 152: | Line 150: | ||
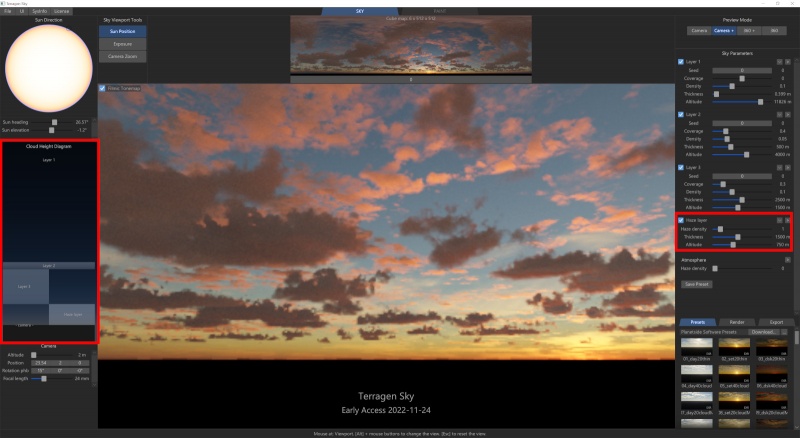
| − | + | [[File:PinkSunrise_22_HazeLayerCloudDiagram.jpg|none|800px|Haze layer and Cloud Height Diagram. ]] | |
| Line 158: | Line 156: | ||
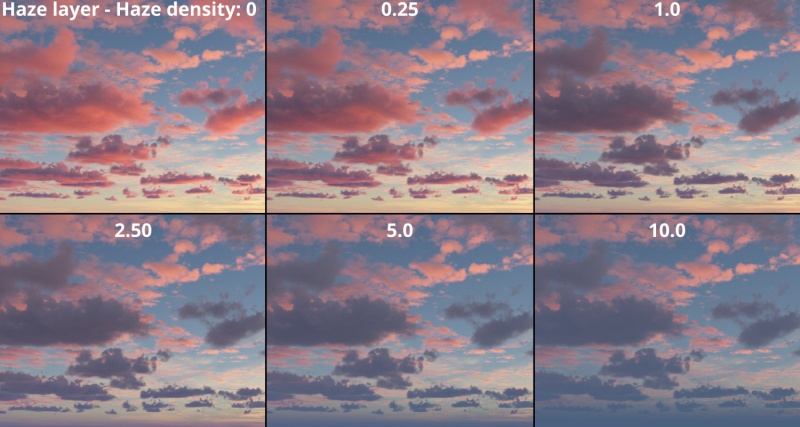
| − | + | [[File:PinkSunrise_25_HazeLayer1-V3Compare.jpg|none|800px|Increasing the Haze density value. ]] | |
| Line 167: | Line 165: | ||
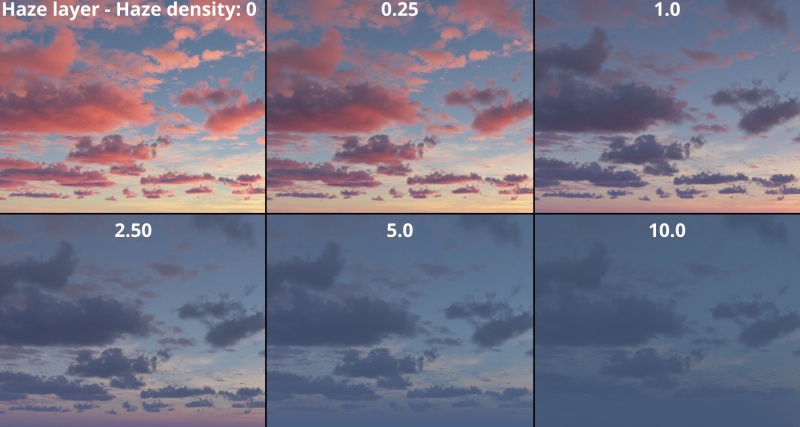
| − | + | [[File:PinkSunrise_24_HazeLayerV3Compare.jpg|none|800px|Increasing the Haze density value. Haze layer overlapping cloud layer. ]] | |
Latest revision as of 06:10, 9 December 2022
If you’re a morning person or early riser, you just might awake in time to catch those brief ten minutes as the sun rises and illuminates the clouds in a beautiful pink colour, right before it transitions to oranges and red.
In this tutorial we’ll look at the components in Terragen Sky to recreate this fleeting moment.
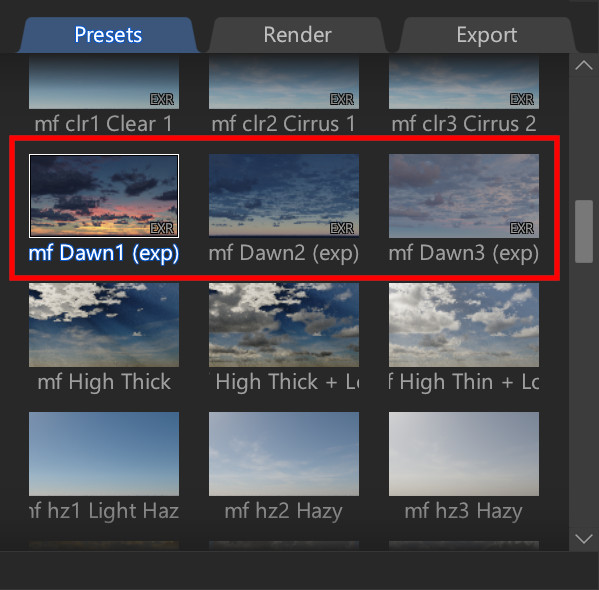
Terragen Sky includes a number of presets for the “dawn” time of day.
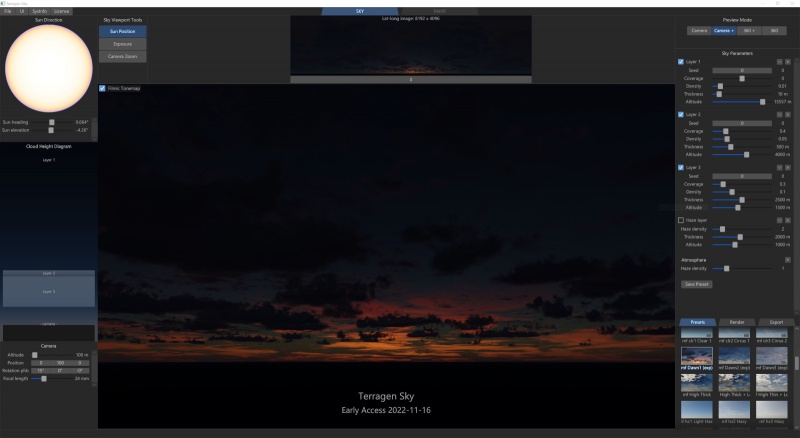
Click on one of the Dawn presets to load its settings into Terragen Sky. We’ll use the preset named “mf Dawn1 (exp)” for this part of the tutorial. If you’ve not modified the exposure setting yet, the Viewport may look pretty dark as in the image below.
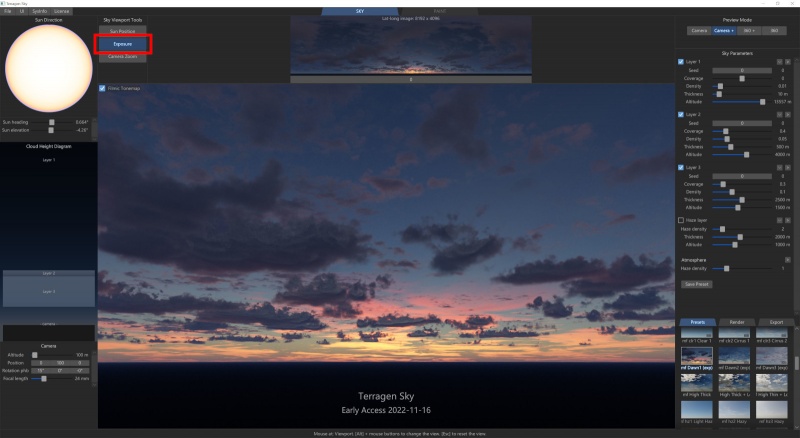
Did you notice that the name of the preset included the notation “(exp)”? This denotes that the exposure controls should be used to adjust the sky. Try doing that now.
- Under the Sky Viewport Tools, click on the Exposure button
- Click in the Viewport and drag to the left and right, to increase or decrease the exposure.
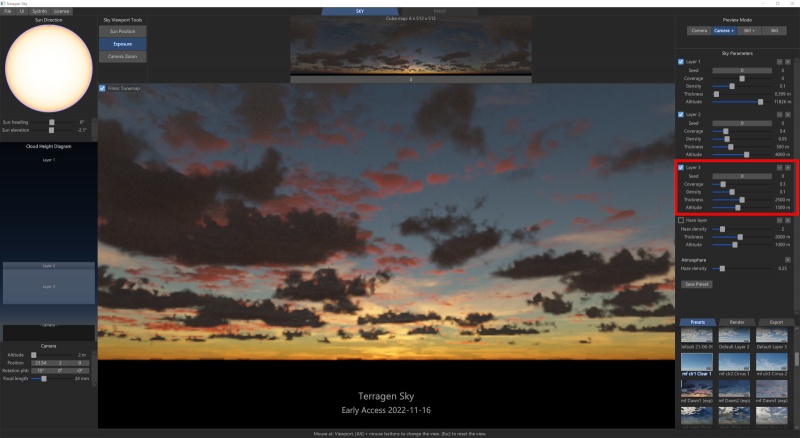
Notice that some of the clouds are pink and yellow while other clouds are dark and shadowed. This has to do with the relationship between the cloud’s altitude and the angle of the rising sun. The clouds that are illuminated with pinks and yellow are found in Layer 1 and are at an altitude of over 13,000 metres. That’s pretty high up compared to Layer 3 whose clouds are only 1,500 metres high. So at this angle of the sun, Layer 1 is being illuminated by the sun while Layer 3 is still in shadow.
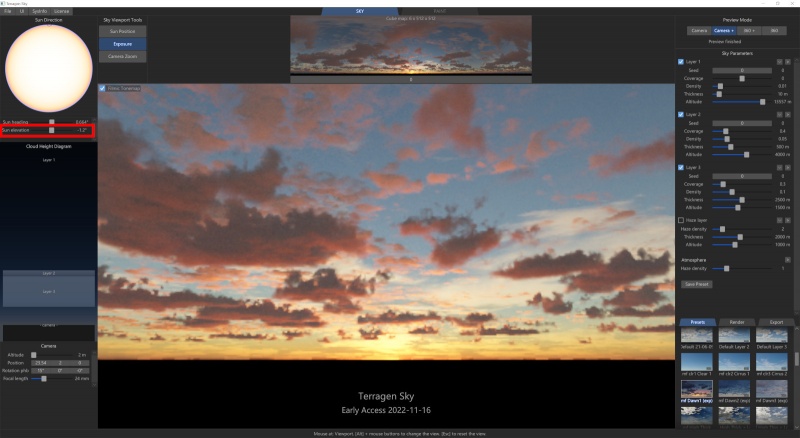
Our goal more or less is to illuminate all of the clouds with the pink sunrise, and there are a number of things we could try to achieve this, like raising the altitude for Layer 2 and Layer 3, or increasing the depth of each layer. But these techniques might not reflect a naturalistic or physically accurate environment, so a better approach is to first adjust the Sun’s elevation value. Because Terragen Sky is based on real world measurements, small increments as measured in degrees can have a huge impact on the lighting of your scene.
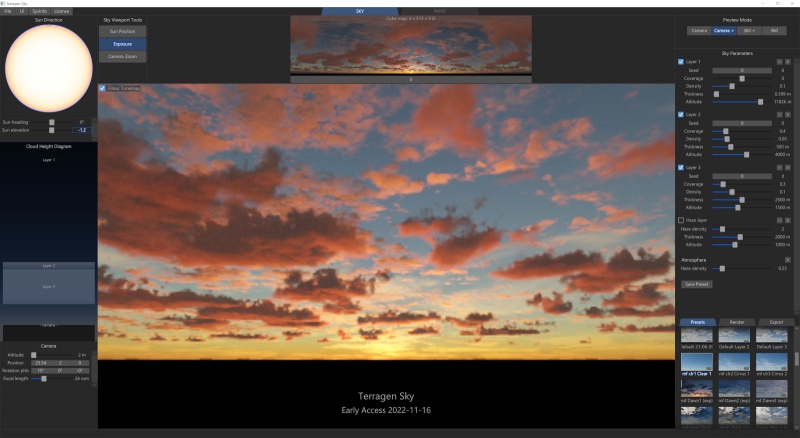
- Change the Sun elevation value to other values to see the effect. We settled on -1.2 degrees.
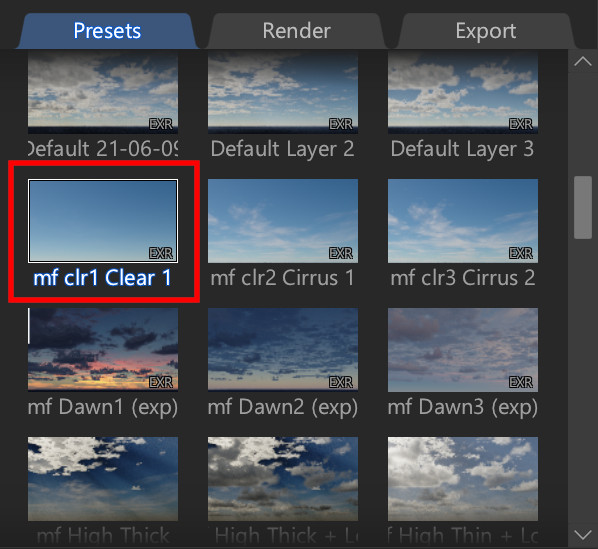
Ok, now that we have an overview of the factors that go into the look of the pink sunrise, let’s try building one from scratch. We can start with the Clear preset and build off of that.
- Click on the preset named “mf clr1 Clear 1”
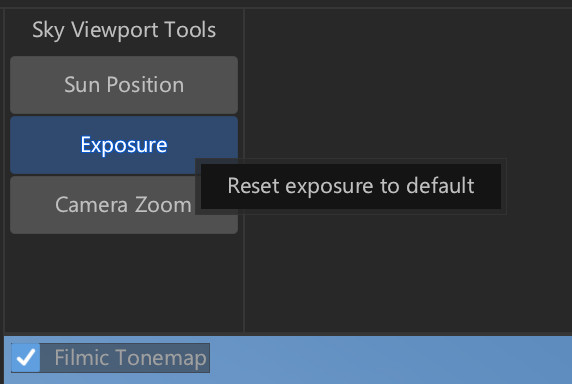
Be sure to also reset the Viewport’s exposure.
- Right-click on the Exposure button and choose “Reset exposure to default”
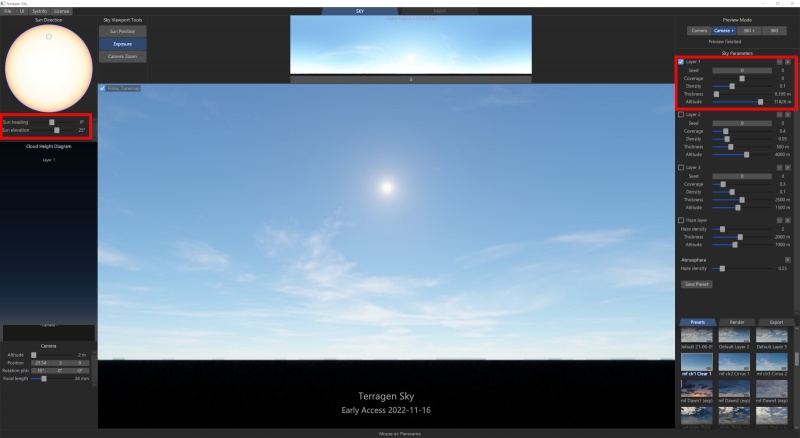
Notice that this preset has only one Layer enabled at an altitude of around 11,000 metres; and the sun’s heading is set to -60 degrees. Let’s make the cloud layer a bit more visible in the project by increasing its density. Let’s also reposition the sun so that we can see it in the Viewport.
- Change Layer 1’s “Density” value to 0.01
- Change the “Sun heading” value to 0.00
Let’s position the sun just below the horizon.
- Change the sun elevation value to -3.0 degrees
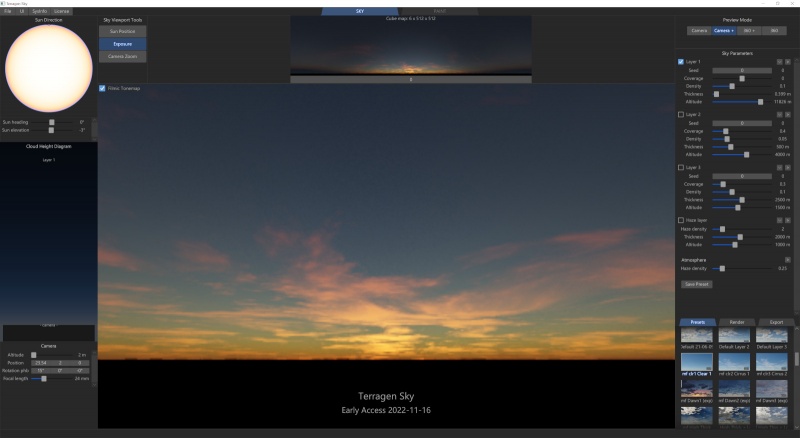
Then increase the exposure value as we did before to bring up the pink illumination of the cloud
- Click in the Viewport and drag to the left to increase the exposure.
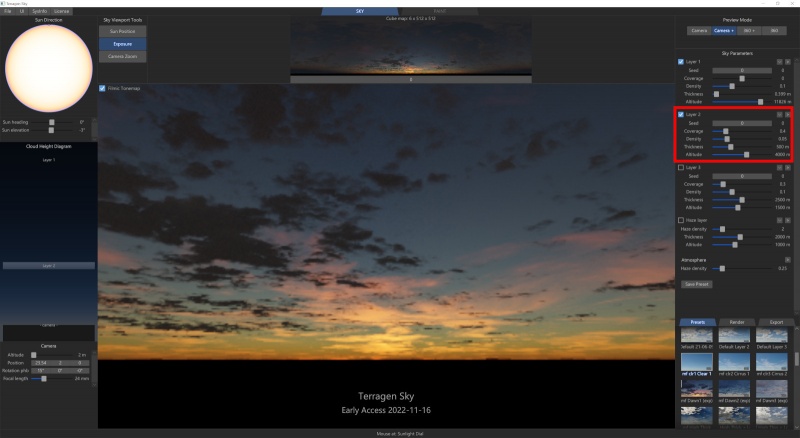
Now enable Layer 2. The clouds appear dark because their altitude is only 4,000 metres and it is no longer being illuminated by the rising sun.
- Click on the checkbox for Layer 2 to enable it.
Just as in the previous example, let’s try adjusting the sun’s elevation value to see the effect it has on the new cloud layer.
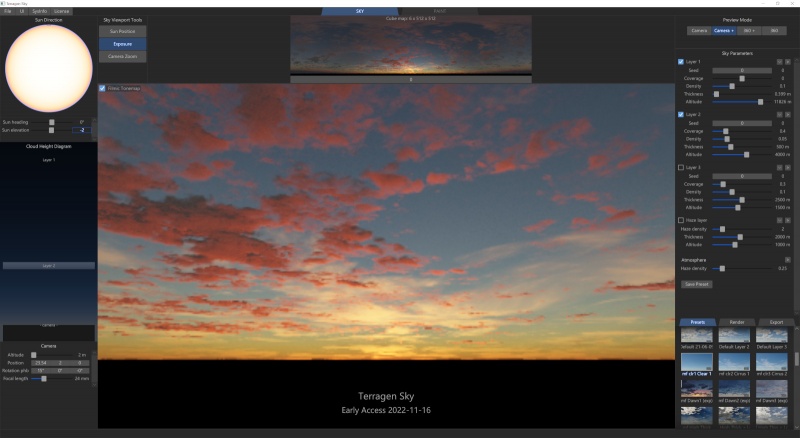
- Change the Sun elevation value to -2.0
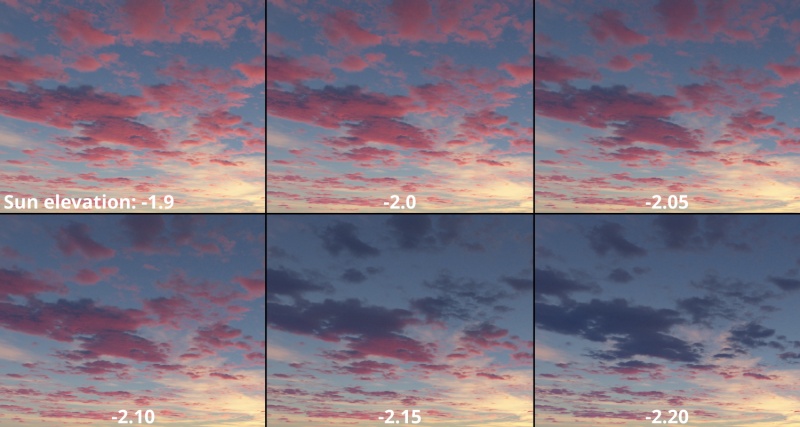
The clouds in Layer 2 are now completely pink. Let’s reduce the value a bit in order to bring some shadow and contrast back into the layer.
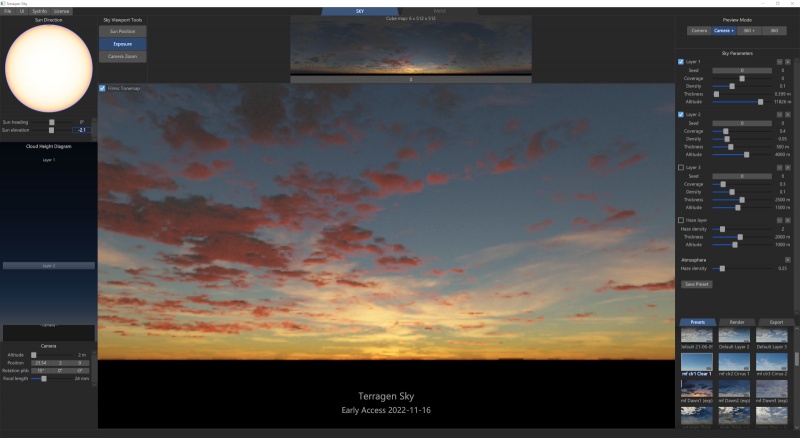
- Change the Sun elevation value to -2.10.
You can see how subtle changes to the sun’s elevation value can result in “large” changes to the look of the cloud layer.
Now enable Layer 3. Notice that the clouds altitude is even lower than the others, around 1,500 metres.
- Click on the checkbox for Layer 3 to enable it.
Once again, let’s adjust the sun rotation by increasing the sun elevation value.
- Change the Sun elevation value to around -1.0.
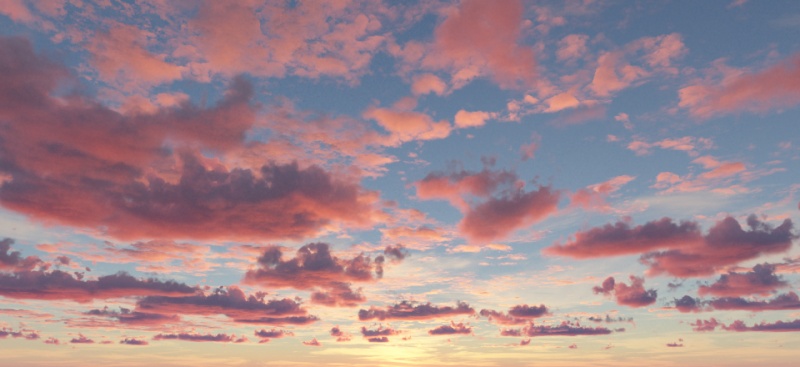
So far, the look of the pink sky has been defined by the placement of the Sun and cloud layers, and in the rendered image below we see a crisp and clear sky environment.
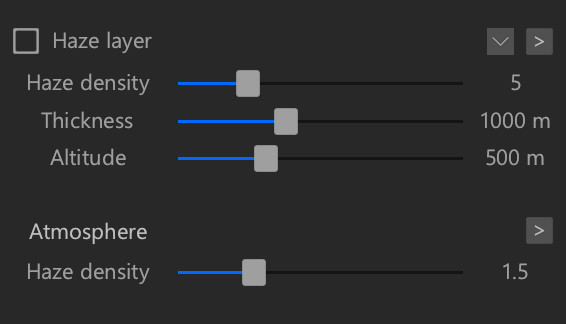
“Haze” can further enhance the look of the sky by simulating a broad range of phenomena such as fog, mist, or dry haze caused by dust and smoke. Two tools exist in Terragen Sky to facilitate the effects of haze in the atmosphere; the Atmosphere’s Haze density parameter and the Haze layer.
The Atmosphere’s Haze density setting defines a layer of haze with exponential fall-off with respect to height above sea level. Notice in the image below, as the value increases the haze becomes more pronounced at the lower altitudes and off in the horizon, while the higher altitude clouds retain more their pink colour.
The Haze layer provides a customizable layer of uniform haze within a defined height range. You can control its density, thickness and altitude just like the other Cloud layers. You can also overlap the Haze layer with the other Cloud layers.
Let’s enable the Haze layer to see how it affects the clarity of the environment. For starters make the haze layer extend from about the ground to just below the lowest cloud layer. You can adjust the Haze layer parameters numerically or with sliders, or you can drag the Haze layer block around in the Cloud Height Diagram pane.
- Set the Haze layer Thickness to around 1,500 metres.
- Set the Haze layer Altitude to around 750 metres.
- Set the Haze layer Density to 1.0
The image below illustrates changes made to the Haze layer’s Density value with the above Thickness and Altitude values. Can you see the differences between the exponential fall-off of the Atmosphere’s Haze density compared to the uniform height range of the Haze layer?
For our last example try adjusting the Haze layer so that it overlaps the other cloud layers. If you set the Altitude value to one half of the Thickness value, the Haze layer will extend up from the ground level, as the Altitude value corresponds to the Haze layer’s mid-point.
- Set the Haze layer Thickness to around 4,000 metres.
- Set the Haze layer Altitude to around 2,000 metres.
Once you’re happy with your new environment, be sure to save it as a preset by clicking on the Save Preset button below the Atmosphere settings. The preset will show up at the bottom of the User Presets sections under the Presets tab.
Now that you know how simple it is in Terragen Sky to recreate an early morning pink sunrise you can sit back and enjoy your cup of coffee!
A parameter is an individual setting in a node parameter view which controls some aspect of the node.

