Difference between revisions of "Terragen Sky Early Access"
(Documentation for Terragen Sky Early Access. Placeholders for example images.) |
(Added example images to documentation.) |
||
| Line 1: | Line 1: | ||
| − | + | =Overview== | |
| + | This is the online documentation for the Early Release version of Terragen Sky. | ||
| + | |||
| + | As features are being added or updated on a daily basis, please consider this documentation to be a work-in-progress. | ||
| Line 7: | Line 10: | ||
'''File menu button''' | '''File menu button''' | ||
| − | + | [[File:13_File_Options.jpg|13_File_Options.jpg |none|468px|File menu.]] | |
| − | 13_File_Options.jpg |none|468px|File menu. | + | |
| − | |||
*'''New:''' Starts a new Terragen Sky project with the default values. | *'''New:''' Starts a new Terragen Sky project with the default values. | ||
| Line 19: | Line 21: | ||
<ul> | <ul> | ||
<span style="color:#0000ff"> | <span style="color:#0000ff"> | ||
| − | 00_UI_Options.jpg |none|469px|UI menu. <br/n> | + | [[File:00_UI_Options.jpg|none|469px|UI menu. ]]<br/n> |
| − | 01_UI_Scale90.jpg|none|800px|UI at 90% <br/n> | + | [[File:01_UI_Scale90.jpg|none|800px|UI at 90% ]]<br/n> |
| − | 02_UI_Scale300. | + | [[File:02_UI_Scale300.jpg|none|800px|UI at 300% ]]<br/n> |
| − | |||
</ul> | </ul> | ||
The presets under this menu scale the user interface components accordingly, so that you can adjust the layout to best fit your display device or visual preference. | The presets under this menu scale the user interface components accordingly, so that you can adjust the layout to best fit your display device or visual preference. | ||
| Line 29: | Line 30: | ||
'''SysInfo button''' | '''SysInfo button''' | ||
| − | + | [[File:14_SysInfo.jpg|none|800px|SysInfo display.]] | |
| − | 14_SysInfo.jpg|none|800px|SysInfo display. | + | |
| − | |||
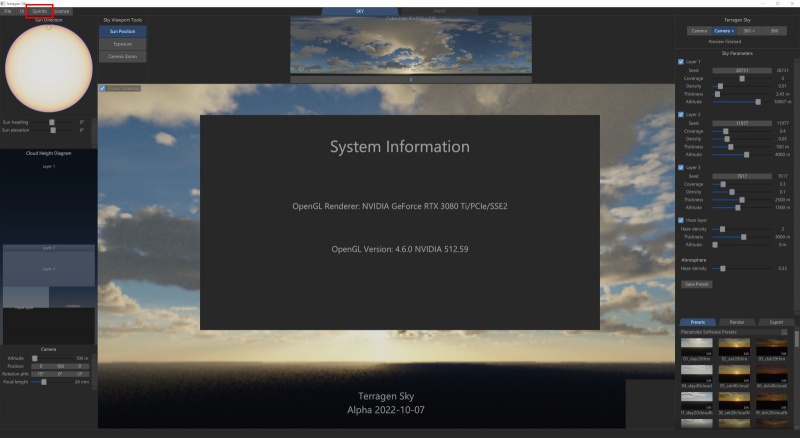
When clicked, the system information is displayed including OpenGL Renderer and OpenGL Version. Click anywhere outside the information window to close it and return to the main interface. | When clicked, the system information is displayed including OpenGL Renderer and OpenGL Version. Click anywhere outside the information window to close it and return to the main interface. | ||
| Line 38: | Line 38: | ||
'''License button''' | '''License button''' | ||
| − | + | [[File:15_LicenseInfo.JPG|none|800px|LicenseInfo display.]] | |
| − | 15_LicenseInfo. | + | |
| − | |||
When clicked, the license information is displayed. One year of maintenance is included with the purchase of a perpetual license of Terragen. Click anywhere outside the information window to close it and return to the main interface. | When clicked, the license information is displayed. One year of maintenance is included with the purchase of a perpetual license of Terragen. Click anywhere outside the information window to close it and return to the main interface. | ||
| Line 46: | Line 45: | ||
==Sun Direction Panel== | ==Sun Direction Panel== | ||
| − | + | [[File:03_Sundial.jpg|none|468px|The Sundial.]] | |
| − | 03_Sundial.jpg|none|468px|The Sundial. | + | |
| − | |||
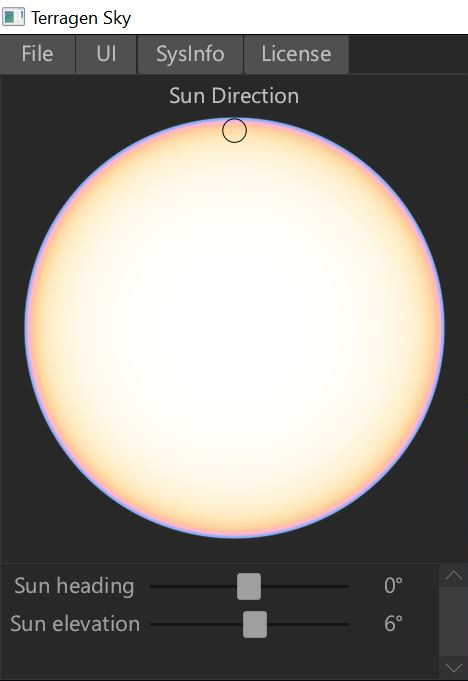
This panel provides control over the direction of the sun by means of a Sundial and/or the use of numeric sliders for heading and elevation parameters. | This panel provides control over the direction of the sun by means of a Sundial and/or the use of numeric sliders for heading and elevation parameters. | ||
| Line 60: | Line 58: | ||
==Sky Viewport Tools== | ==Sky Viewport Tools== | ||
| − | + | [[File:04_SkyViewport.jpg|none|245px|Sky Viewport Tools.]] | |
| − | 04_SkyViewport.jpg|none|245px|Sky Viewport Tools. | + | |
| − | |||
*'''Sun Position:''' When active, clicking in the main viewport repositions the sun to that location, updating the Sun heading and elevation values. | *'''Sun Position:''' When active, clicking in the main viewport repositions the sun to that location, updating the Sun heading and elevation values. | ||
| Line 68: | Line 65: | ||
*'''Exposure:''' When active, clicking and dragging in the main viewport changes the camera’s exposure value, simulating the response to light a real camera might have. Dragging to the right increases the exposure value and brightens up the image as more light reaches the film. Dragging to the left decreases the exposure value and darkens the image, much like stopping down the camera lens aperture from f/2 to f/4. Right-click the exposure button to open a context menu which has the option to reset the exposure value to default. | *'''Exposure:''' When active, clicking and dragging in the main viewport changes the camera’s exposure value, simulating the response to light a real camera might have. Dragging to the right increases the exposure value and brightens up the image as more light reaches the film. Dragging to the left decreases the exposure value and darkens the image, much like stopping down the camera lens aperture from f/2 to f/4. Right-click the exposure button to open a context menu which has the option to reset the exposure value to default. | ||
<ul> | <ul> | ||
| − | + | [[File:16_SkyViewportTools_ExposureReset.jpg|none|450px|Exposure reset.]] | |
| − | 16_SkyViewportTools_ExposureReset.jpg|none|450px|Exposure reset. | ||
| − | |||
</ul> | </ul> | ||
| + | |||
*'''Camera Zoom:''' When active, clicking and dragging in the main viewport changes the camera’s focal length, which can also be seen in the Camera Focal length parameter. | *'''Camera Zoom:''' When active, clicking and dragging in the main viewport changes the camera’s focal length, which can also be seen in the Camera Focal length parameter. | ||
<ul> | <ul> | ||
| − | + | [[File:19_CameraZoom_Reset.JPG|none|549px|Right click on the Camera Zoom button to reset the camera zoom. ]] <br /n> | |
| − | 19_CameraZoom_Reset. | + | [[File:20_CameraZoomFocalLengths0001.jpg|none|800px|Various camera focal lengths.]] |
| − | 20_CameraZoomFocalLengths0001.jpg|none|800px|Various camera focal lengths. | ||
| − | |||
</ul> | </ul> | ||
| Line 85: | Line 79: | ||
The Cloud Height Diagram provides a visual and alternate way of positioning the cloud and haze layers, and camera. Moving an item within the diagram adjusts its altitude. When one item’s altitude overlaps with another their indicators appear side by side. | The Cloud Height Diagram provides a visual and alternate way of positioning the cloud and haze layers, and camera. Moving an item within the diagram adjusts its altitude. When one item’s altitude overlaps with another their indicators appear side by side. | ||
| − | + | {| | |
| − | 21_CloudHeightDiagram_Default.jpg|none|266px|Default Cloud heights. | + | |- |
| − | 22_CloudHeightDiagram_Overlap.jpg|none|266px|Overlapping Cloud heights. | + | | [[File:21_CloudHeightDiagram_Default.jpg|none|266px|Default Cloud heights. ]] || [[File:22_CloudHeightDiagram_Overlap.jpg|none|266px|Overlapping Cloud heights. ]] || [[File:23_CloudHeightDiagram_Staggered.jpg|none|266px|Staggard Cloud heights. ]] |
| − | 23_CloudHeightDiagram_Staggered.jpg|none|266px|Staggard Cloud heights. | + | |} |
| − | |||
==Camera== | ==Camera== | ||
| − | + | [[File:05_UI_CameraeLens.jpg|none|470px|The Camera.]] | |
| − | 05_UI_CameraeLens.jpg|none|470px|The Camera. | + | |
| − | |||
*'''Altitude:''' This parameter controls the height of the virtual camera. Dragging the slider to the right increases the altitude of the camera and updates the preview window and Cloud Height Diagram, while dragging to the left decreases the camera’s altitude. | *'''Altitude:''' This parameter controls the height of the virtual camera. Dragging the slider to the right increases the altitude of the camera and updates the preview window and Cloud Height Diagram, while dragging to the left decreases the camera’s altitude. | ||
| Line 110: | Line 102: | ||
The Panorama displays a “lat-long” (spherical) image or a cube map overview of the entire environment. The overlaid text provides information about the type and resolution of the environment map, whose resolution depends on the Terragen Sky mode selected. Dragging the grey roller below the Panorama rotates the environment from -180° to +180°. Clicking with the RMB resets the rotation value to 0. . | The Panorama displays a “lat-long” (spherical) image or a cube map overview of the entire environment. The overlaid text provides information about the type and resolution of the environment map, whose resolution depends on the Terragen Sky mode selected. Dragging the grey roller below the Panorama rotates the environment from -180° to +180°. Clicking with the RMB resets the rotation value to 0. . | ||
| − | + | ||
| − | 23_Panoramic_LatLong.jpg|none|800px|The Panorama view displaying LatLong information. <br /n> | + | [[File:23_Panoramic_LatLong.jpg|none|800px|The Panorama view displaying LatLong information. ]]<br /n> |
| − | 24_Panoramic_CubeMap.jpg|none|800px|The Panorama view displaying CubeMap information. | + | [[File:24_Panoramic_CubeMap.jpg|none|800px|The Panorama view displaying CubeMap information.]] |
| − | + | ||
| Line 130: | Line 122: | ||
Below the viewport is the status bar, which displays helpful information, such as the name of the UI component that the mouse is currently pointed at. | Below the viewport is the status bar, which displays helpful information, such as the name of the UI component that the mouse is currently pointed at. | ||
| − | + | [[File:26_MainViewport.JPG|none|800px|The Viewport.]] | |
| − | 26_MainViewport. | + | |
| − | |||
*'''Filmic Tonemap:''' When checked, a tone map is applied to the viewport in much the same way as the Renderers Tonemap settings in Terragen 4. When unchecked, no tone mapping is applied and you may see clipping in the bright areas of the sky. | *'''Filmic Tonemap:''' When checked, a tone map is applied to the viewport in much the same way as the Renderers Tonemap settings in Terragen 4. When unchecked, no tone mapping is applied and you may see clipping in the bright areas of the sky. | ||
<ul> | <ul> | ||
| − | + | {| | |
| − | + | |- | |
| + | | [[File:27_ToneMapOn.JPG|none|400px|Tonemap checked.]] || [[File:28_ToneMapOff.JPG|none|400px|Tonemap unchecked.]] | ||
| + | |} | ||
</ul> | </ul> | ||
| Line 144: | Line 137: | ||
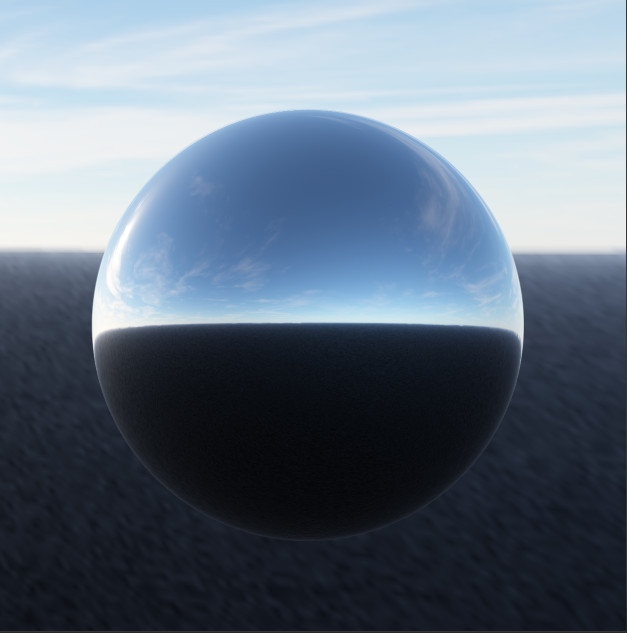
*'''Enviro map/sphere:''' Inset into the main viewport is an environment shader object. <!---When the Panorama displays a “lat-long” spherical image this will appear as a flat 2d plane with the environment map applied to it. When the Panorama displays a cube-map, the object changes to a reflective sphere, which can be useful when rotating the environment map in order to see what’s behind the camera position. --> This chrome sphere can be useful when rotating the environment map in order to see what's behind the camera position. You can drag the object around the viewport by clicking on it with the LMB, or resize it using the MMB. | *'''Enviro map/sphere:''' Inset into the main viewport is an environment shader object. <!---When the Panorama displays a “lat-long” spherical image this will appear as a flat 2d plane with the environment map applied to it. When the Panorama displays a cube-map, the object changes to a reflective sphere, which can be useful when rotating the environment map in order to see what’s behind the camera position. --> This chrome sphere can be useful when rotating the environment map in order to see what's behind the camera position. You can drag the object around the viewport by clicking on it with the LMB, or resize it using the MMB. | ||
| − | <ul> | + | <ul> |
<!--33_EnviroPlane.jpg --> | <!--33_EnviroPlane.jpg --> | ||
| − | + | [[File:32_EnviroBall.JPG|none|627px|The chrome sphere.]] | |
</ul> | </ul> | ||
==Preview Modes (Camera, Camera+, 360+, 360)== | ==Preview Modes (Camera, Camera+, 360+, 360)== | ||
| − | + | [[File:52_PreviewMode.jpg|none|602px|Preview modes.]] | |
| − | 52_PreviewMode.jpg|none|602px|Preview modes. | + | |
| − | |||
'''Camera-Priority Modes:''' | '''Camera-Priority Modes:''' | ||
| Line 160: | Line 152: | ||
*'''Camera+:''' In this mode, whatever you’re looking at is progressively refined up to an internal target resolution and quality, then the rest of the 360° view is updated and refined until everything is at the internal target resolution and quality. | *'''Camera+:''' In this mode, whatever you’re looking at is progressively refined up to an internal target resolution and quality, then the rest of the 360° view is updated and refined until everything is at the internal target resolution and quality. | ||
| + | |||
'''360/Lighting-Priority Modes:''' | '''360/Lighting-Priority Modes:''' | ||
| Line 173: | Line 166: | ||
'''Cloud Layers''' | '''Cloud Layers''' | ||
| − | < | + | <!-- [[File:30_SkyParameters_CloudLayers.JPG|602px|Cloud Layer parameters.]] --> |
| − | + | [[File:48_CloudLayer.jpg|597px|Cloud Layer parameters.]] | |
| − | |||
*'''Layer # (checkbox):''' When checked, the layer is active and will appear in the viewport and in renders. | *'''Layer # (checkbox):''' When checked, the layer is active and will appear in the viewport and in renders. | ||
| Line 195: | Line 187: | ||
'''Presets menu''' | '''Presets menu''' | ||
| + | |||
| + | [[File:50_CloudHazePresets.jpg|464px|Presets menu.]] | ||
Through the presets menu for Cloud and Haze layers, you have access to the cloud type presets available in Terragen, including Cloud Layer V2, Cloud Layer V3, and Easy Clouds. | Through the presets menu for Cloud and Haze layers, you have access to the cloud type presets available in Terragen, including Cloud Layer V2, Cloud Layer V3, and Easy Clouds. | ||
| − | |||
| − | |||
| − | |||
| − | |||
*'''High-level:''' These cloud layers default to an altitude of 8,000 metres or more, and are based on Terragen’s Cloud Layer V2 or Easy Clouds presets. When an Easy Cloud preset is selected, you can further choose between Cumulus, Altocumulus Castellanus, and Stratocumulus cloud types under the cloud layer’s advanced settings. | *'''High-level:''' These cloud layers default to an altitude of 8,000 metres or more, and are based on Terragen’s Cloud Layer V2 or Easy Clouds presets. When an Easy Cloud preset is selected, you can further choose between Cumulus, Altocumulus Castellanus, and Stratocumulus cloud types under the cloud layer’s advanced settings. | ||
| Line 213: | Line 203: | ||
'''Haze Layer''' | '''Haze Layer''' | ||
| − | + | [[File:07_UI_SkyParams_Haze.JPG|none|567px|The Haze layer.]] | |
| − | 07_UI_SkyParams_Haze. | + | |
| − | |||
Haze is the appearance of moisture and particulates in the atmosphere. It can be used to simulate a broad range of phenomena such as fog, mist, or dry haze caused by dust and smoke. The Haze layer is a layer of uniform haze with a prescribed height range, whereas the Atmosphere is a layer of haze with exponential fall-off with respect to height above sea level. | Haze is the appearance of moisture and particulates in the atmosphere. It can be used to simulate a broad range of phenomena such as fog, mist, or dry haze caused by dust and smoke. The Haze layer is a layer of uniform haze with a prescribed height range, whereas the Atmosphere is a layer of haze with exponential fall-off with respect to height above sea level. | ||
| Line 230: | Line 219: | ||
'''Atmosphere''' | '''Atmosphere''' | ||
| − | + | [[File:08_UI_SkyParams_Atmo.JPG|none|567px|Atmosphere.]] | |
| − | 08_UI_SkyParams_Atmo. | + | |
| − | |||
*'''Haze density:''' The exponential fall-off of haze in the atmosphere with respect to height above sea level. | *'''Haze density:''' The exponential fall-off of haze in the atmosphere with respect to height above sea level. | ||
| Line 239: | Line 227: | ||
'''Other buttons''' | '''Other buttons''' | ||
| − | + | [[File:31_SavePreset.JPG|none|602pox|Save presets button.]] | |
| − | 31_SavePreset. | + | |
| − | |||
*'''Save Preset button:''' Clicking this button saves the current settings as a preset, which becomes available in the Presets tab. | *'''Save Preset button:''' Clicking this button saves the current settings as a preset, which becomes available in the Presets tab. | ||
| Line 247: | Line 234: | ||
==Presets Tab== | ==Presets Tab== | ||
| − | + | [[File:09_UI_PresetsTab.JPG|none|599px|The Presets Tab.]] | |
| − | 09_UI_PresetsTab. | + | |
| − | |||
The presets tab is a convenient way to access your favorite Terragen Sky settings. | The presets tab is a convenient way to access your favorite Terragen Sky settings. | ||
| Line 259: | Line 245: | ||
== Render Tab == | == Render Tab == | ||
| − | + | [[File:10_UI_RenderTab.JPG|none|601px|The Render Tab.]] | |
| − | 10_UI_RenderTab. | + | |
| − | |||
The render tab provides controls for the rendered output, including size and quality settings. | The render tab provides controls for the rendered output, including size and quality settings. | ||
| Line 267: | Line 252: | ||
*'''Current View & Spherical:''' These settings provide a dropdown menu of standard image resolutions to choose from. The width and height of the rendered image will be set to the chosen resolution. | *'''Current View & Spherical:''' These settings provide a dropdown menu of standard image resolutions to choose from. The width and height of the rendered image will be set to the chosen resolution. | ||
<ul> | <ul> | ||
| − | + | [[File:11_UI_RenderTab_CurrentViewSpherical.JPG|none|599px|Current and Spherical view resolutions.]] | |
</ul> | </ul> | ||
| Line 283: | Line 268: | ||
== Export Tab == | == Export Tab == | ||
| − | + | [[File:12_UI_ExportTab.JPG|none|599px|The Export Tab]] | |
| − | 12_UI_ExportTab. | + | |
| − | |||
The items on the Export tab allow you to save the project as a Terragen clip file or scene file for further use in Terragen 4. Additionally, with Live Send 360, you can immediately save the environment map to a file for access by third party software. | The items on the Export tab allow you to save the project as a Terragen clip file or scene file for further use in Terragen 4. Additionally, with Live Send 360, you can immediately save the environment map to a file for access by third party software. | ||
Revision as of 07:05, 9 December 2022
Overview=[edit]
This is the online documentation for the Early Release version of Terragen Sky.
As features are being added or updated on a daily basis, please consider this documentation to be a work-in-progress.
Contents
Menu Bar[edit]
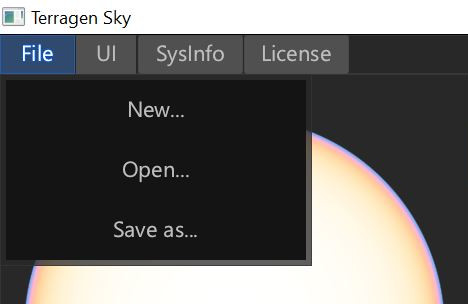
File menu button
- New: Starts a new Terragen Sky project with the default values.
- Open: Opens a previously saved Terragen Sky project.
- Save As: Saves the current project as a Terragen Sky project.
UI menu button
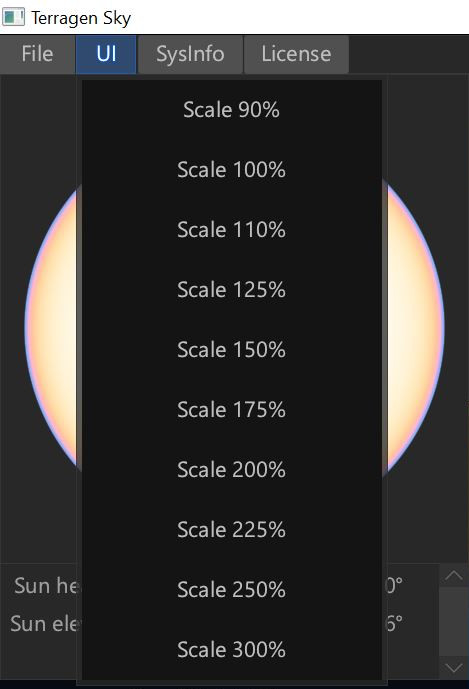
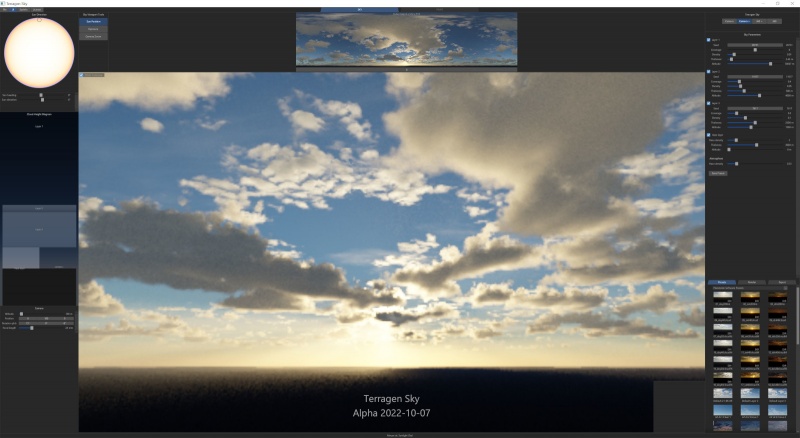
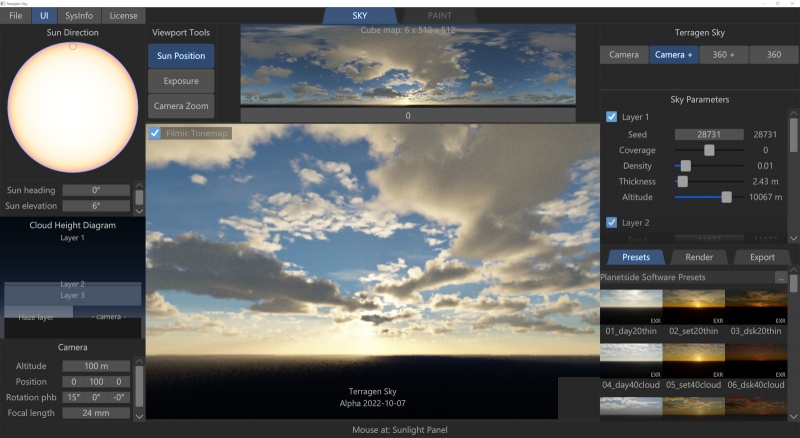
The presets under this menu scale the user interface components accordingly, so that you can adjust the layout to best fit your display device or visual preference.
SysInfo button
When clicked, the system information is displayed including OpenGL Renderer and OpenGL Version. Click anywhere outside the information window to close it and return to the main interface.
License button
When clicked, the license information is displayed. One year of maintenance is included with the purchase of a perpetual license of Terragen. Click anywhere outside the information window to close it and return to the main interface.
Sun Direction Panel[edit]
This panel provides control over the direction of the sun by means of a Sundial and/or the use of numeric sliders for heading and elevation parameters.
- Sunlight dial: Clicking or dragging with the mouse within the Sunlight dial automatically sets the sun heading and elevation values.
- Sun heading: This parameter sets the heading of the sun in degrees. You can think of 0° as North, +90° as East, +-180° as South, and -90° as West. The parameter can be used as a slider with a range of -180 to +180 degrees, or by clicking on the numerical value to directly input an amount.
- Sun elevation: This parameter sets the elevation of the sun in degrees. You can think of 0° being directly on the horizon, +90° being directly overhead, and -90° being on the underside of the planet. When negative values are used to simulate a night sky, you can compensate for the darkness by increasing the Exposure value. The parameter can be used as a slider with a range of -90 to +90 degrees, or by clicking on the numerical value to directly input an amount.
Sky Viewport Tools[edit]
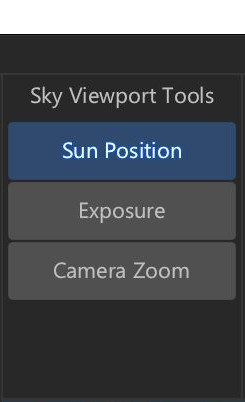
- Sun Position: When active, clicking in the main viewport repositions the sun to that location, updating the Sun heading and elevation values.
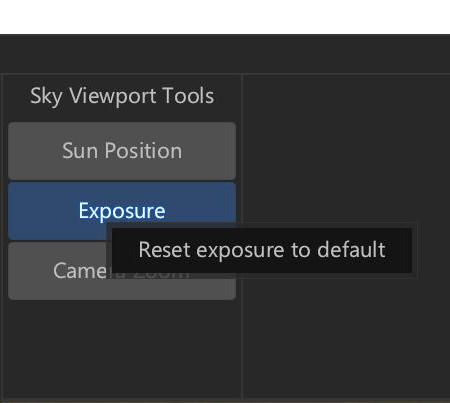
- Exposure: When active, clicking and dragging in the main viewport changes the camera’s exposure value, simulating the response to light a real camera might have. Dragging to the right increases the exposure value and brightens up the image as more light reaches the film. Dragging to the left decreases the exposure value and darkens the image, much like stopping down the camera lens aperture from f/2 to f/4. Right-click the exposure button to open a context menu which has the option to reset the exposure value to default.
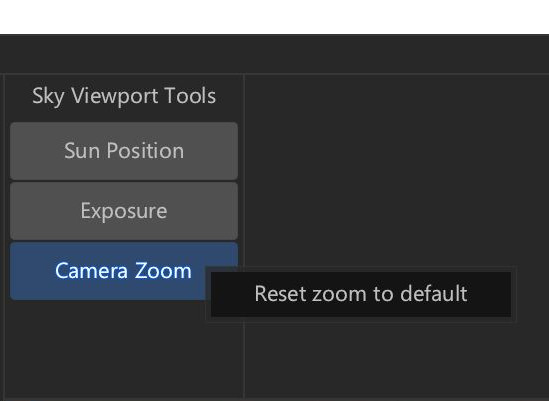
- Camera Zoom: When active, clicking and dragging in the main viewport changes the camera’s focal length, which can also be seen in the Camera Focal length parameter.
Cloud Height Diagram[edit]
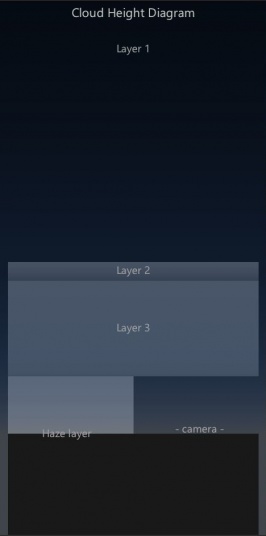
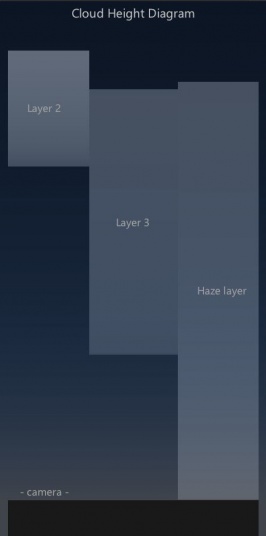
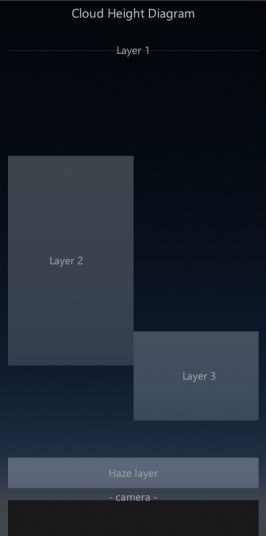
The Cloud Height Diagram provides a visual and alternate way of positioning the cloud and haze layers, and camera. Moving an item within the diagram adjusts its altitude. When one item’s altitude overlaps with another their indicators appear side by side.
Camera[edit]
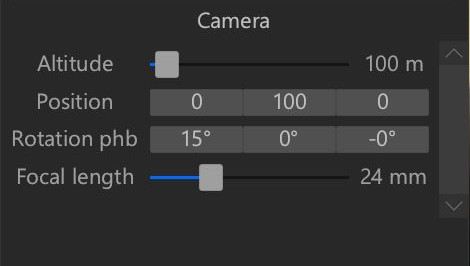
- Altitude: This parameter controls the height of the virtual camera. Dragging the slider to the right increases the altitude of the camera and updates the preview window and Cloud Height Diagram, while dragging to the left decreases the camera’s altitude.
- Position: This parameter controls the position of the virtual camera in the scene. XYZ position values may be modified by dragging the sliders to the left or right, or by directly clicking on a value and entering a new numeric value.
- Rotation phb: This parameter controls the rotation of the virtual camera in the scene. Pitch, heading, and bank values may be modified by dragging the sliders to the left or right, or by directly clicking on a value and entering a new numeric value.
- Focal length: This parameter controls the focal length of the virtual camera lens and is the equivalent to the focal length of a real camera lens. The parameter includes a slider ranging from 0 mm to 300 mm, and a numerical input field in which you can enter any value.
Panorama and Panorama Roller[edit]
The Panorama displays a “lat-long” (spherical) image or a cube map overview of the entire environment. The overlaid text provides information about the type and resolution of the environment map, whose resolution depends on the Terragen Sky mode selected. Dragging the grey roller below the Panorama rotates the environment from -180° to +180°. Clicking with the RMB resets the rotation value to 0. .
Paint Tab[edit]
This is a teaser of things to come.
Viewport[edit]
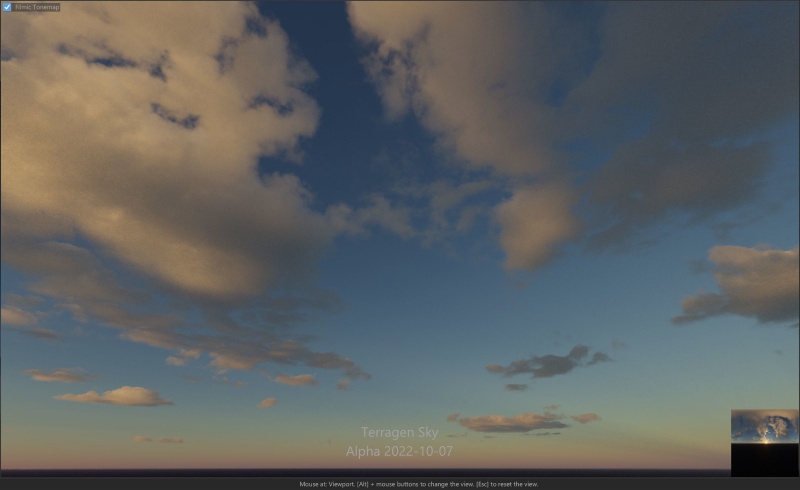
The viewport is the main display of the UI. The Alt key + mouse buttons and dragging in the viewport will change the view. These are similar to the default bindings in Terragen 4.
Translate forwards/backwards (dolly): Alt+MMB, or Alt+Shift+LMB Translate up/down/left right: Alt+RMB, or Alt+Ctrl+LMB
Pressing the Esc key resets the camera’s position and rotation to the values they had when the project was loaded, or created in the case of using New Project.
Below the viewport is the status bar, which displays helpful information, such as the name of the UI component that the mouse is currently pointed at.
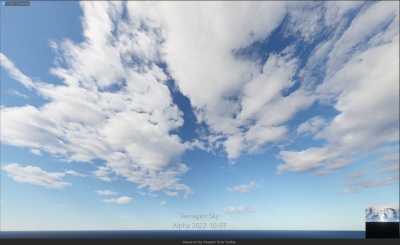
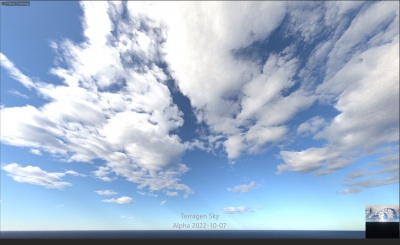
- Filmic Tonemap: When checked, a tone map is applied to the viewport in much the same way as the Renderers Tonemap settings in Terragen 4. When unchecked, no tone mapping is applied and you may see clipping in the bright areas of the sky.
- Enviro map/sphere: Inset into the main viewport is an environment shader object. This chrome sphere can be useful when rotating the environment map in order to see what's behind the camera position. You can drag the object around the viewport by clicking on it with the LMB, or resize it using the MMB.
Preview Modes (Camera, Camera+, 360+, 360)[edit]
Camera-Priority Modes:
- Camera: Use this mode when you want to preview the area you’re looking at as quickly as possible. In this mode, whatever you’re looking at is progressively refined up to an internal target resolution and quality.
- Camera+: In this mode, whatever you’re looking at is progressively refined up to an internal target resolution and quality, then the rest of the 360° view is updated and refined until everything is at the internal target resolution and quality.
360/Lighting-Priority Modes:
- 360 +: Use this mode when you want an approximate 360° render as quickly as possible (e.g. for lighting) but you also want to refine the area within the camera’s view. In this mode, the entire 360° view is first updated to a minimum resolution, then whatever you’re looking at is refined to the internal target resolution and quality, and finally the rest of the 360° view is updated and refined until everything is at the internal target resolution and quality.
- 360: Use this mode when you want a 360° view as quickly as possible (e.g. for lighting). In this mode, the entire 360° view is updated at a uniform resolution.
Sky Parameters[edit]
The Sky parameters consist of three cloud layers, a Haze layer and an Atmosphere control.
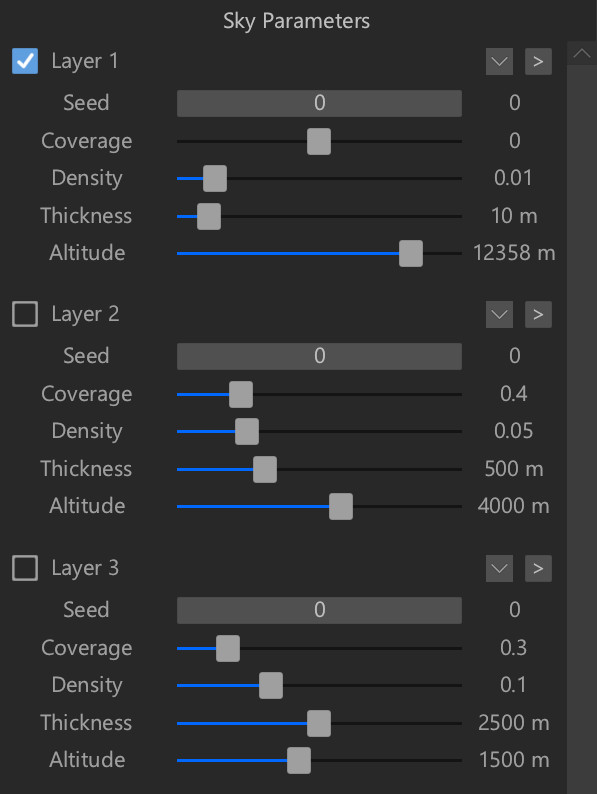
Cloud Layers
- Layer # (checkbox): When checked, the layer is active and will appear in the viewport and in renders.
- Presets menu (down chevron): When clicked, a list of cloud presets is displayed, allowing you to choose the type of clouds to assign to this cloud layer. See below.
- Advanced Settings (right chevron): When clicked, the advanced settings for the selected cloud, haze or atmosphere is displayed. This feature is not currently implemented.
- Seed: This value generates the random aspects of the cloud layer.
- Coverage: This setting controls the amount of clouds within the cloud layer. Low values reduce the amount of individual clouds and increase the amount of empty space between them. Increasing the value fills up the area with more individual clouds.
- Density: This setting controls the transparency or opaqueness of the clouds within the cloud layer. Low values make the clouds look thin and let more light pass through them. Higher values make the clouds look thicker and denser, as well as darker because less light passes through them.
- Thickness: This setting controls the height range of the cloud layer from top to bottom. This corresponds to “Cloud depth” in Terragen 4.
- Altitude: This setting controls the height of the cloud in metres above sea level. For some cloud types this corresponds to the base of the cloud and for others it corresponds to the mid-point between the base and the top.
Presets menu
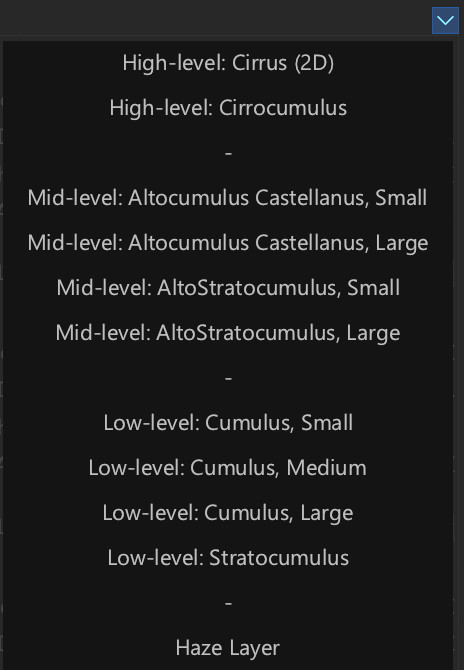
Through the presets menu for Cloud and Haze layers, you have access to the cloud type presets available in Terragen, including Cloud Layer V2, Cloud Layer V3, and Easy Clouds.
- High-level: These cloud layers default to an altitude of 8,000 metres or more, and are based on Terragen’s Cloud Layer V2 or Easy Clouds presets. When an Easy Cloud preset is selected, you can further choose between Cumulus, Altocumulus Castellanus, and Stratocumulus cloud types under the cloud layer’s advanced settings.
- Mid-level: These cloud layers default to an altitude around 4,000 metres, and are based on Terragen’s Easy Cloud presets. Under the cloud layer’s advanced settings you can further choose between Cumulus, Altocumulus Castellanus, and Stratocumulus cloud types.
- Low-level: These cloud layers default to an altitude around 1,500 - 2,000 metres and are based on Terragen’s Easy Cloud presets. Under the cloud layer’s advanced settings you can further choose between Cumulus, Altocumulus Castellanus, and Stratocumulus cloud types.
- Haze: This layer is based on Terragen’s Cloud Layer V2 without a Density shader, tapering or falloff. It provides a volumetric layer in which you can control the density, thickness and altitude.
Haze Layer
Haze is the appearance of moisture and particulates in the atmosphere. It can be used to simulate a broad range of phenomena such as fog, mist, or dry haze caused by dust and smoke. The Haze layer is a layer of uniform haze with a prescribed height range, whereas the Atmosphere is a layer of haze with exponential fall-off with respect to height above sea level.
- Haze layer: When checked, the haze layer is visible.
- Haze density: This is the opacity of the haze layer.
- Thickness: This is the height range of the Haze layer from top to bottom, measured in metres.
- Altitude: This is the altitude, specified in metres, at which the bottom of the Haze layer begins.
Atmosphere
- Haze density: The exponential fall-off of haze in the atmosphere with respect to height above sea level.
Other buttons
- Save Preset button: Clicking this button saves the current settings as a preset, which becomes available in the Presets tab.
Presets Tab[edit]
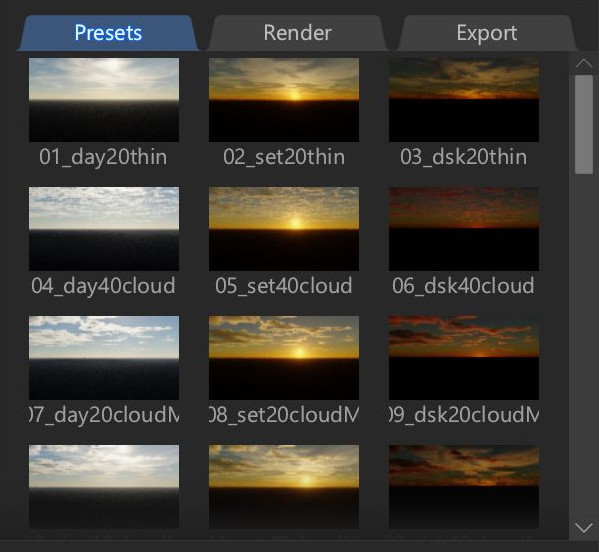
The presets tab is a convenient way to access your favorite Terragen Sky settings.
The Planetside Software Presets category displays the presets that ship with Terragen Sky. User presets and presets from other sources show up under the User Presets or Unregistered categories.
To load a preset, simply click on the thumbnail image in the Presets tab, or right click it and select “Load Preset”. To save a preset, simply press the Save Preset button, and the new preset will be added to the Preset tab.
Render Tab[edit]
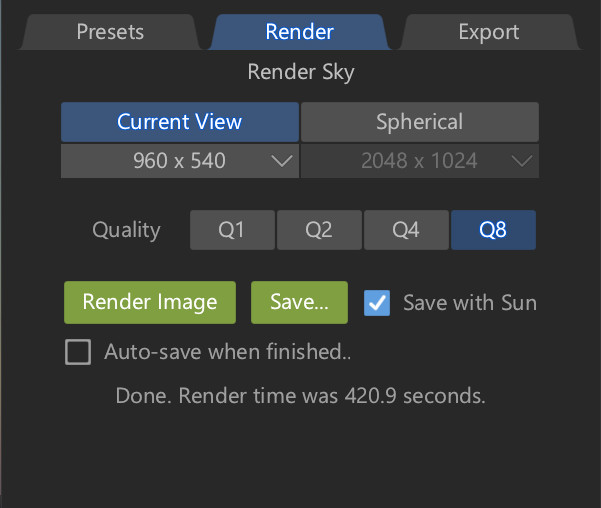
The render tab provides controls for the rendered output, including size and quality settings.
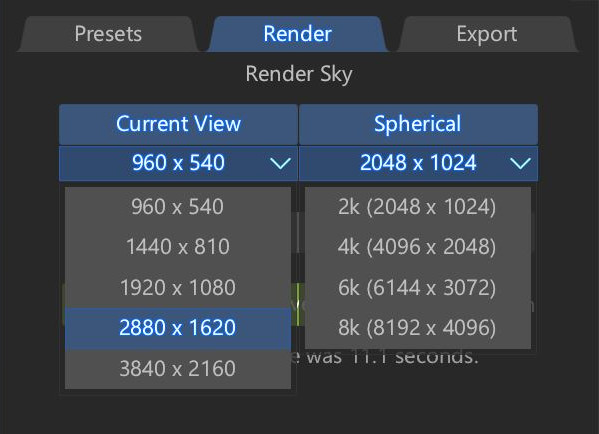
- Current View & Spherical: These settings provide a dropdown menu of standard image resolutions to choose from. The width and height of the rendered image will be set to the chosen resolution.
- Quality: The quality of the rendered image is governed by the four Q buttons. The higher the Q button value the better the quality of the rendered image, at the expense of a longer render time.
- Render Image button: Click this button to start the render process. When the process is complete, a notification is displayed below the button indicating how long the render took.
- Save button: Click this button to save the rendered image.
- Save with sun: When checked, the sun disc is saved in the rendered image. Note that to turn the sun disc on or off, the image does not need to be re-rendered.
- Auto-save when finished: When checked, the image will automatically be saved upon render.
Export Tab[edit]
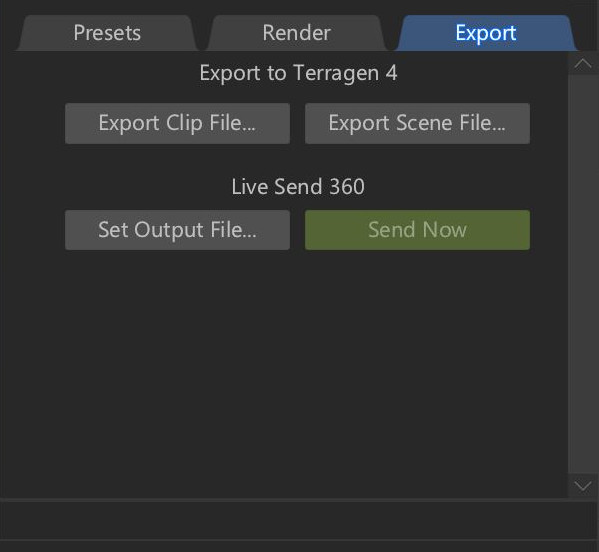
The items on the Export tab allow you to save the project as a Terragen clip file or scene file for further use in Terragen 4. Additionally, with Live Send 360, you can immediately save the environment map to a file for access by third party software.
Export to Terragen 4
- Export Clip File: Saves the Sky Parameter settings as a clip file which can then be imported into Terragen 4 for further manipulation.
- Export Scene file: Saves the project, including Sky Parameters, sun and camera, as a scene file which can be opened in Terragen 4 for further manipulation.
Live Send 360: This feature allows you to export a 2k spherical image to a specific location which is based on the current render state of the viewport, eliminating the need to wait for a final rendered image.
- Set Output File: Clicking this button brings up a standard file requestor in which to set the filename and path for the Live Send 360 output.
- Send Now: Clicking this button immediately updates the image defined in Set Output File parameter.
A parameter is an individual setting in a node parameter view which controls some aspect of the node.
A shader is a program or set of instructions used in 3D computer graphics to determine the final surface properties of an object or image. This can include arbitrarily complex descriptions of light absorption and diffusion, texture mapping, reflection and refraction, shadowing, surface displacement and post-processing effects. In Terragen 2 shaders are used to construct and modify almost every element of a scene.
